Newsletters
Newsletters
The newsletters module is an easy tool to manage address lists and send out newsletters. Using powerful templates you can personalize your messages.
Accounts
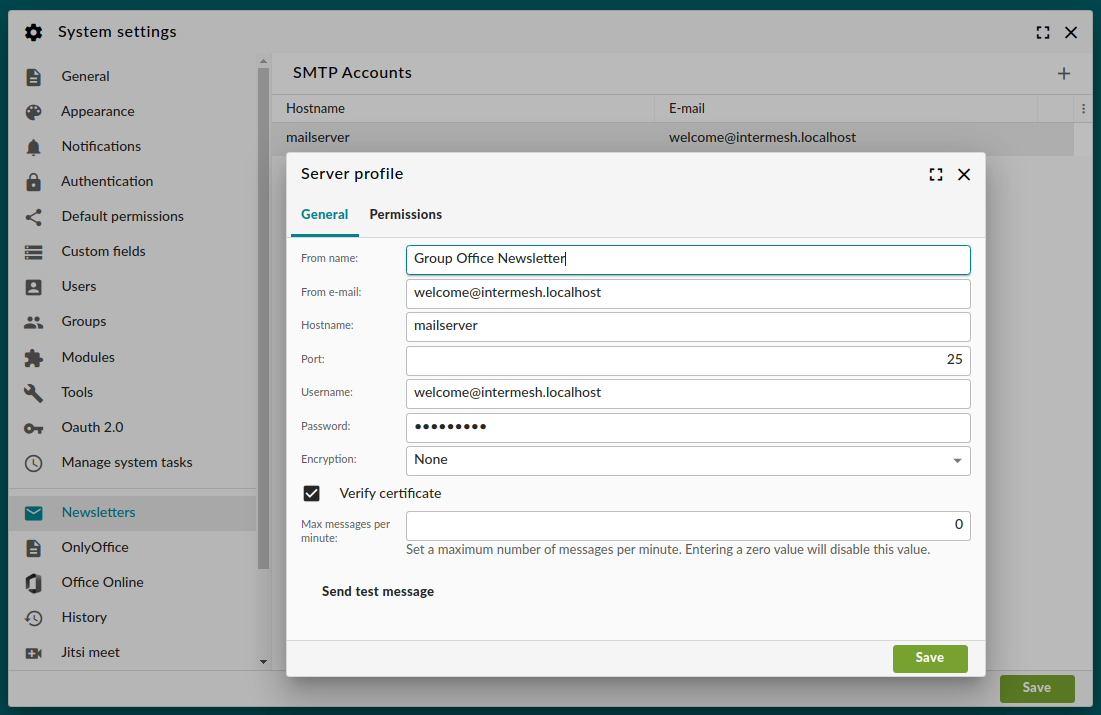
If you have manage permissions for the newsletters module, you can manage SMTP accounts from System Settings screen, tab Newsletters.
Account management
Tip
If you need to prevent your SMTP server to end up on a spam blacklist, you can maximize the number of messages sent per minute.
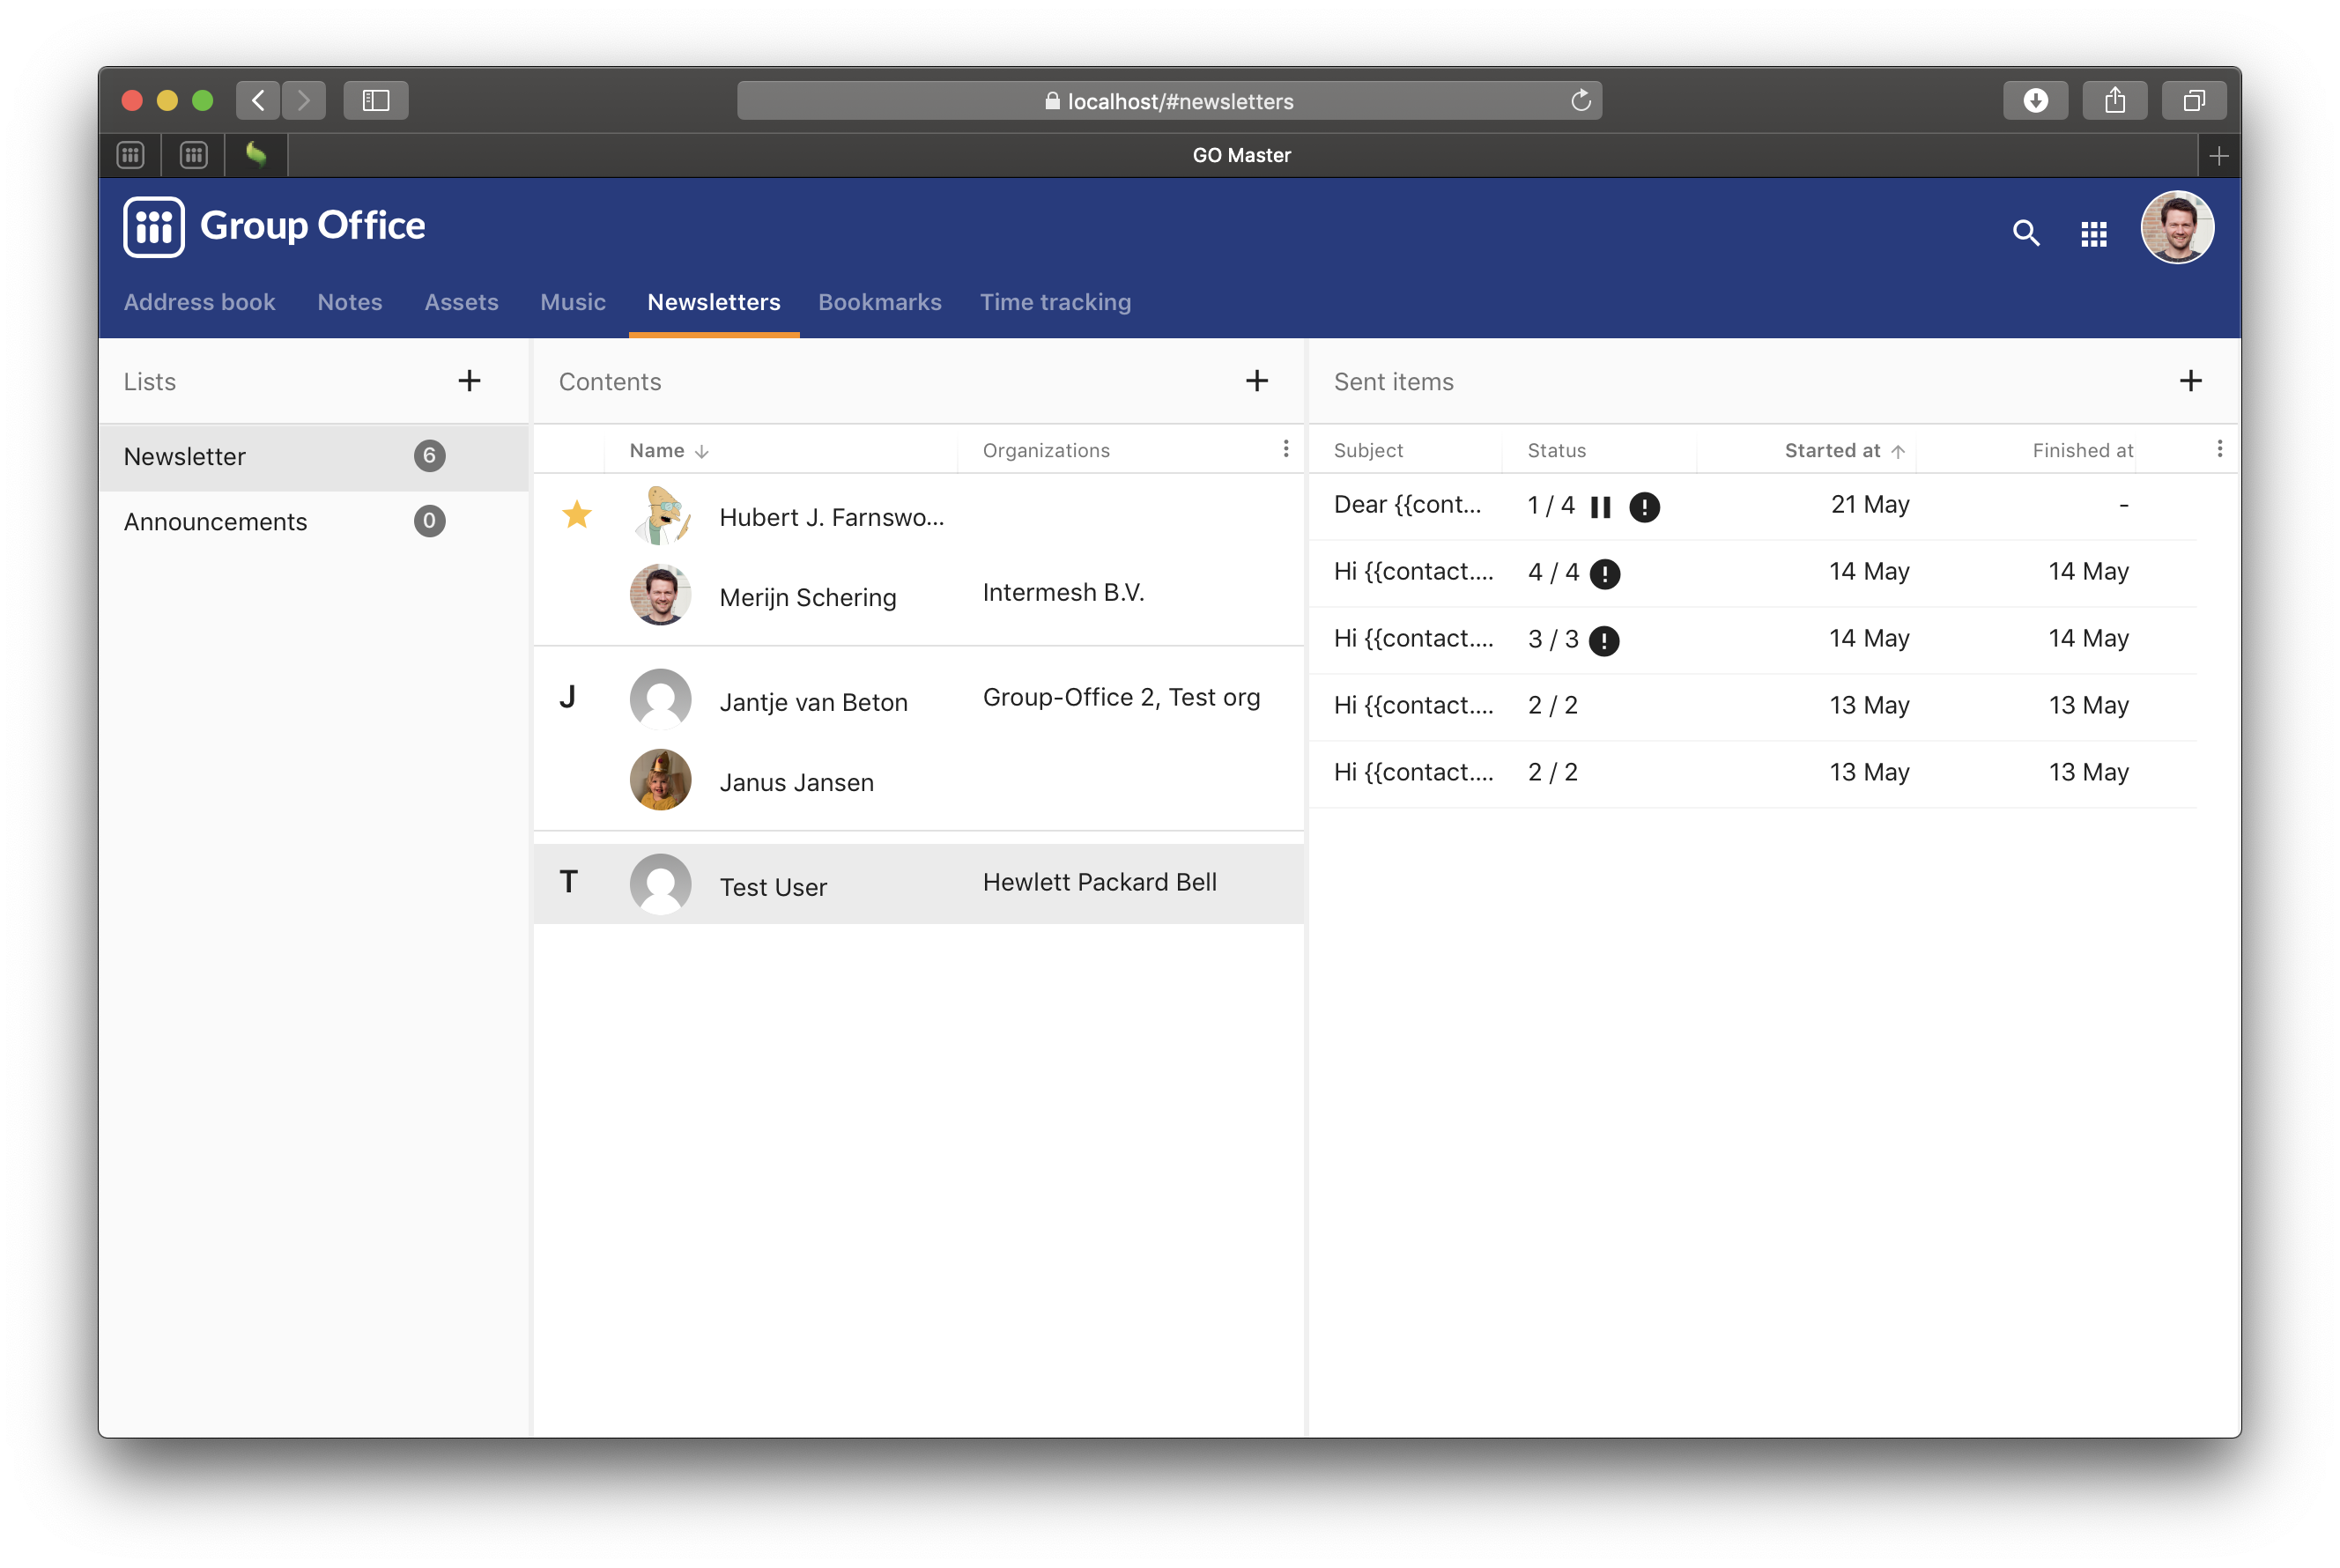
Create lists
Create a list by clicking the add button in the “Lists” toolbar. Then click the add button from the “Contents” toolbar in the middle to add contacts.
You can add contacts one by one but you can also add entire search results using filters.
Note
Individual newsletters inherit their permissions from the parent distribution list. In practice this means that users can only manage newsletters
Compose
To send a newsletter, click the “Compose” button from the “Sent items” panel. Start sending the message by clicking the “Send” button.
Testing a newsletter is easy. Just click the “Test message” button and you will send the newsletter to the selected recipients only.
Compose
Tip
After hitting the “Send” button you can pause / unpause the distribution of the newsletter. That will pause or unpause the next batch of emails to be sent the next minute.
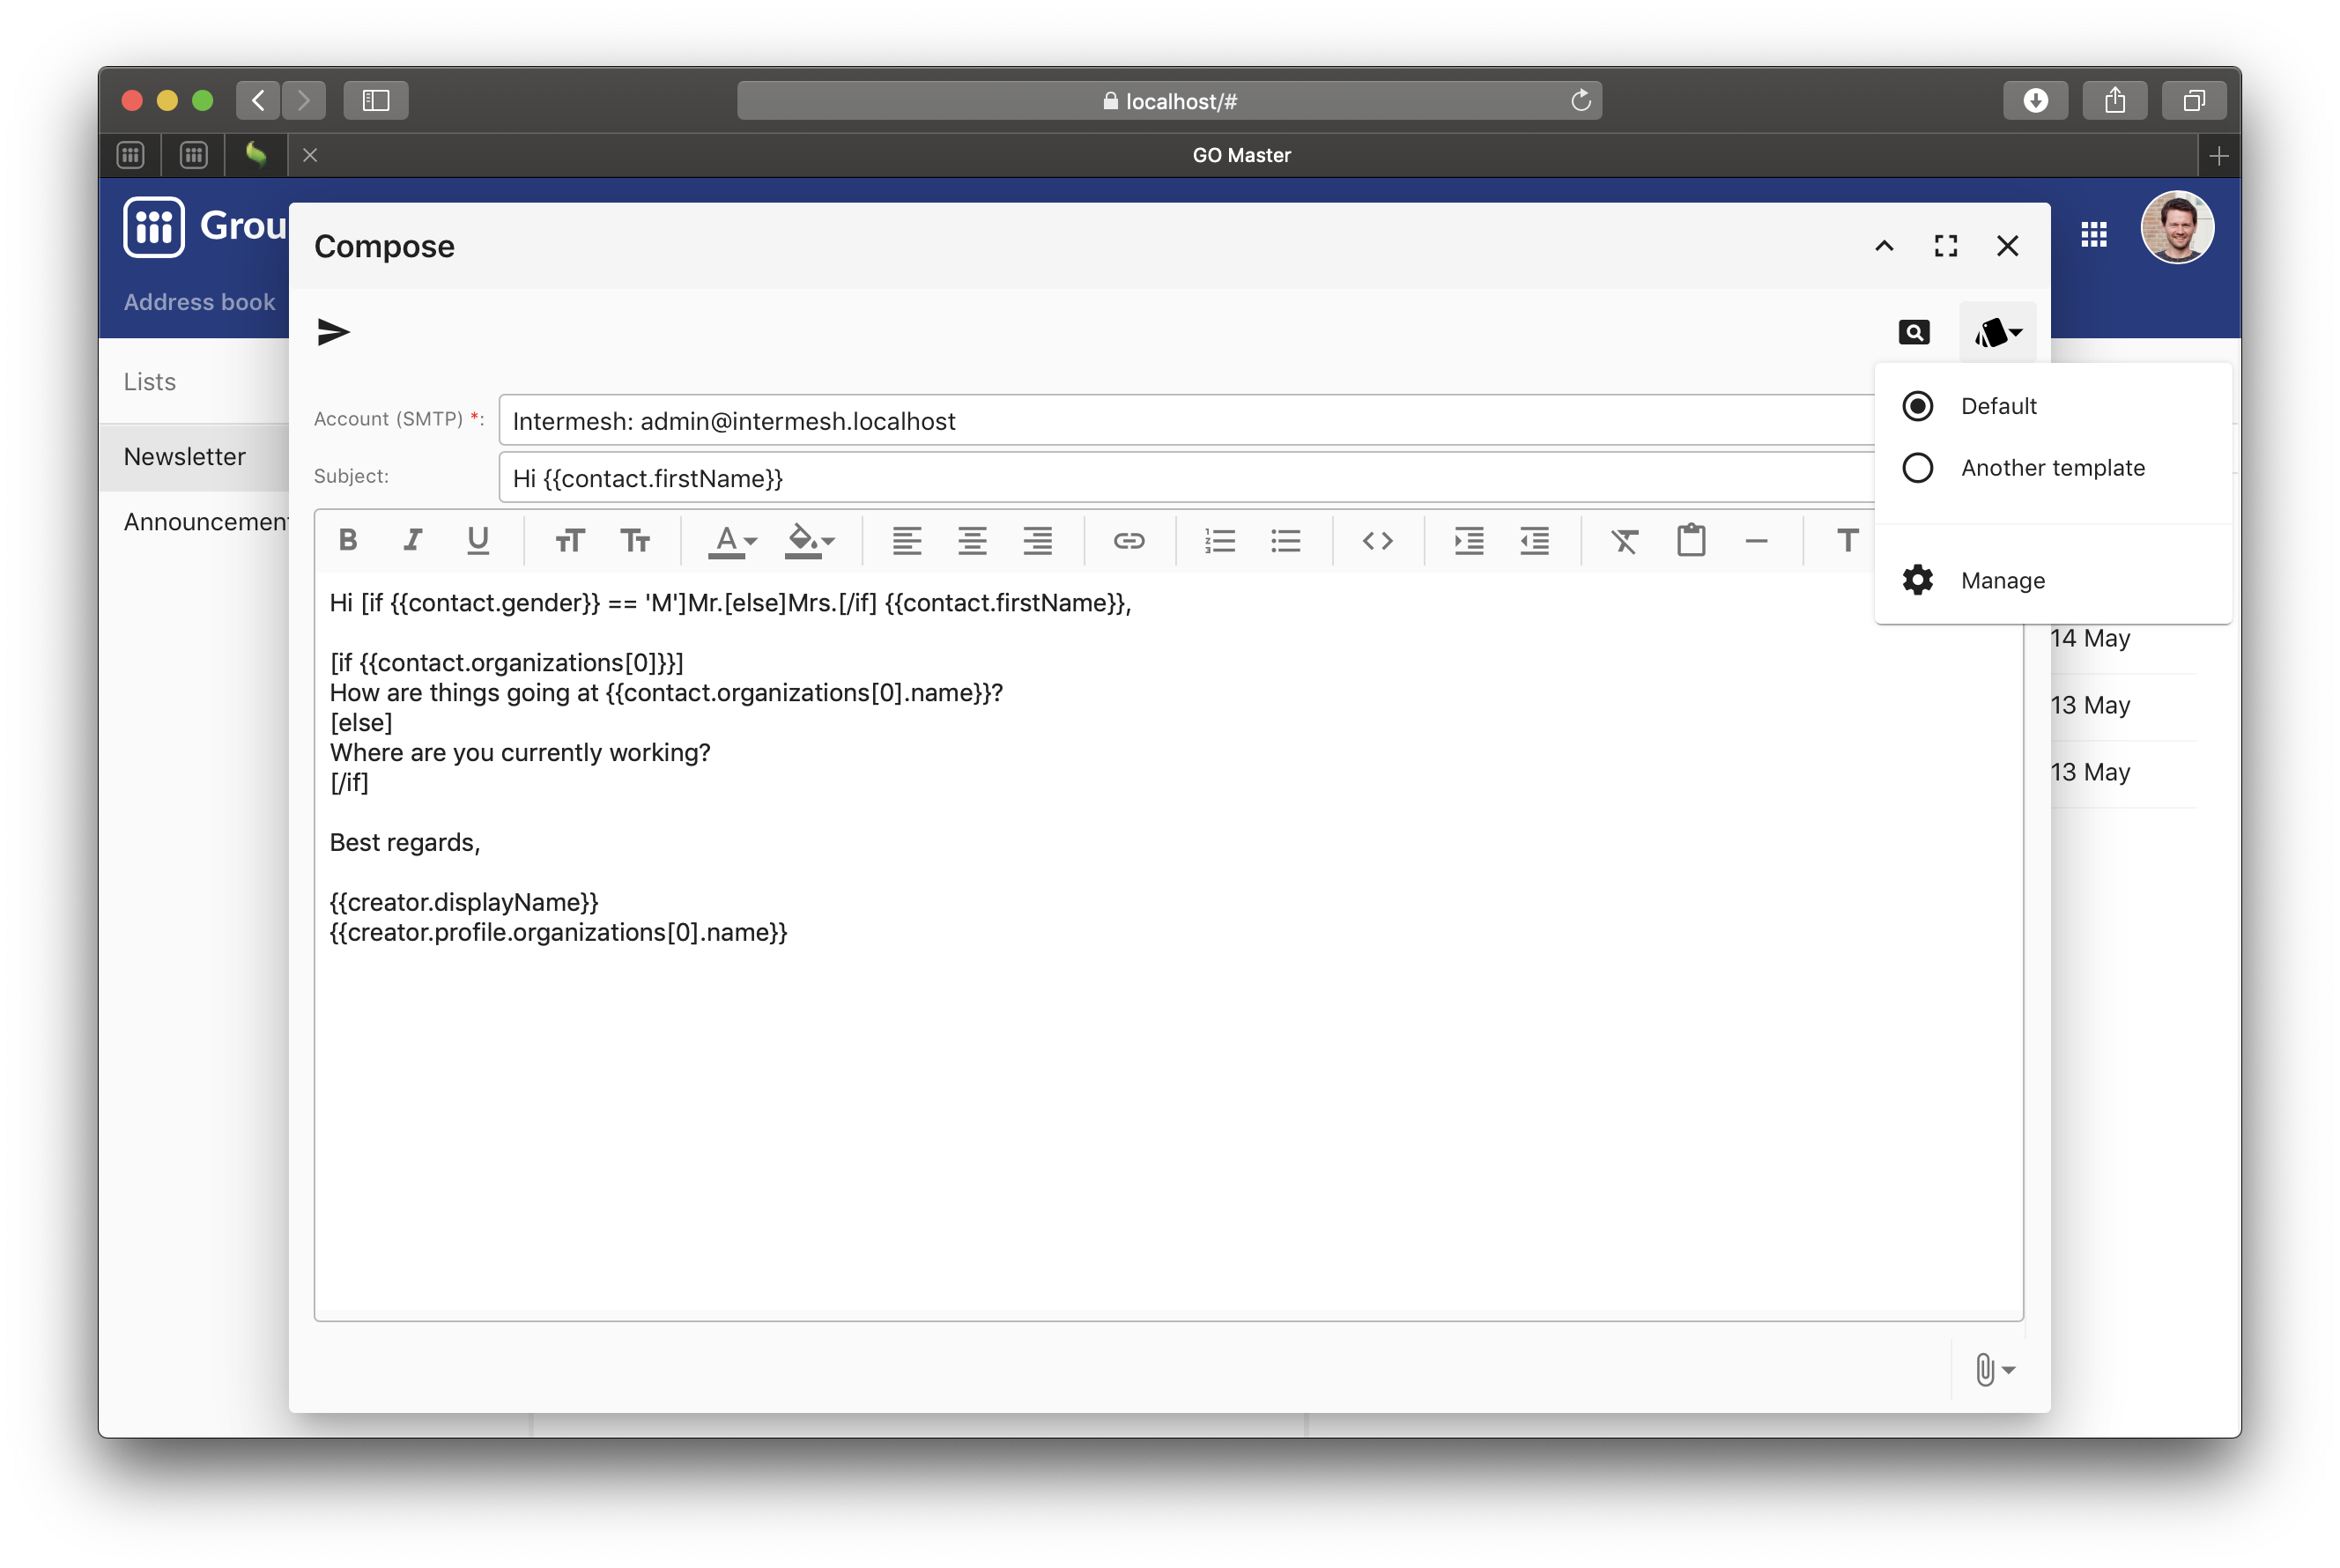
Templates
From the composer you can also manage templates. Via the menu shown in the screenshot above. You can use the following variables in these templates:
Contact
Fields of the recipient
contact.salutation
contact.name
contact.prefix
contact.firstName
contact.middleName
contact.lastName
contact.suffix
contact.jobTitle
contact.gender
contact.organizations: Array(same properties as contact)
contact.dates: Array (type, date)
contact.emailAddresses: Array(type, email)
contact.phoneNumbers: Array(type, number)
contact.addresses: Array(type, street, street2, zipCode, city, state, country, countryCode)
contact.urls: Array(type, url)
contact.debtorNumber
contact.IBAN
contact.vatNo
Custom fields (See the syntax below)
Other
unsubscribeUrl: The URL a recipient can use to remove himself from the list. eg. <a href=”{{unsubscribeUrl}}”>unsubscribe</a>
now: (Date) The time the message is sent
Creator
Fields of the user who created the newsletter
creator.displayName
creator.email
creator.username
Syntax
A variable is written like this:
{{contact.name}}
Or a custom field:
{{contact.customFields.<DATABASE_NAME_OF_CUSTOMFIELD>}}
Some custom fields are stored with an ID. Like a select field for example. You can get the text like this:
{{contact.customFields.asText.<DATABASE_NAME_OF_CUSTOMFIELD>}}
Arrays can be written like this:
{{contact.emailAddresses[0].email}}
You can also iterator over arrays:
[each address in contact.addresses]
  [if {{address.type}} == "billing"]
    {{address.formatted}}
  [/if]
[/each]
And filter arrays by property and only write first match using “eachIndex”:
[each emailAddress in contact.emailAddresses | filter:type:"billing"]
    [if {{eachIndex}} == 1]
        {{emailAddress.email}}
    [/if]
[/each]
But this is probably the best way to handle the case where you prefer a type of address but just use the first if that’s not found. It uses [assign] to create a new variable. If it’s empty it will use the first address:
[assign address = contact.addresses | filter:type:"postal" | first]
[if !{{address}}]
[assign address = contact.addresses | first]
[/if]
{{address.formatted}}
An advanced example for printing a custom salutation (Just an example. You can use {{contact.salutation}}):
Dear [if {{contact.prefixes}}]{{contact.prefixes}}[else][if !{{contact.gender}}]Ms./Mr.[else][if {{contact.gender}}=="M"]Mr.[else]Ms.[/if][/if][/if] {{contact.lastName}}
A simple example template:
Hi {{contact.salutation}},


Best regards,

{{creator.displayName}}
{{creator.profile.organizations[0].name}}
{{creator.profile.phoneNumbers[0].number}}
Finding a contact with id = 1
[assign contact = 1 | entity:Contact]
{{contact.name}}
Find the first linked contact:
[assign firstContactLink = someEntityVar | links:Contact | first]
{{firstContactLink.name}}
Filters
You can use filters to format data. They can be used with a “|” char followed by the filter name. Optionally the filter can take arguments separeted by a “:”.
For example a date:
{{contact.dates[0].date|date:d-m-Y}}
A number formatted in Dutch style with 2 decimals:
{{contact.customFields.number|number:2:,:.}}
Upload message
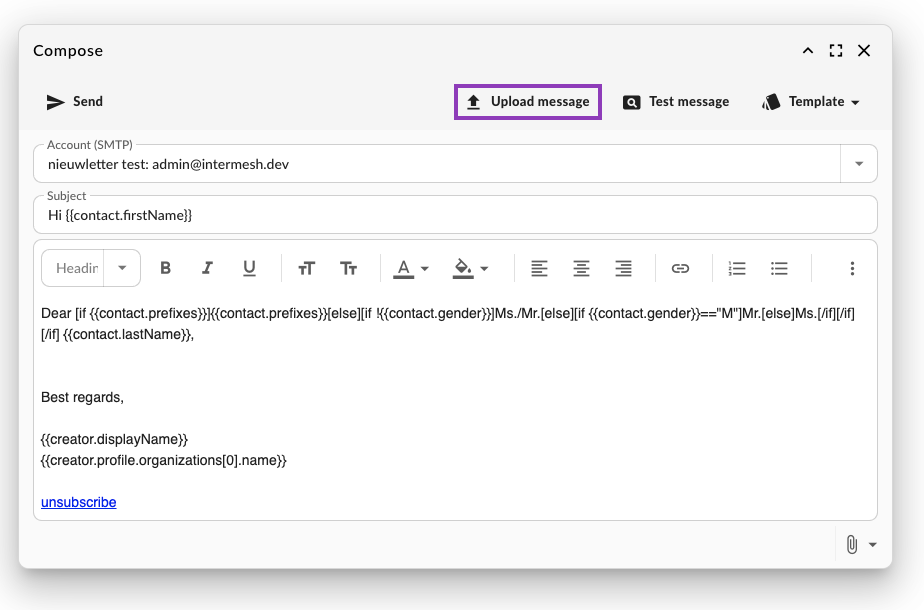
Upload a pre-created email message by pressing the “Upload message” button in the Newletter composer. The file needs to be a .ZIP with the following content:
/index.html
/images/*
Note
Email template creators like BeeFree will generate exported messages in this format.
All the images references in index.html need to be inside the images/ folder. If images are not in this folder they can not be extracted and included in the email.
Once the message is uploaded the Compsoser dialog will switch to read-only mode.