Tickets
With the ticket system you can easily manage the support requests from your customers.
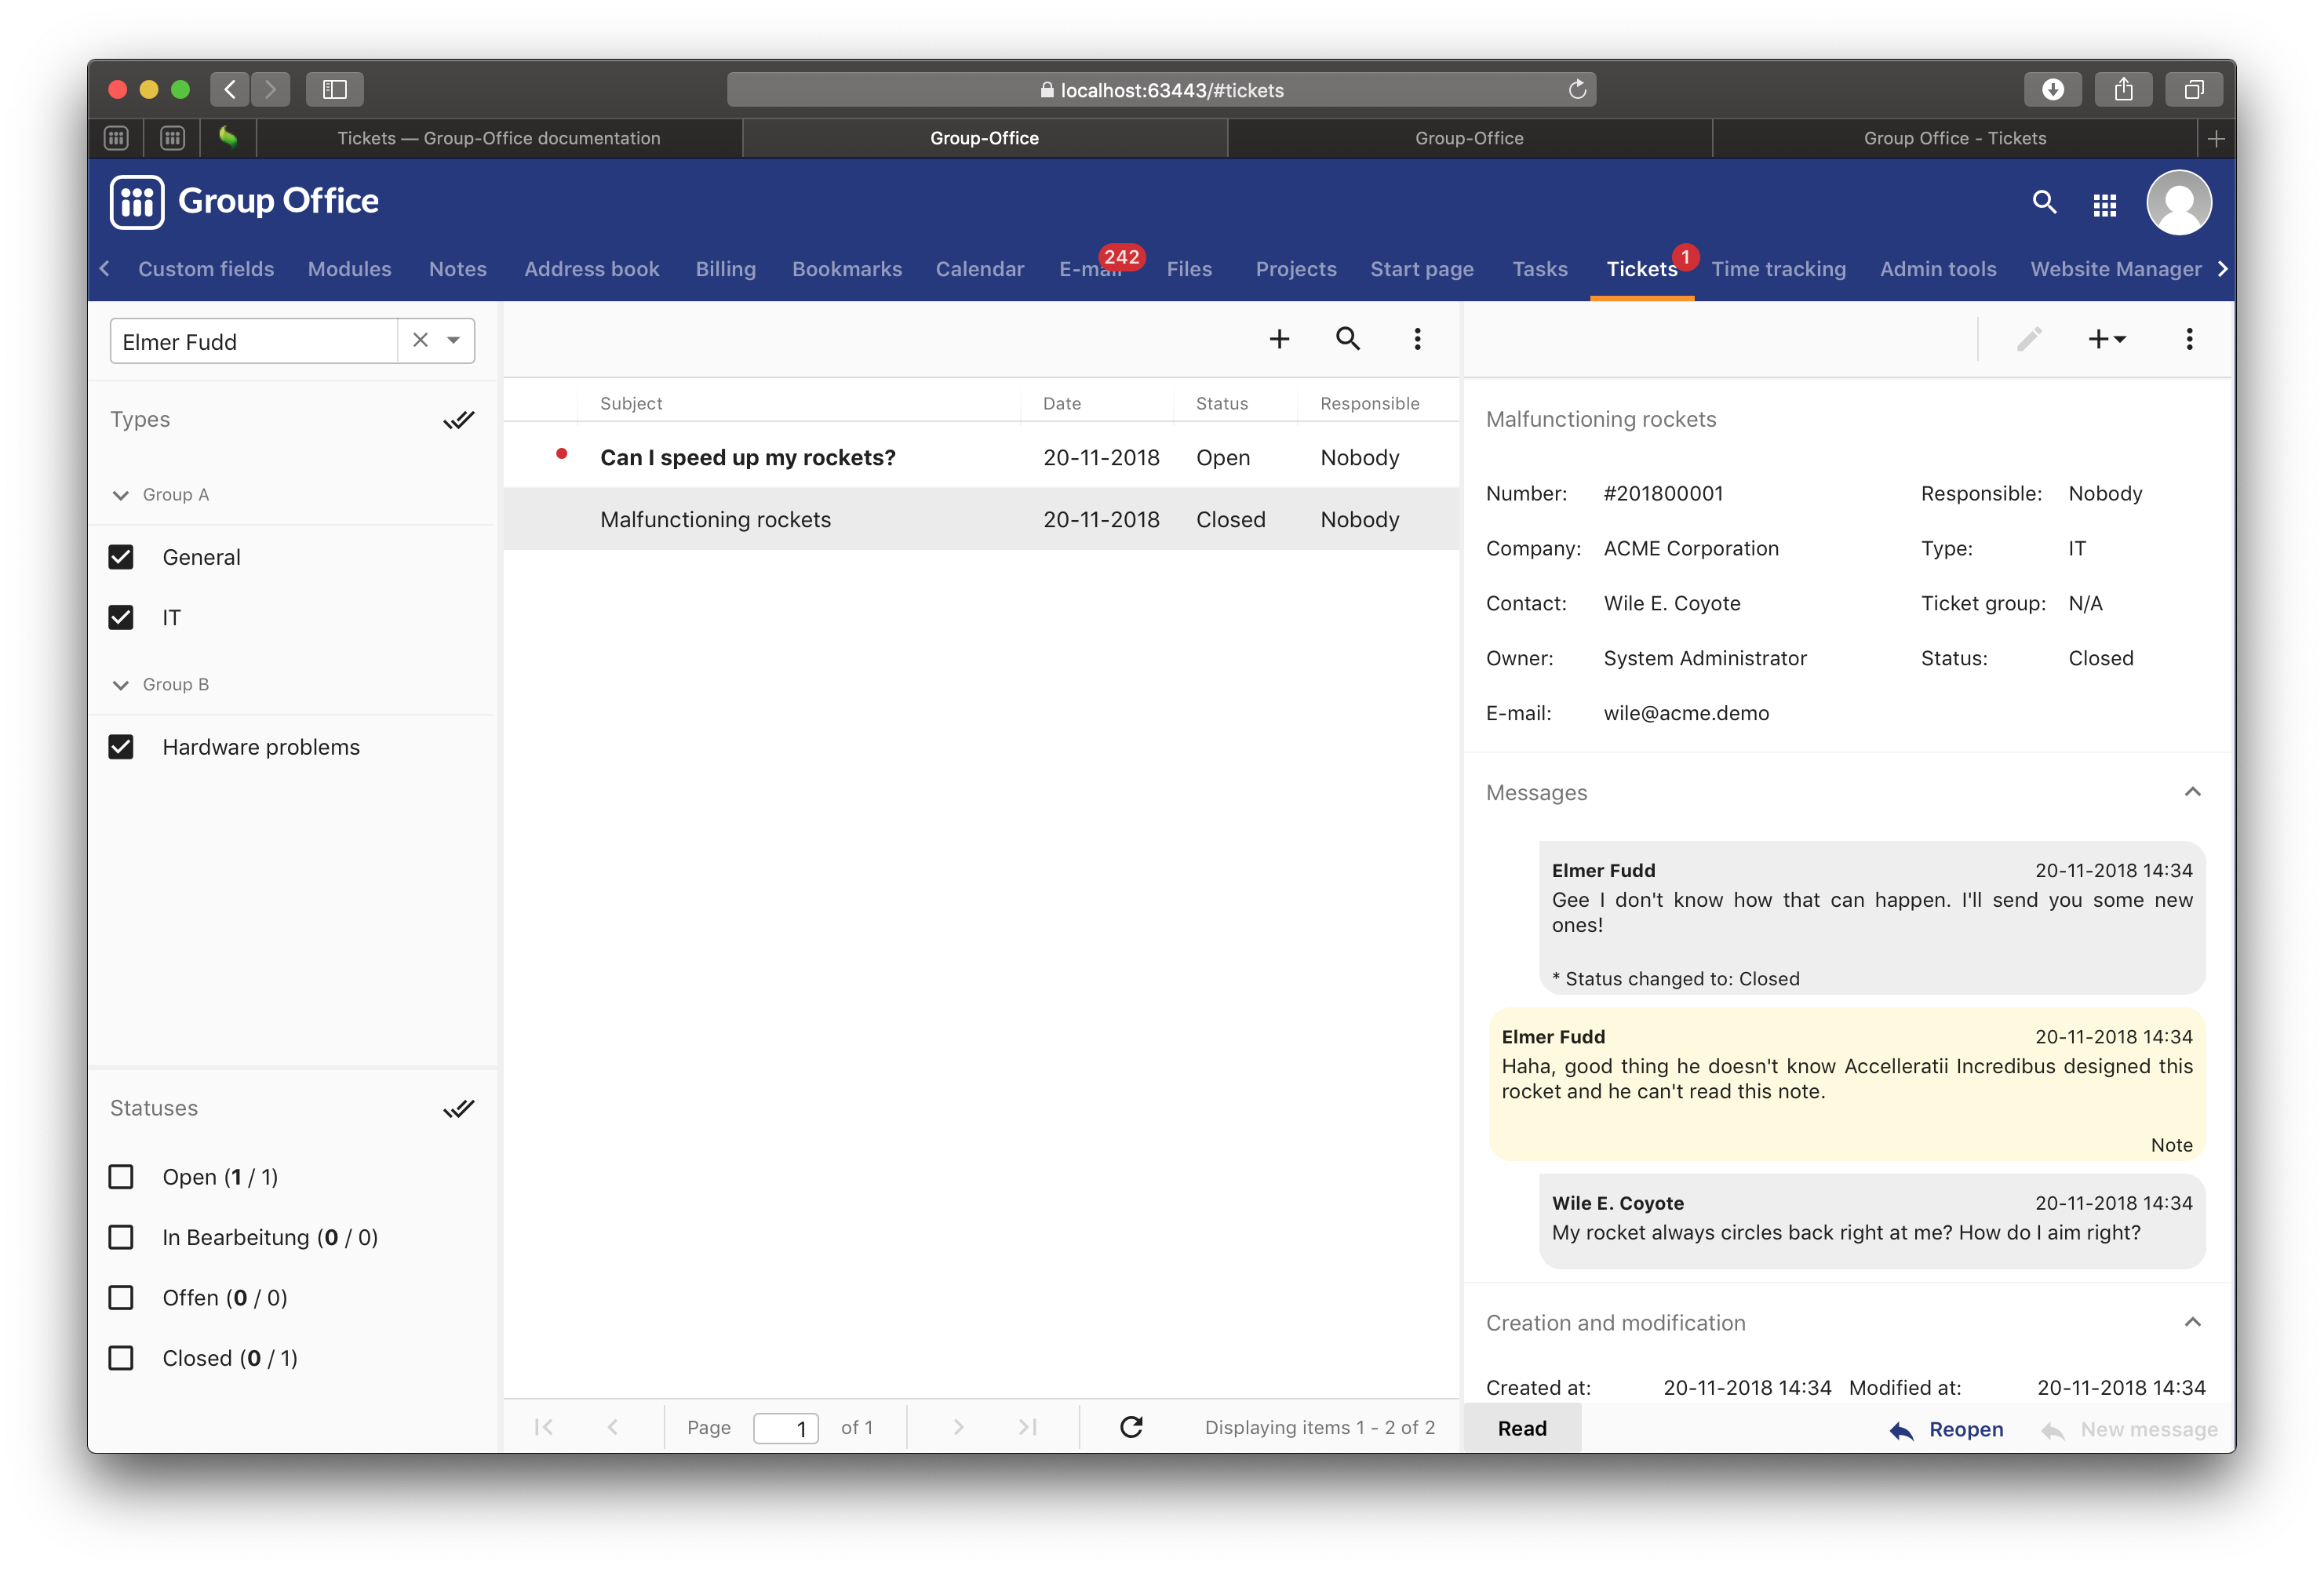
Tickets module
The ticket system will be used by:
Users: users who create tickets when they have a problem.
Agent: A user who is authorized to claim and respond to tickets.
A user only needs write permission for ticket types. A user will become an agent when the user is granted manage permissions at Administration -> Types -> Type -> Permissions.
The tickets module supports:
Note
Anonymous tickets
A customer does not necessarily need to be a user. Read the external ticket page section for more information.
Types
The first thing you need to do after installing the tickets module is defining the types. Types are used for different purposes:<br>
Permissions, you can control which agent or user is allowed to create tickets of this type.
Reporting, there are reports about how many tickets per type etc.
Configuration, each type can have different settings. For example who gets an e-mail when a new ticket of this type is created.
You could define a separate type for each product for example.
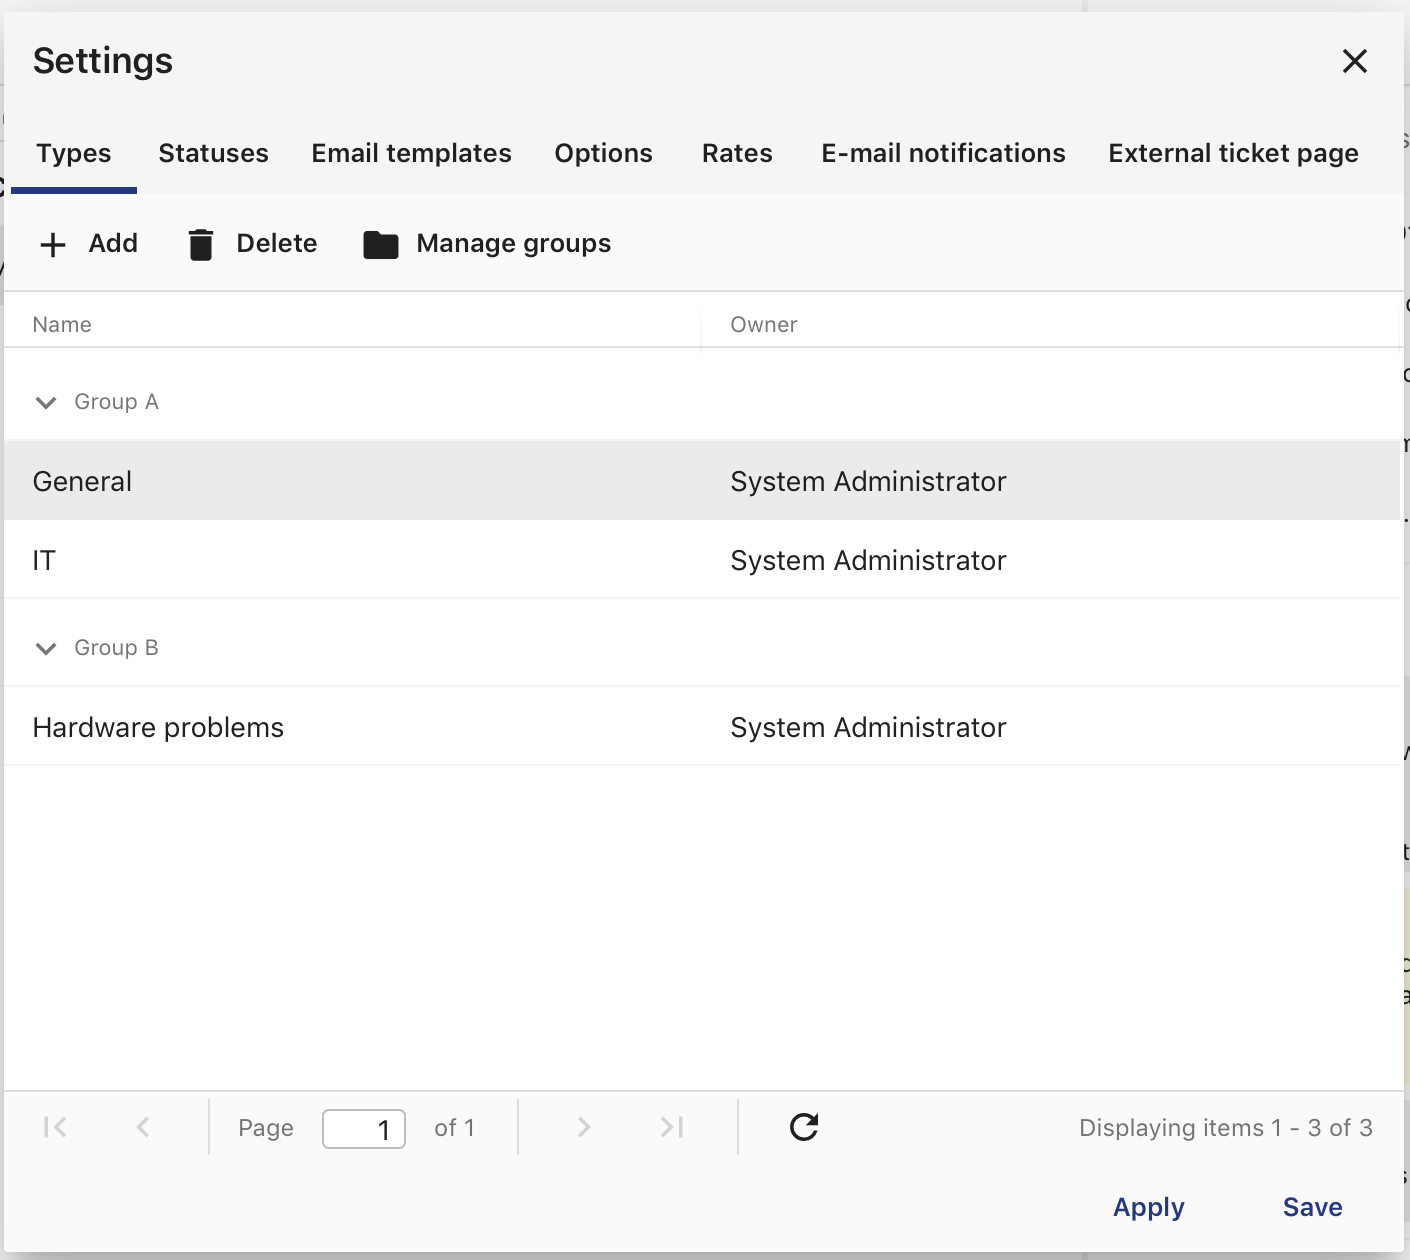
Types
Type settings
The following settings are on the properties tab:
Type group
Groups are useful for organizing the ticket types. In the screenshot you can see two defined groups. You can create them by clicking on the “Manage groups” button from the types tab.
Description
The description is shown in the interface when you hold your mouse over the type in the filter.
Show tickets from other users
When you enable this checkbox, all users with access to this type can see other people’s tickets.
“E-mail to” on new checkbox
You can enter a comma separated list of e-mail addresses here that will receive a notification when a new ticket is created by a user.
Alternate sender
By default the system will send an e-mail from the webmaster e-mail with the Group-Office title as name and the sender is always the same for each type. You can configure the default in the “Options” tab. One address for all types might not always be ideal. Use the alternate sender settings to set the from address per type.
IMAP Mailbox
You can specify a mailbox here for incoming tickets.
Permissions
The type permissions are very important. It defines if a user is an agent or a regular user. If you have “Manage permissions” on a ticket type then you are an agent.
Here’s an overview of the permission levels:
Level |
Description |
|---|---|
Read only |
The user can only read his own tickets. Probably not very useful in most cases. |
Create |
Users may create new tickets. |
Write |
Identical to create permission |
Delete |
The user may delete his own tickets |
Manage |
The user will be an agent that can see all tickets in this type and can reply to and modify the ticket. |
Note
Make sure each user has at least write permission for one type. Otherwise this user will get an access denied error when he attempts to create a ticket.
E-mail to tickets
You can easily configure an e-mail address to accept incoming tickets. Create an e-mail account as administrator that is dedicated for tickets. Then select this e-mail account in the type properties where you want the e-mails to be imported too.
Warning
All e-mail in the inbox of this account will be imported into the ticket system and the e-mail will be removed from the IMAP server.
The scheduled task is configured to import the tickets every 5 minutes.
Statuses
Statuses are very simple and straight forward. You can create and delete them at Administration -> Statuses. Statuses can be filtered on and there’s a counter with the number of tickets in that status in the filter.
E-mail templates
Here you can configure the messages that will be sent to your customers.
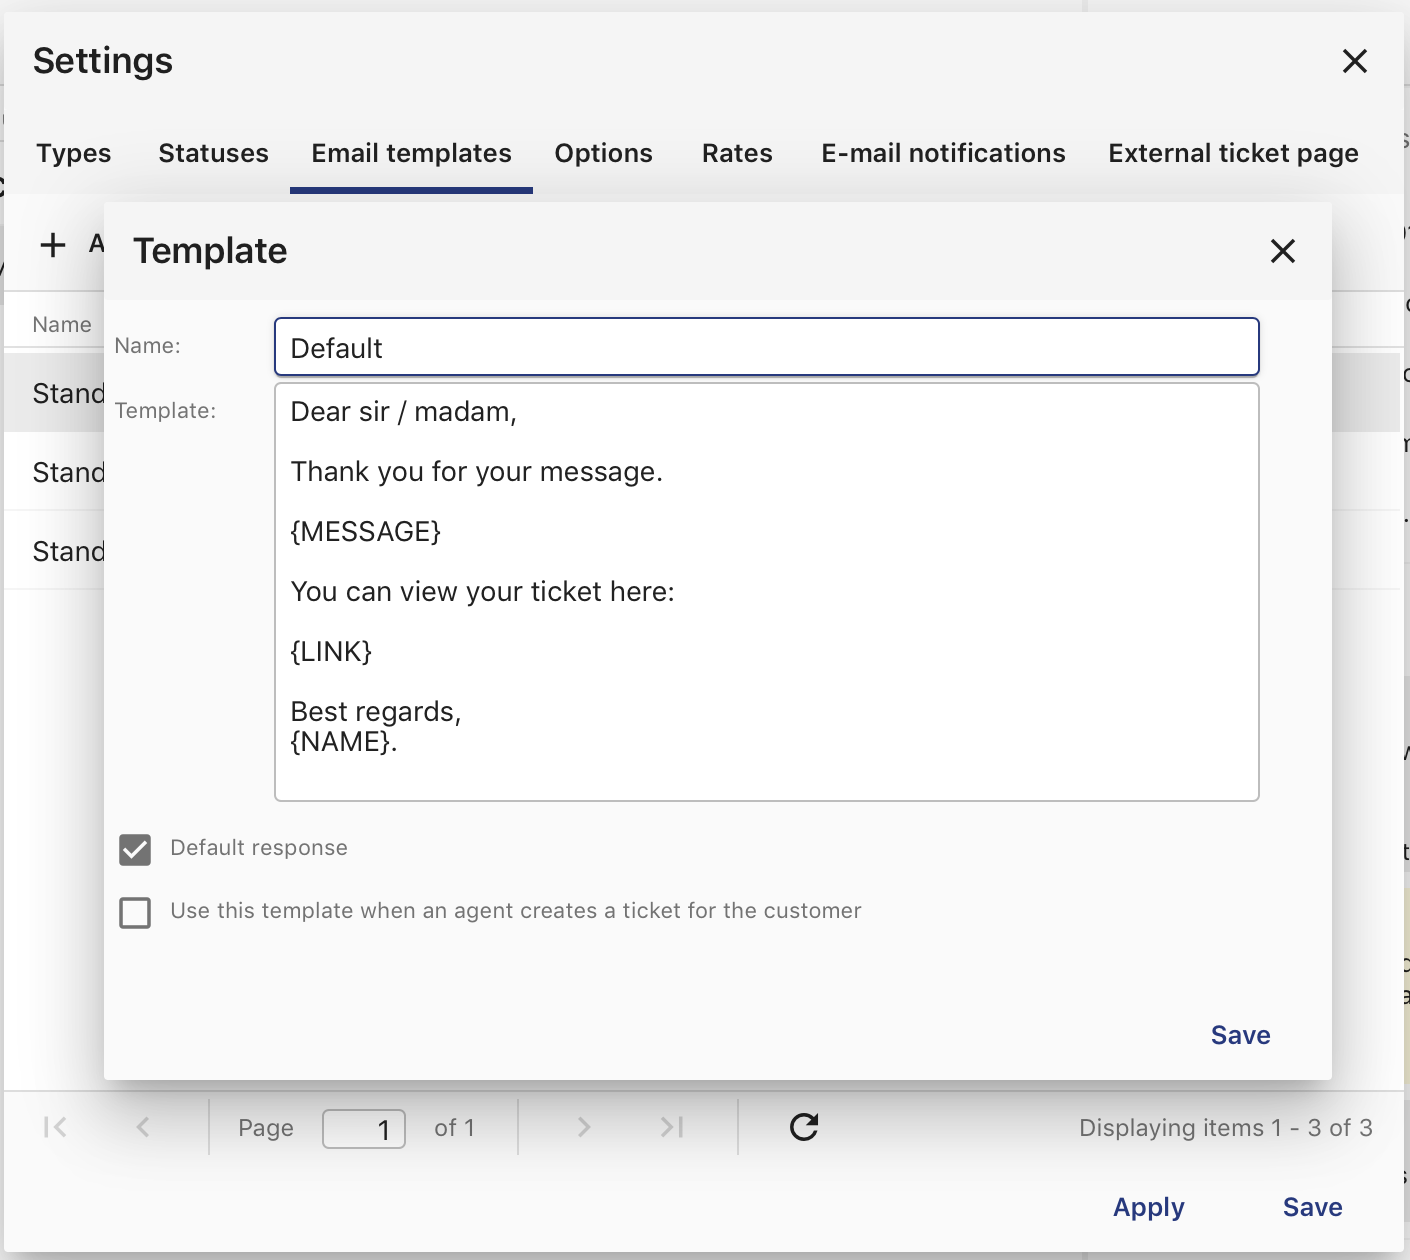
E-mail template
There are five template types:
Name |
Description |
|---|---|
Default response |
This template is used by default when an agent replies to a customer |
Auto reply |
This template is used for auto replies when customers create new tickets |
Ticket created for client |
This template is used when an agent creates a ticket for a customer. |
Ticket created for agent |
This template is used when a customer created a new ticket. This message will be sent to all e-mail addresses listed in the type settings. |
Ticket claimed notification |
his template is for the message that is sent to the customer when an agent claims the ticket. |
Note
All templates are optional. If you leave the template out this message type will be disabled.
Template variables
The following template variables can be used to show information about the contact that is set in the ticket:
{contact:sirmadam} Sir or Madam depending on the gender.
{contact:salutation} The salutation
{contact:formatted_address} Get the full address formatted according to the country standards.
{contact:first_name} First name
{contact:middle_name}
{contact:last_name}
{contact:initials}
{contact:title}
{contact:email}
{contact:home_phone}
{contact:fax}
{contact:cellular}
{contact:address}
{contact:address_no}
{contact:zip}
{contact:city}
{contact:state}
{contact:country}
{contact:department}
{contact:function}
{contact:work_phone}
{contact:work_fax}
{contact:homepage}
If the contact has a company set then you can also use these variables to show the company information:
{company:formatted_address} Get the full address formatted according to the country standards.
{company:formatted_post_address} Get the full address formatted according to the country standards.
{company:mtime}
{company:ctime}
{company:crn} Company registration number
{company:iban}
{company:vat_no}
{company:bank_no}
{company:comment}
{company:homepage}
{company:email}
{company:fax}
{company:phone}
{company:post_zip}
{company:post_country}
{company:post_state}
{company:post_city}
{company:post_address_no}
{company:post_address}
{company:country}
{company:state}
{company:city}
{company:zip}
{company:address}
{company:address_no}
{company:name2}
{company:name}
{company:id}
The following template variables can be used to show information about the ticket itself:
{AGENT} The current ticket agent that corresponds with the contact.
{MESSAGE} The current message that is about to be sent.
{LINK} Hyperlink to the ticket’s page.
{ticket:ticket_number}
{ticket:subject}
{ticket:type}
{ticket:company}
{ticket:first_name} Contact’s first name.
{ticket:middle_name} Contact’s middle name.
{ticket:last_name} Contact’s last name.
{ticket:email} Contact’s email address.
{ticket:phone} Contact’s phone number.
{ticket:rate} The total amount in money spent on the ticket
{ticket:rateHours} The total amount in hours spent on the ticket
Options
In the options tab you can configure various options:
Name
The default sender name for e-mail messages
The default sender address for e-mail messages
Subject A template for the e-mail subject so the ticket number is included. Defaults to the ticket subject.
Note
The subject is always prefixed with [ts #{ticket_number}] because the e-mail importer relies on this format for detecting replies.
Language
The language of the templates. Group-Office will switch to this language when sending messages to customers.
Days for close
You can optionally enter a number of days that will be used to automatically close tickets when a customer does not respond within this period. A scheduled task is configured to perform this task.
Never close tickets in this status
An exception for the above setting.
Check boxes
The check boxes in the bottom of this tab speak for itself.
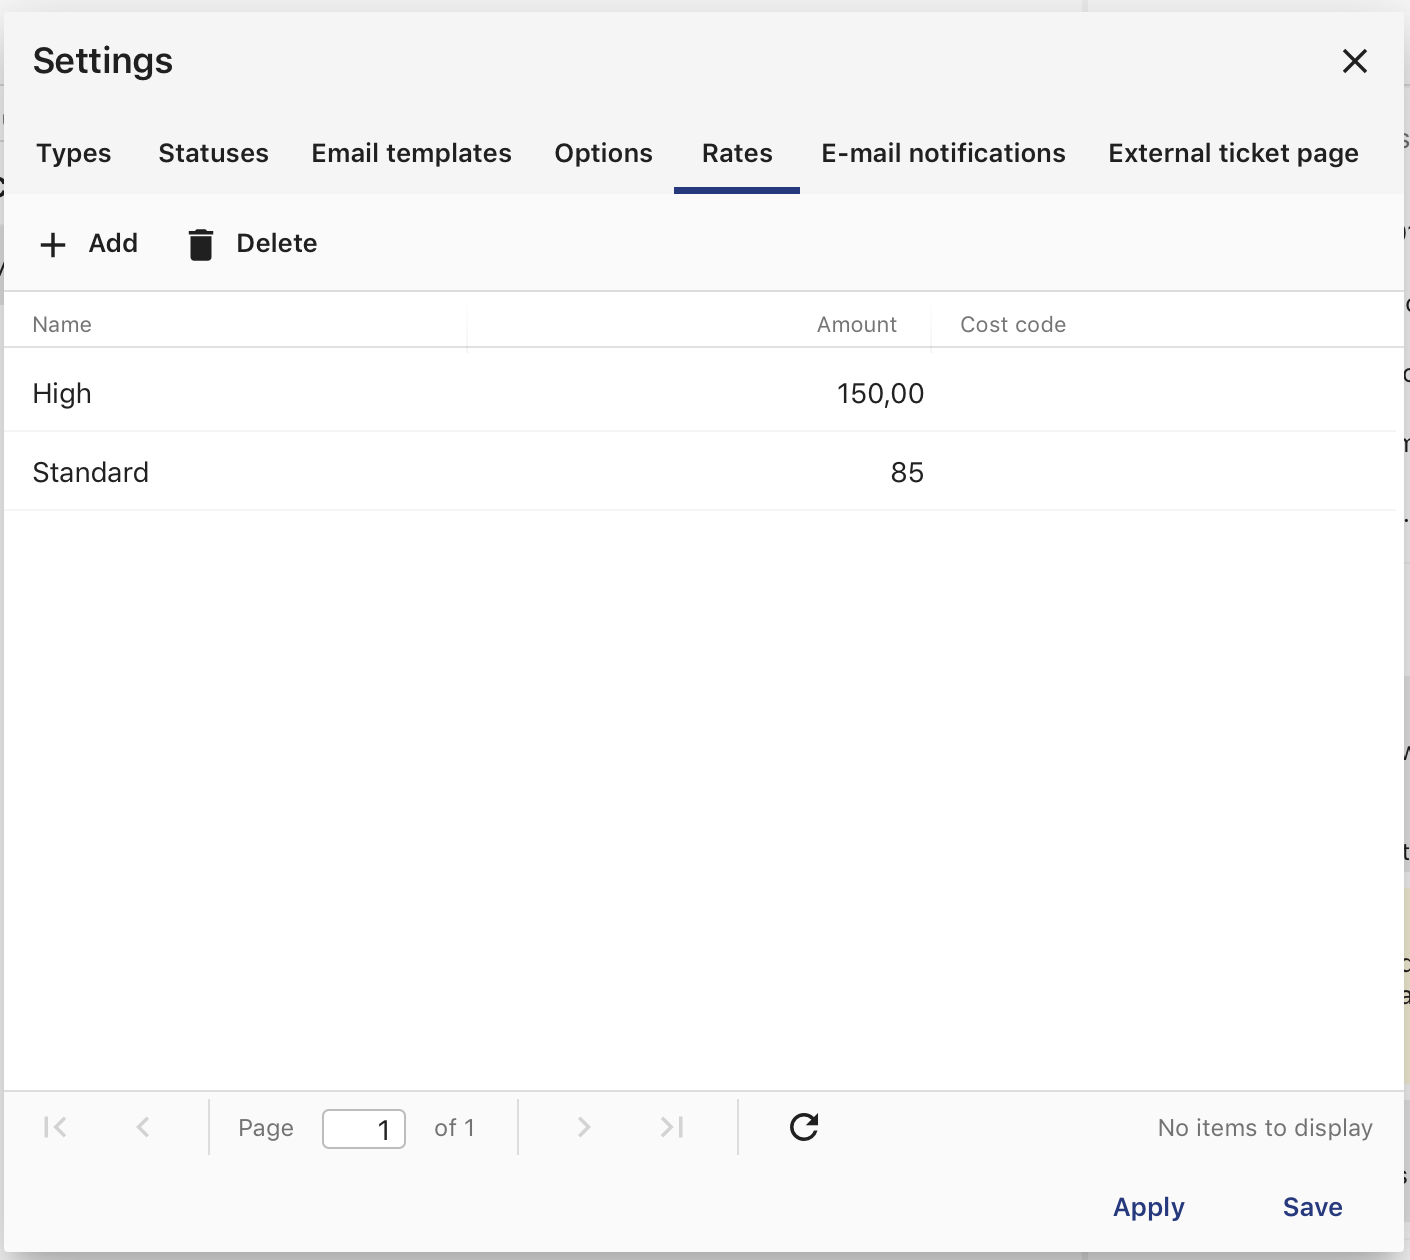
Rates
In the rates tab you can define multiple support rates with a name and value. When you setup rates it’s possible to register a number of hours worked on each message you create on a ticket. In the screenshot below you can see how agents can enter rates. Rates can be exported or converted in to invoices when you also use the billing module.
Types
External ticket page
The external page can be used as an iframe of your website or it can be styled like your website.
This feature depends on the “site” and “defaultsite” module. When you enable the page these modules will be installed automatically.
The following settings are available:
Enable external page
Enable the public external page. This will install a site in the website manager module.
Enable for anonymous users
Allow visitors to create tickets without logging in.
Use alternative URL
This URL is used for e-mail messages. Group-Office will send users to the external page rather then Group-Office when you enable this. It’s required for anonymous tickets.
Custom CSS
Add your own styling to the external page.
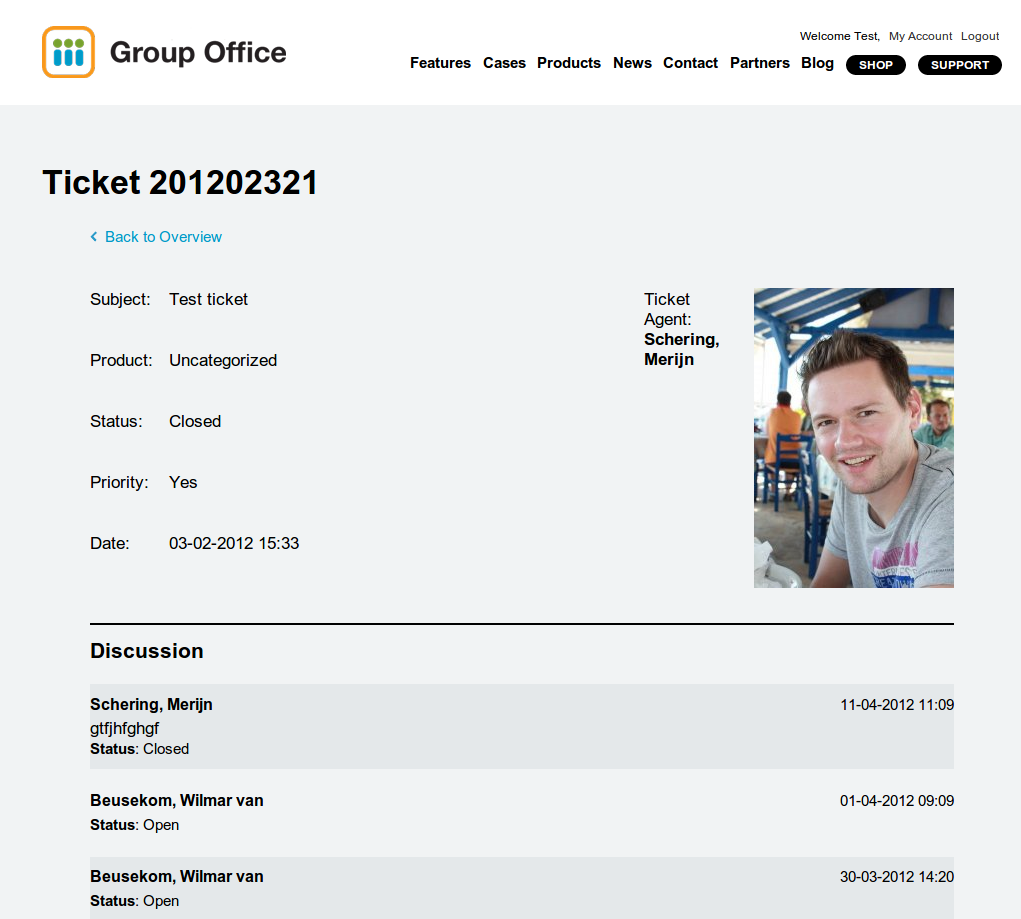
Example customer ticket page
By default the external page style is very basic. But you can of course customize that.
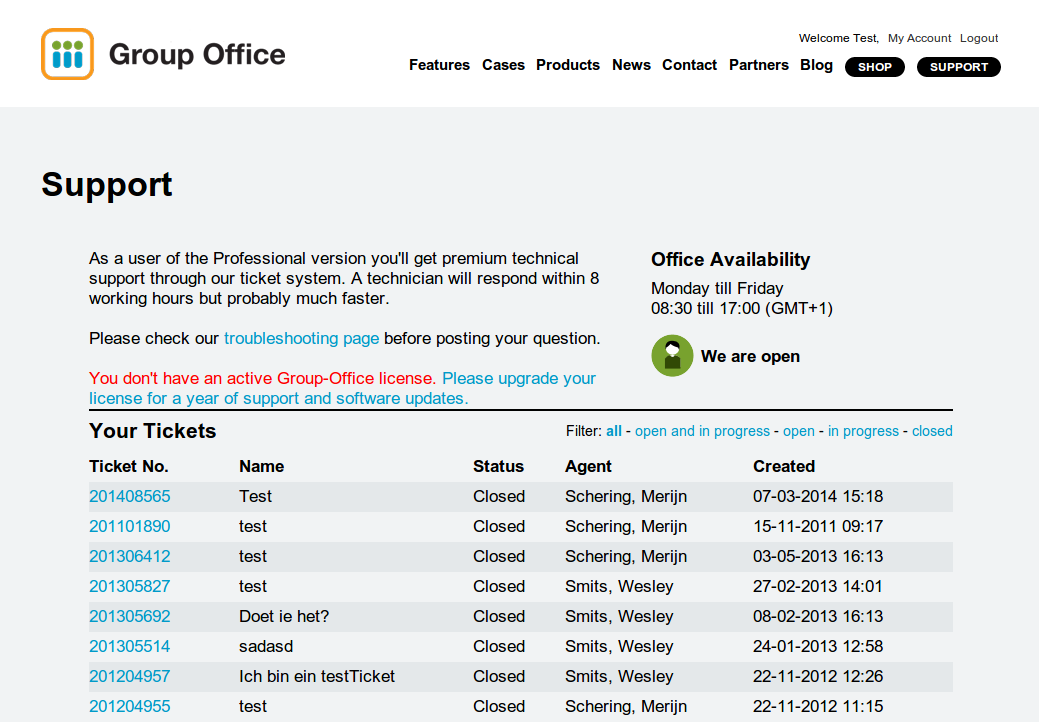
External ticket list
External ticket page