Custom fields
Every organization is different and has different data to store. That’s why most entities in Group-Office can be extended with custom fields.
Custom fields show in the:
Edit dialogs
Detail views
Grid columns
Advanced search and filters
You can create custom fields via System settings at:
Notes
Address book
Billing
Projects
Tickets
Calendar
Tasks
Files
… and many more!
Note
The above list depends on the modules installed. You may have less or more options.
Creating and editing fields
Navigate to System settings -> Custom fields. You’ll see a list of customizable entities and their corresponding modules.
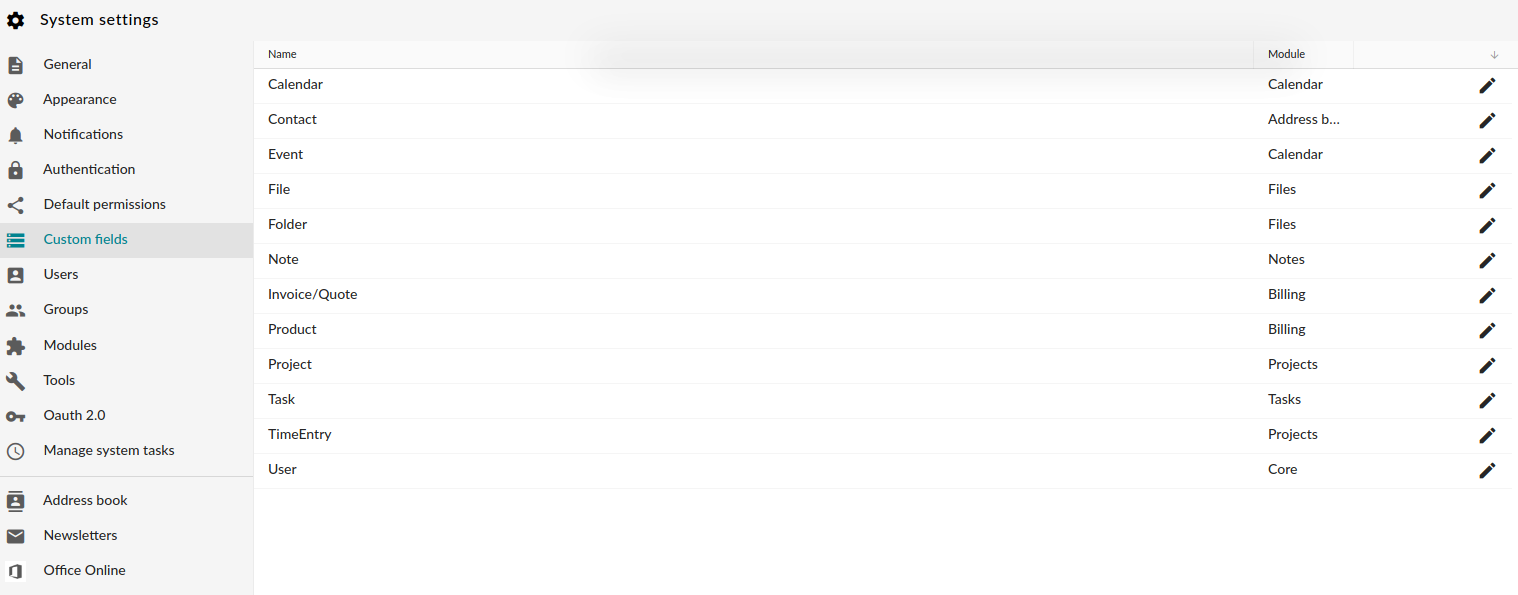
Custom fields overview window
Click on the pencil icon in the right column to manage custom fields for a certain object. For an non-customized object, the resulting window wll look like below:
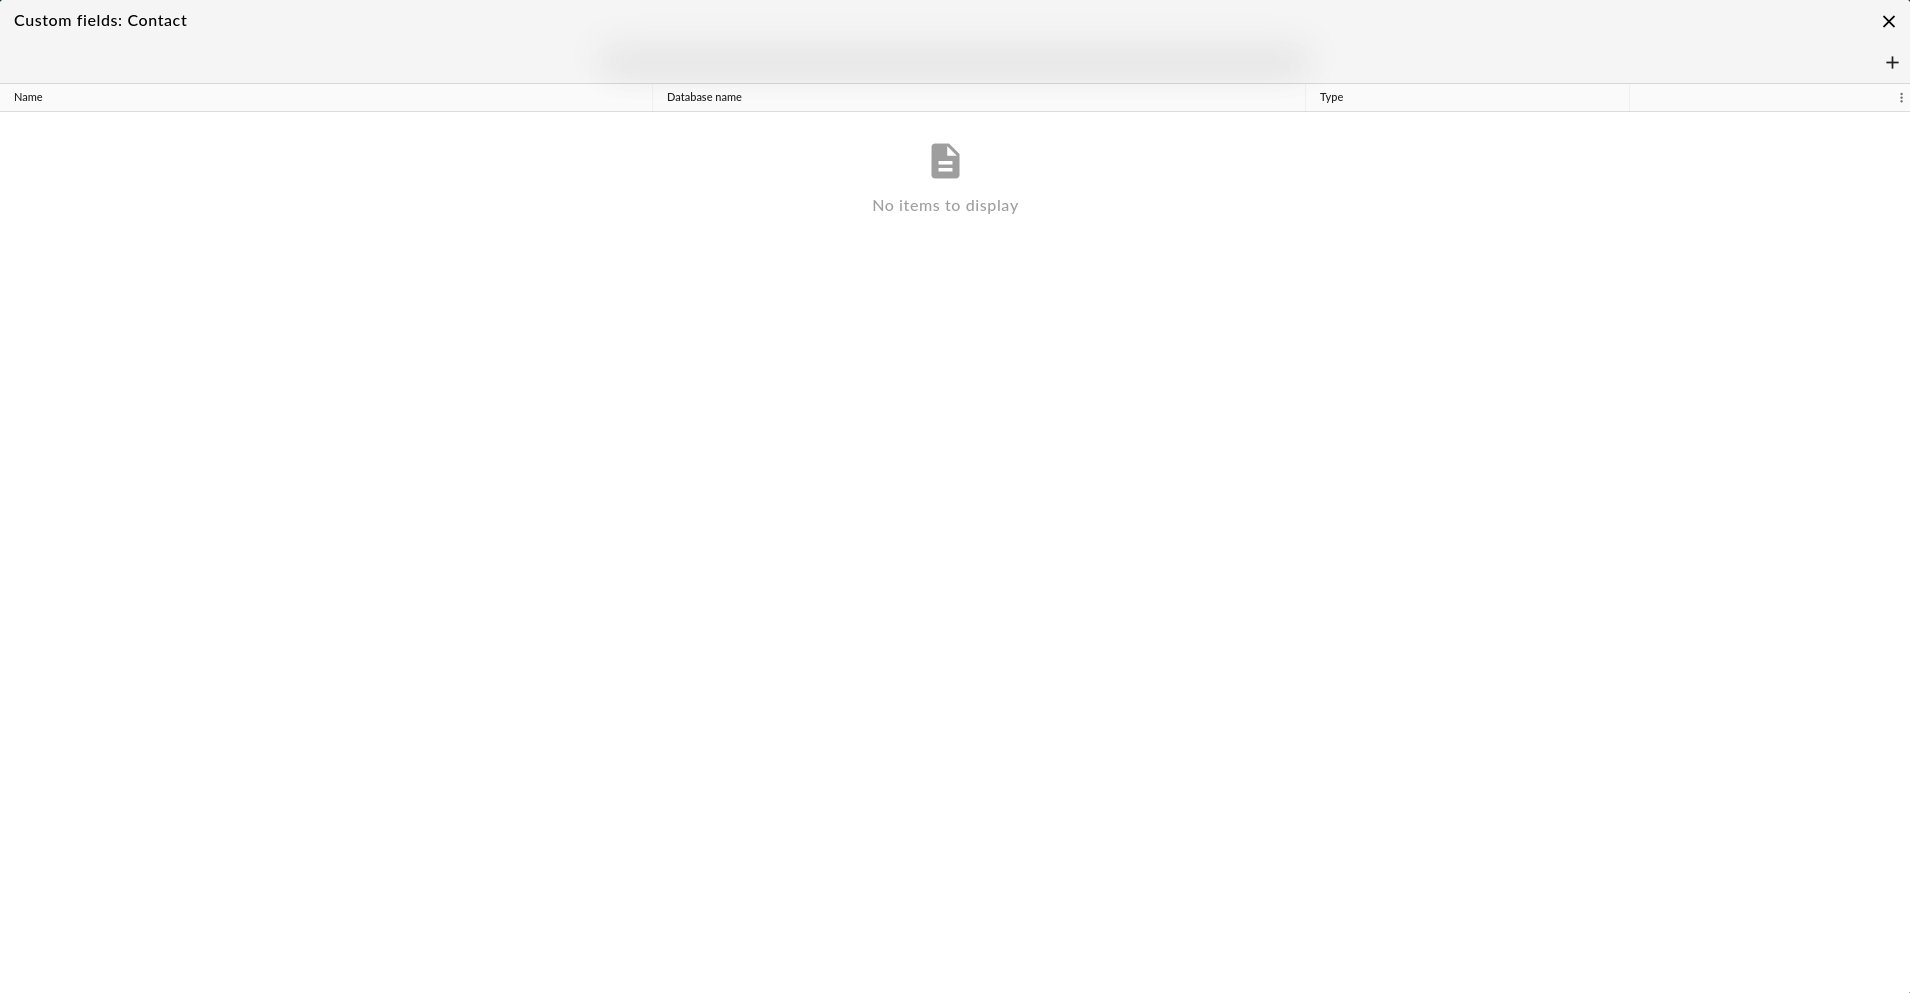
Custom fields for a non-customized object
Click the + icon to add a field set first. A field set is a group of fields that has a title and an optional description that will be shown on the form. You can also hide field set in some cases. This depends on the module. In the address book you can only show it on certain address books for example.
When you’ve created a field set you can add a field via the ‘+’ button on the field set row:
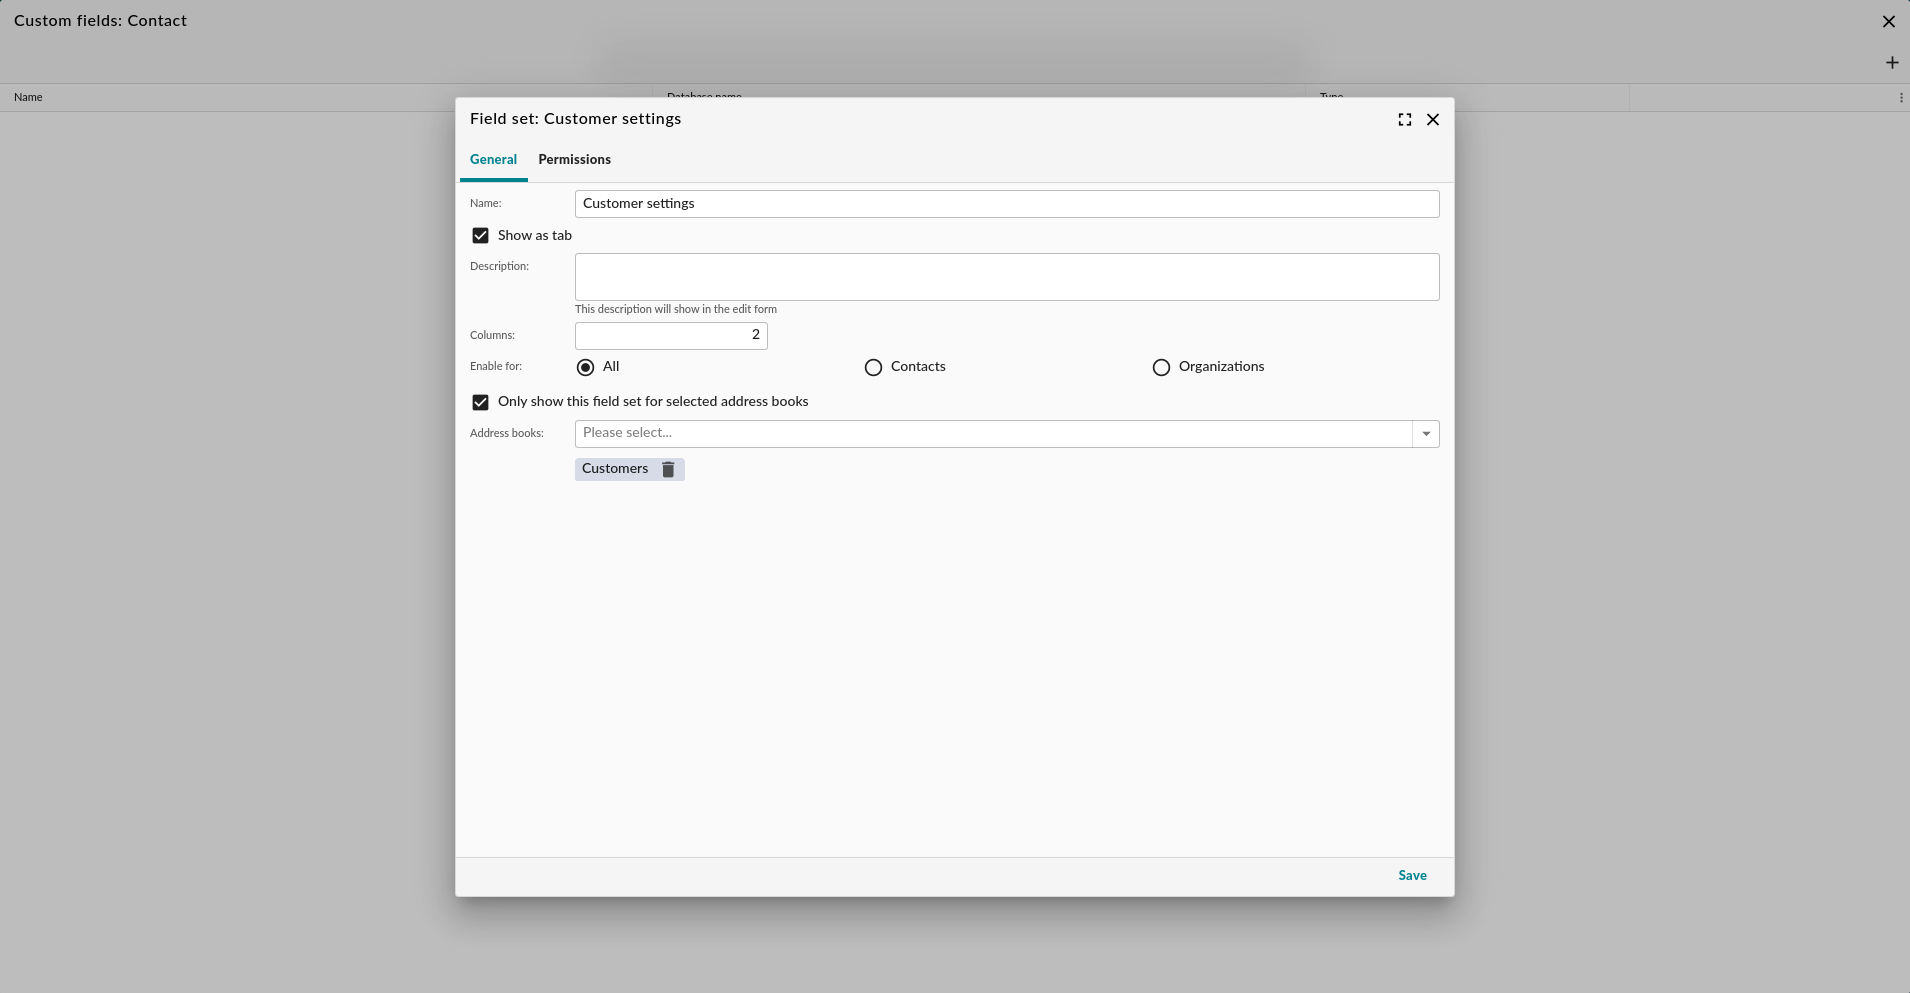
Add custom field set
The image below shows the custom field types you can add.
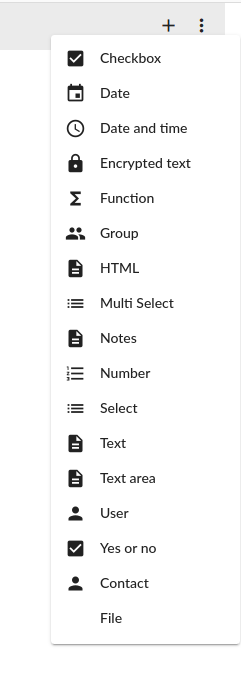
Custom field types
Note
The types of custom fields that you can add depend on the modules you have installed.
Depending on the type of custom field, you have a plethora of options for your customization. For instance, you can conditionally require and/or hide a field:
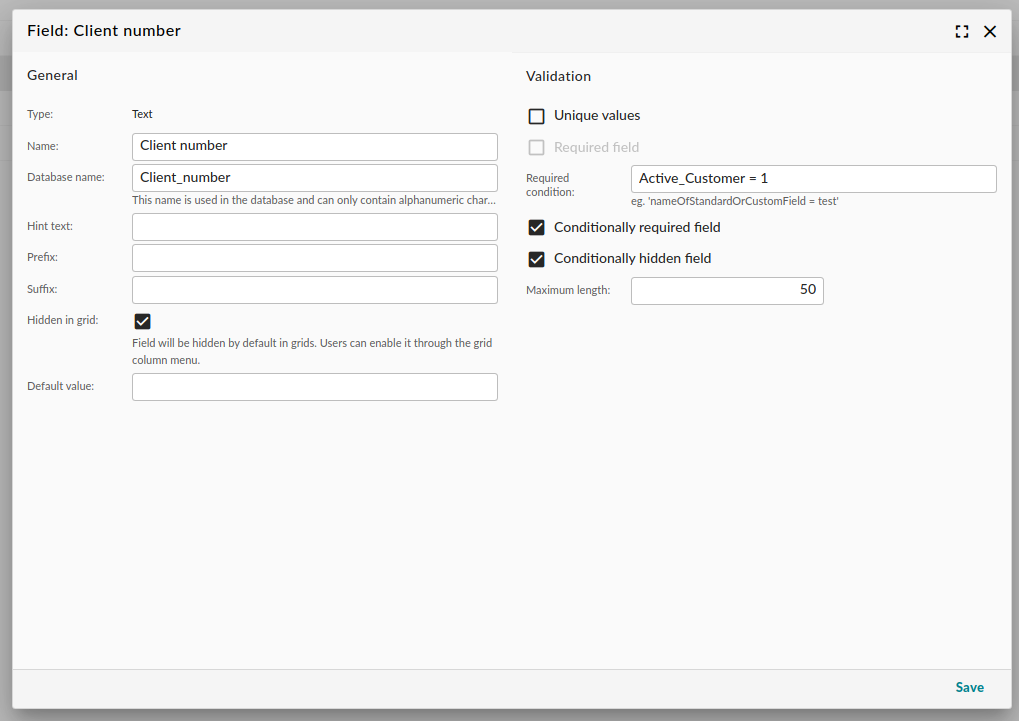
Example text fields with extra conditions
The custom field will show in the:
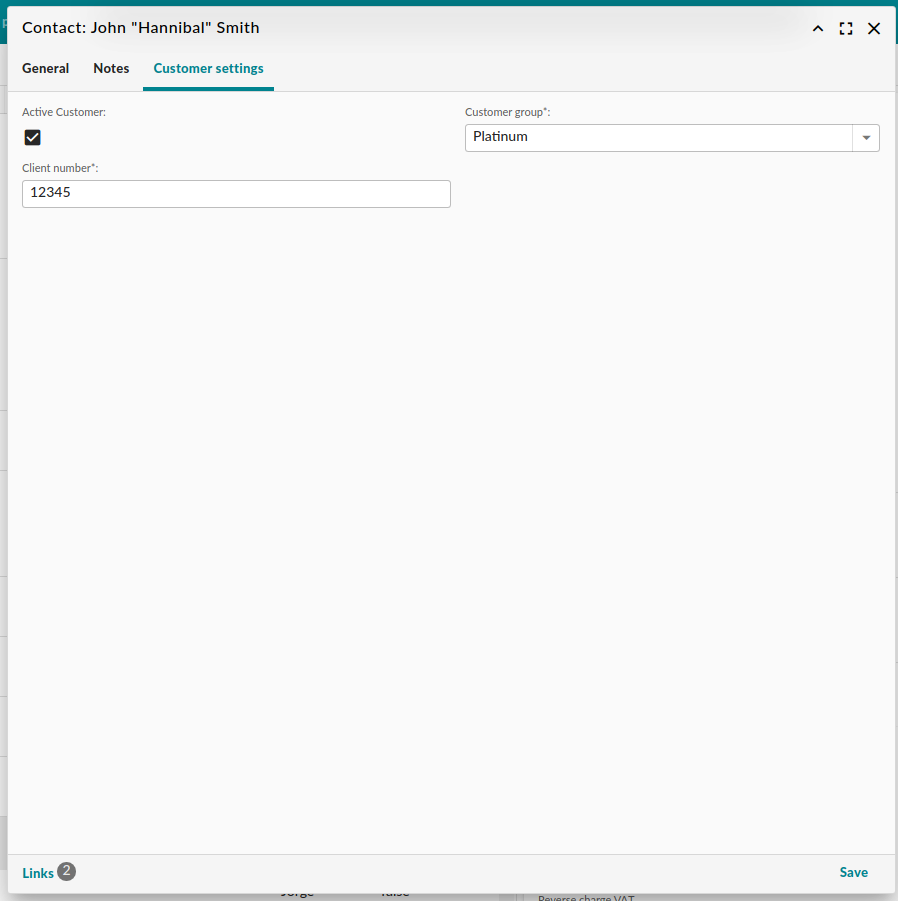
Example edit dialog. Please note the separate tab
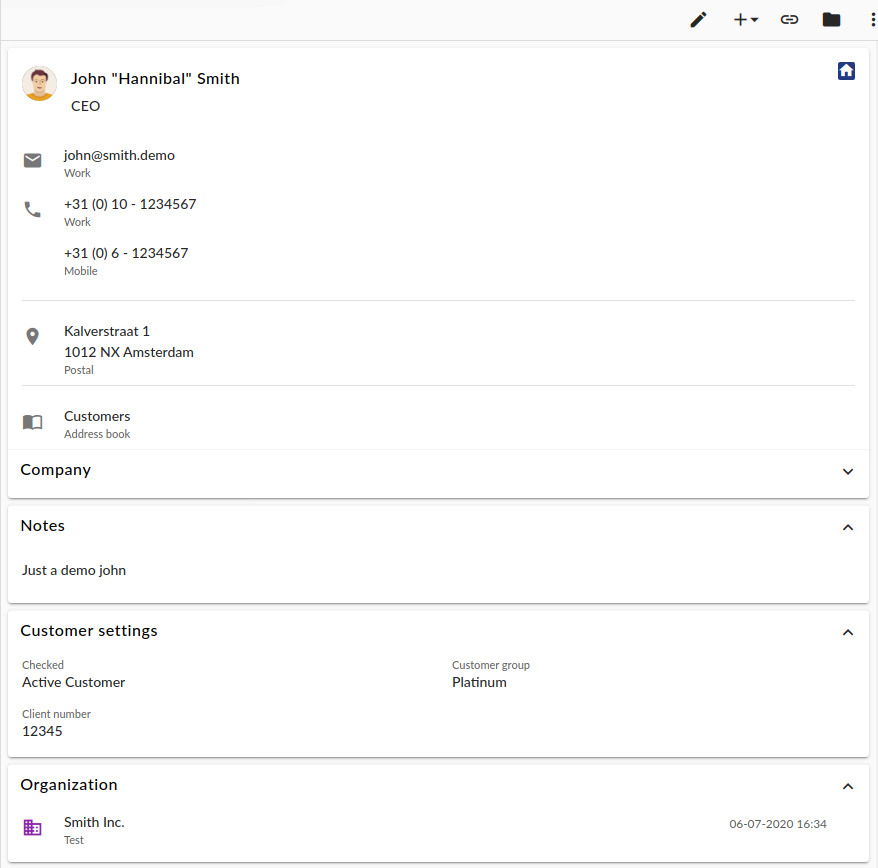
Detail view

Toggle custom fields in grid columns
Permissions
By default, custom field sets and fields can only be managed by administrator users. In order to enable end users to manage field sets, add the ‘Change custom fields’ permission to the desired users or groups. This can be found in System Settings -> Modules -> System Permissions.
Fieldsets versus entities
Please note that fieldset permissions are independent on the permissions for the individual entities. When editing custom fields for an individual entity, the permissions are inherited from said entity. Custom fields for entities depend on the permissions for the entity proper and not on the field set. However, if an end user wants to edit a field set for a certain entity type, the permissions for the field set apply.
Filters
Aside from displaying and storing data, it is a breeze to filter items by custom field values. In the left column, near the Filters header, click on the + and select Filter:
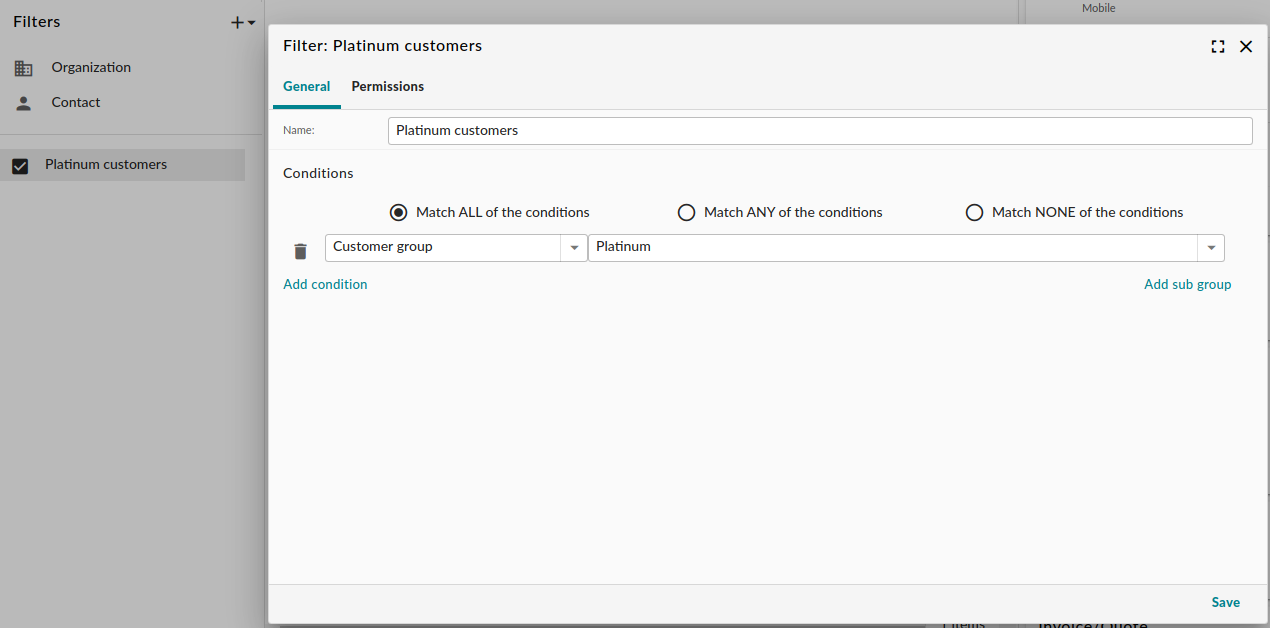
An example filter
Conditionally required fields
It’s possible to make fields required based on one or more simple conditions. You can also hide the field if the condition does not match.
For example you could create a checkbox called “provideDetails” and create a text field “details” with a condition ‘provideDetails = true’. The result will be that when you check the box the provideDetails field will be shown and made required.
The condition syntax is very simple:
<fieldName> <operator> <value>
Where:
fieldName can be any property or custom field
operator can be: =, !=, >, >=, <, <=
value is a string without quotes. For checkboxes you can use 0,1 or true or false.
empty or non-empty values are checked by using myField is empty and myOtherField is not empty respectively
multiple conditions can be combined with either AND or OR.
Grouping is also possible since 6.4.219. eg. <fieldName1> is true AND (<fieldName2> = test OR <fieldName2> = 1234)
Warning
The fieldName, operator and value must be separated by spaces.
Note
Older modules have a slightly weird issue with comboboxes. For example: if you want to add a condition to filter on project status, the proper syntax would be status_id = Closed.
Examples
If the Answer is supposed to be larger than 41, but smaller than 43, use the following:
theAnswer = 42
or if you are into Vogon poetry:
theAnswer > 41 AND theAnswer < 43
If you want to require or hide a field based on the following conditions:
The answer is 42;
- Either of the conditions below:
There is a home planet destruction date but the owner has no towel;
The home planet still exists and the owner has a towel;
then the condition should read something like this:
(theAnswer = 42 AND ((homePlanetDestructionDate is not empty AND hasTowel = 0) OR (homePlanetDestructionDate is empty AND hasTowel = 1)))
Template field
The template field can render data using Templates.
The template holds the “entity” model as variable. Which is the entity the custom field belongs too.
You can for example take the first linked contact and store it’s name:
[assign firstContactLink = entity | links:Contact | first]
{{firstContactLink.name}}
Or the first project (A list of entities is available in the database table core_link.clientName):
[assign firstProjectLink = entity | links:Project | first]
{{firstProjectLink.name}}
Or store the postal code of the first linked contact:
[assign firstContactLink = entity | links:Contact | first]
[assign address = firstContactLink.addresses | first]{{address.zipCode}}
Or if you want addresses of the contact in the grid you could create a field with this template:
{{entity.addresses | column:formatted| implode}}
Or fetching a contact from a custom field:
[assign contact = entity.customFields.<CONTACT_CUSTOM_FIELD_DATABASE_NAME> | entity:Contact]
{{contact.name}}
Custom fields often hold ID numbers. You can convert them to text like this:
{{contact.customFields.asText.<DATABASE_NAME>}}
Sometimes it can be useful to show the database ID on the information panels. You can use this template for it:
{{entity.id}}
More documentation about the template syntax can be found here.