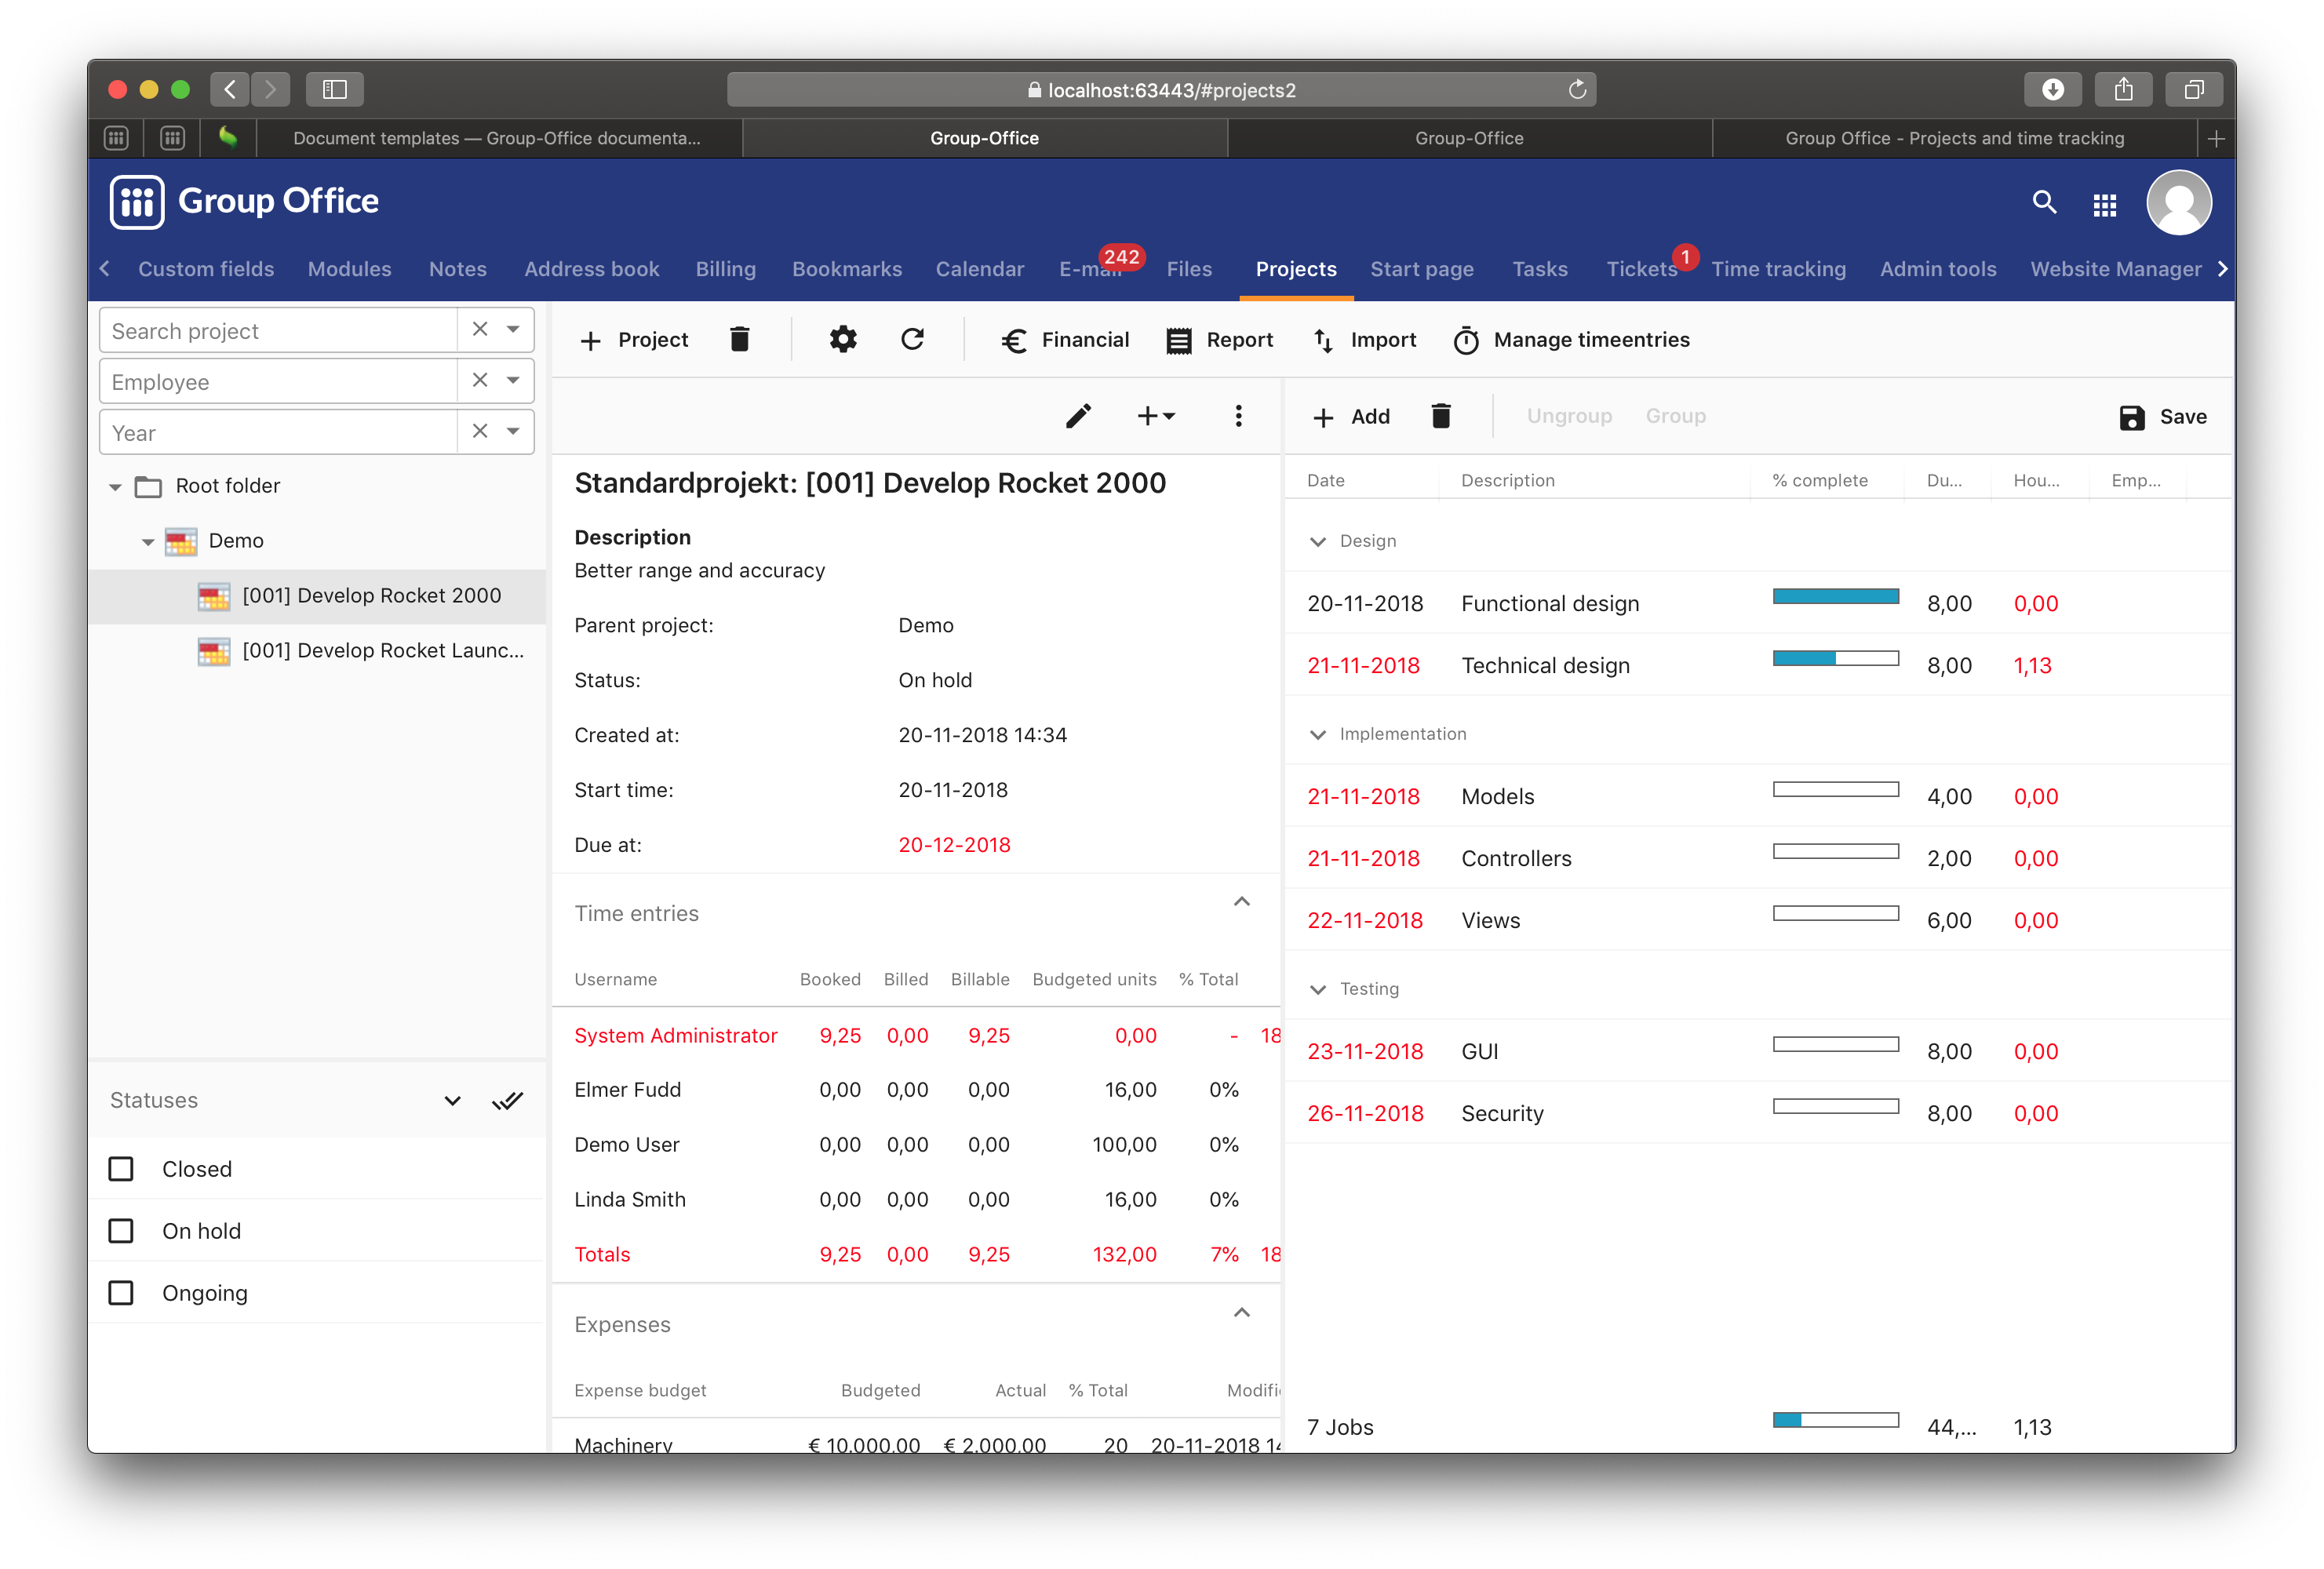
Projects
With the projects module you can easily manage project information in one place and keep track of worked hours, material usage and travel costs. You can also share projects with customers and co-workers. With the project tasks it’s easy for employees and the manager to keep track of the project progress.
The managers also have reports about progress and budgeting.
Projects module
The projects module supports:
Note
Having trouble with making time entries?
Make sure the projects are not having a status that is closed. Also make sure the user account is an employee of a business. and project resource.
Administration
Permission types
Permission types control who can access projects in the projects module. You don’t set permissions per project but each project can have a permission type. If you’re a small organization just one permission type might be sufficient. But if you have different departments it could be useful to setup a permission type for each department. It just depends on who may see the project information.
The permission levels are straightforward and you can read more about it here.
Note
Root level
Only users with manage permission on the projects module are allowed to create projects on the root level. To create sub projects you need at least create permission on the parent project.
Finance permissions
Here you can control which users can see financial data like budgets and actual costs. Also the billing button to create invoices from time entries is only available to those users.
Templates
Project templates are very powerful. You can control what information the end user sees in the project information panel and edit dialog. The templates control:
Which standard fields are enabled on the project dialog.
Which custom field categories are enabled on the project dialog
Default project files and folders
Default project tasks
Default permission type and status
The icon displayed in the project tree and grid
Enable / disable the jobs panel
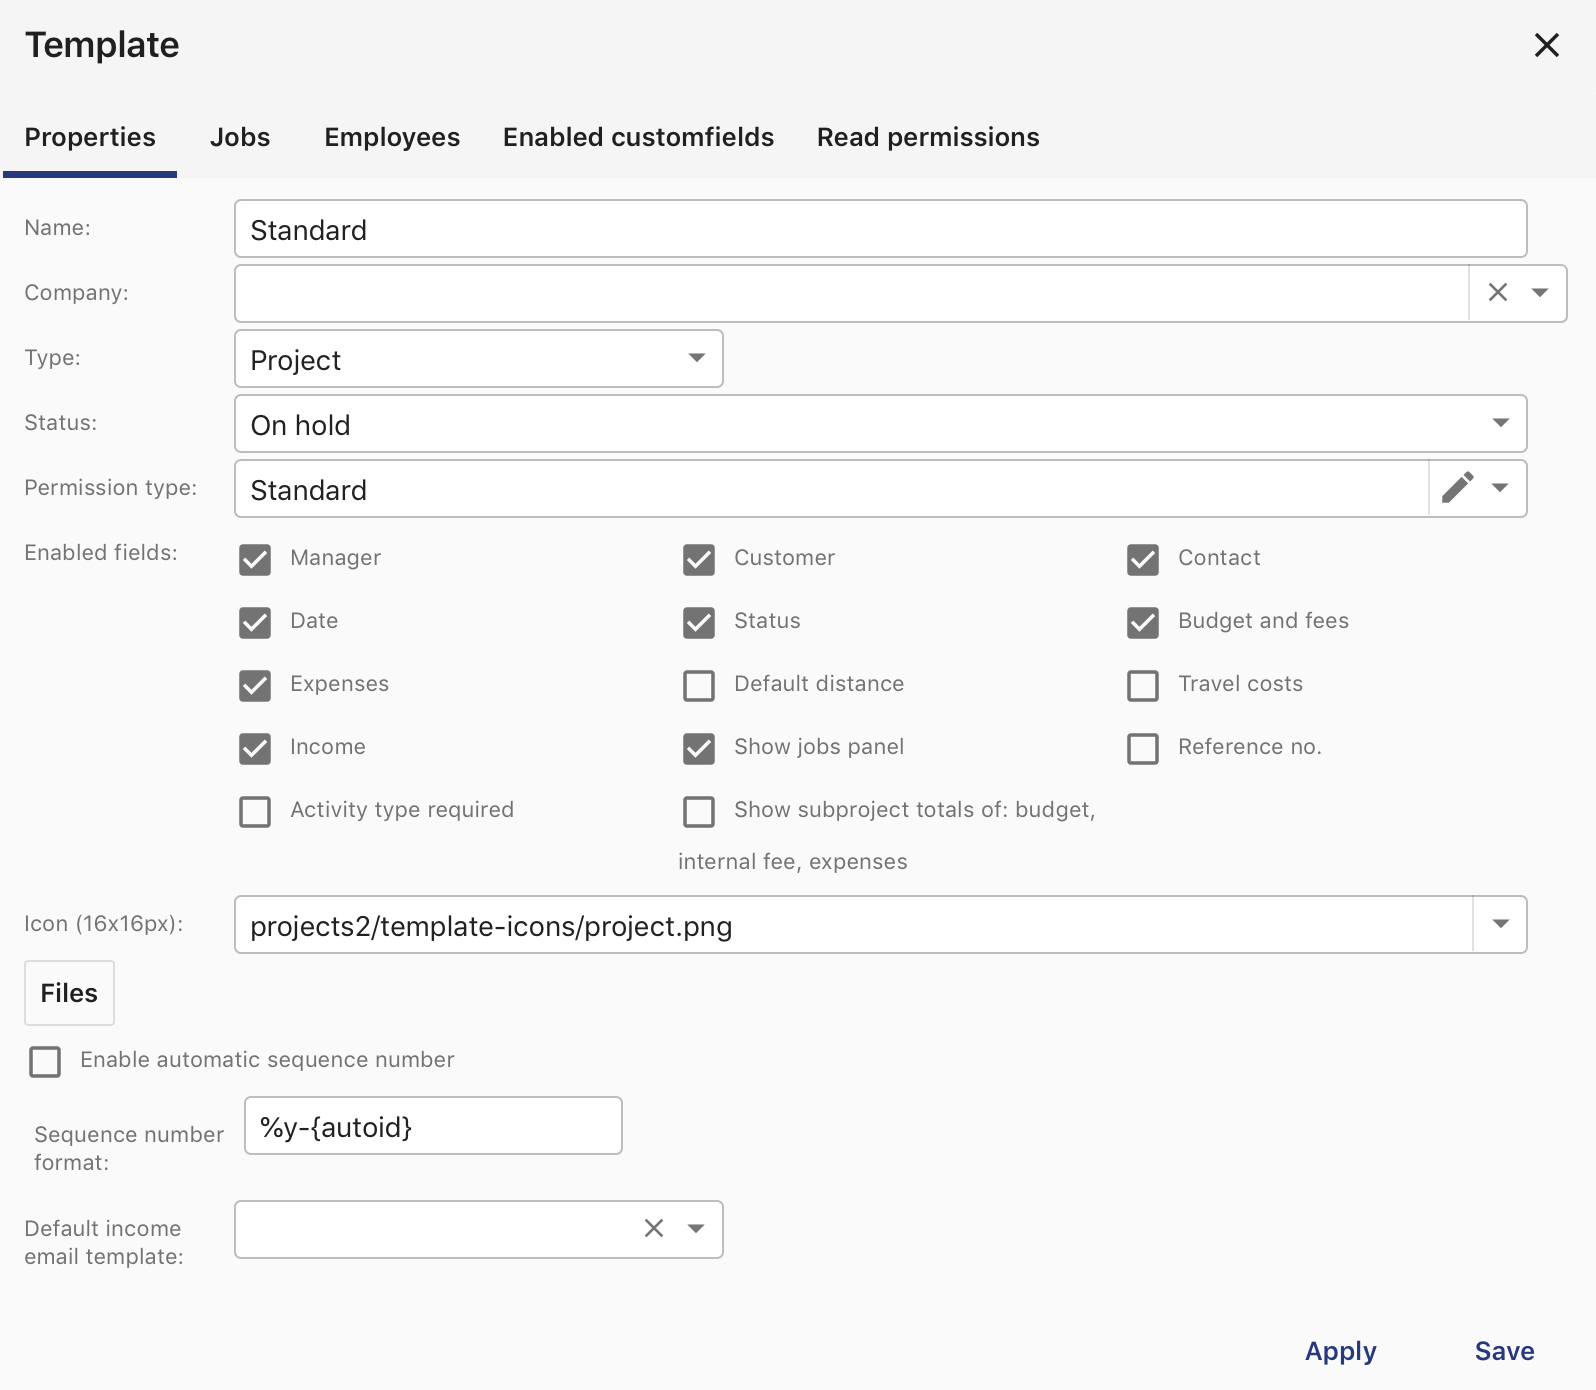
Project template
Properties
The following properties can be configured:
Property |
Description |
|---|---|
Name |
The name of the template |
Type |
The template type. Projects with a container type template have no time tracking and expenses functionality. |
Status |
The default status of the project |
Permission type |
The default permission type of the project |
Enabled fields |
Controls which standard fields are enabled on the project dialog. |
Icon |
An icon that will be disabled in the tree and grid |
Jobs
On this tab you can define default project:
Tasks, either linked to the users’ default list or in a special project task list
Sub projects
On the name and description fields you can use template tags like:
{project:name}
{customer:name}
{contact:name}
You can use additional Template variables.
Permissions
On the permissions tab you can control which user may use the template.
Office times
Set the office times here. These times will be used for guessing the default time for new time entries and also for estimating a project task due date.
Statuses
Manage project statuses here. Per status you can set if a project is completed or not if it’s visible in the tree.
Note
Missing projects in the tree or for time entries? Completed projects won’t be available for time tracking anymore. You can also set if the project is visible in the tree. This is useful for keeping your projects overview organized.
Activity Types
Activity types will be available in a drop down when making time entries. It also has a preset for the description and duration.
It’s also possible to exclude hours from billing or to setup different fees per activity type.
Employees
Every user that needs access to time tracking must be an employee of a business. Go to System Settings -> Users. Double click a user and go to the “Employee” tab. The minimal field required is the value for “Business”. When that is set the user will be available as a resource for projects.
To make the projects available for the time tracking module of a user you’ll also need to define for each project which employees are working on it. To do that, you’ll need to open the edit dialog of a project and go to the “Employees” tab. Add every employee for that project in this screen.
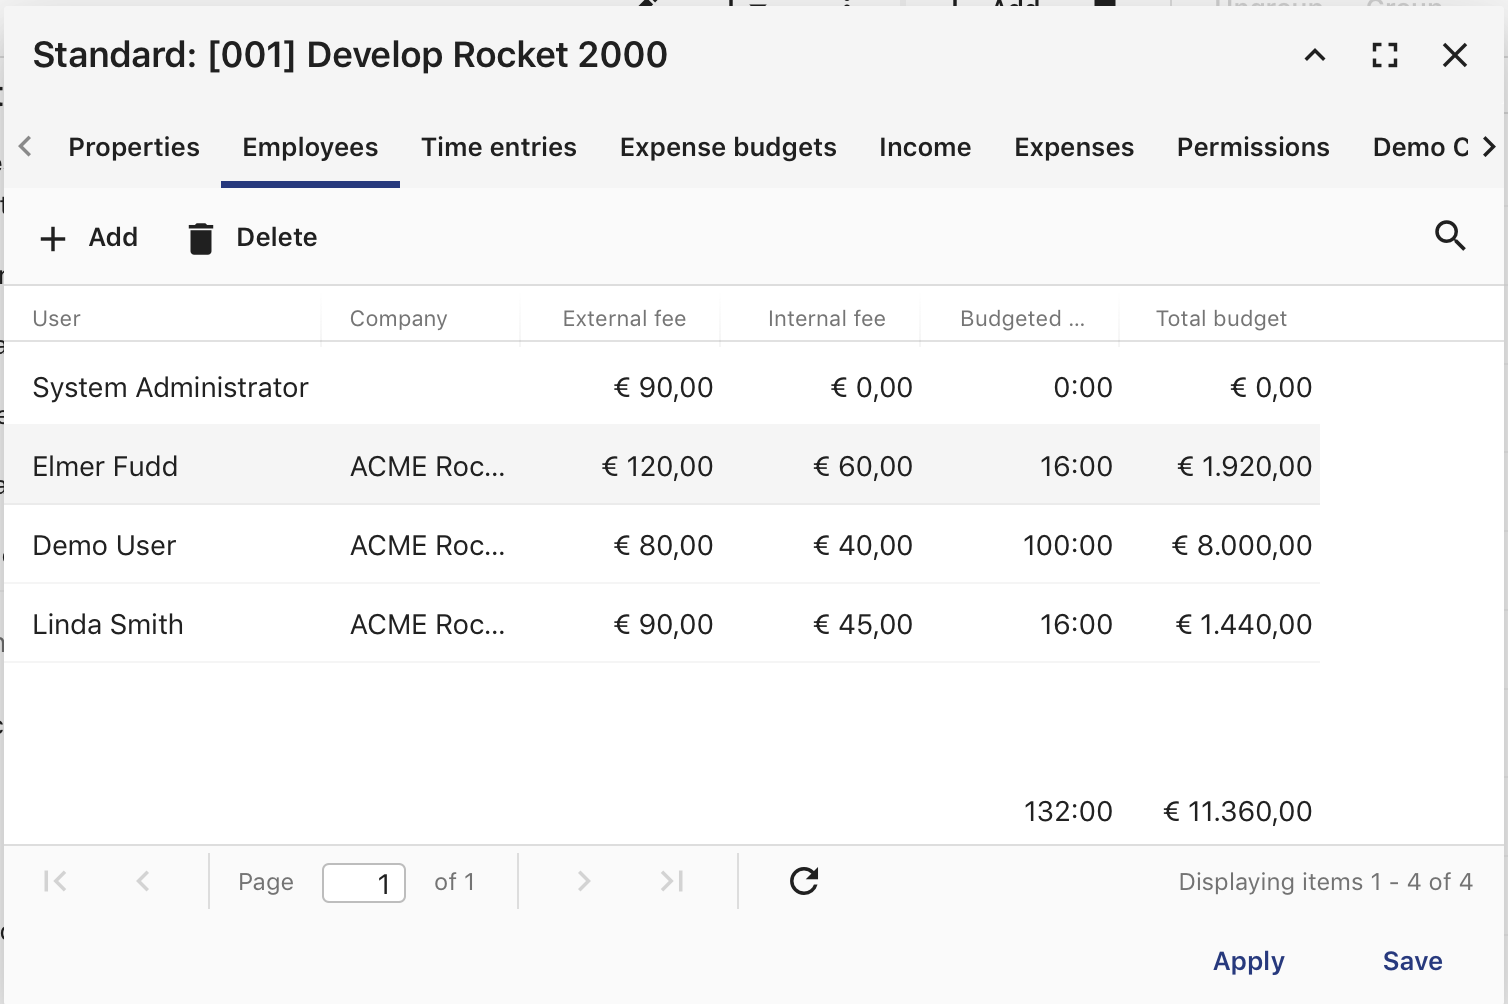
Project resources / employees
CSV Import and Export
It is entirely possible to manage projects by exporting them to CSV or importing them from CSV. Please note that by default, this is only to be done by admin users or other users with the ‘manage’ permission.
CSV Export
Exporting your current projects is done from the menu above the projects grid:
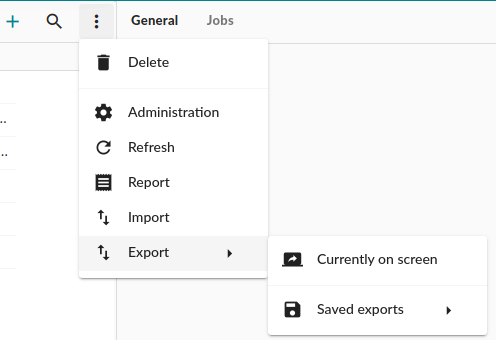
A dialog window is opened with export options and a tab in which to select the columns to export. Upon clicking the save button, a CSV file should be generated and saved.
Note
Please note that if you have work with parent projects and child projects, only the projects will be exported that are on the current level in the hierarchy and that are not project folders.
CSV Import
Likewise, you can import projects from CSV from the menu above the projects grid. Upon clinking the import option, a new dialog is opened:
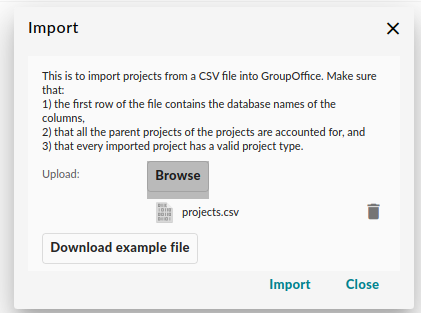
Projects import dialog with an already uploaded file
In the CSV, the first row should contain the column names. For an example, you can download an example CSV file from the import dialog.
In order for a project import to be successful, the following columns should exist in the CSV file:
nameorpath. Thenamecan be distilled from the path. If thepathis omitted, a project will always be imported into the top level of the projects hierarchy.type_idortype_name. We should know which project type a project is.status_idorstatus_name. Defines the project status.template_idortemplate_name. Defines the project template.
If one of the conditions above is not satisfied, the import script will return an error message.
Note
In order to import a hierarchical structure of projects, be sure to include the path or parent_project_id
column. Each level consists of the project name by level, concatenated with forward slashes, e.g.
Project/Subproject/Subsubproject. If you want to import a large number of subprojects, for which the parent
project ID fields are known, you can include the column parent_project_id instead. If both columns are included,
the parent_project_id column will be ignored.
Reports
Group-Office comes with some reports that are useful for most businesses. But reports can also be customized if you have PHP knowledge. The Group-Office reports are available in source code. Intermesh also offers report customization. Contact us for more information about this.
The default reports are:
Time tracking entries in CSV
Project information and planning in PDF
Time entries in PDF
Overview of all projects in PDF
For more information about customizing reports you may want to read our [blog post about it](http://groupoffice.blogspot.com/2014/02/introduction-with-new-projects-version.html)
Time tracking
For users to be able to use time tracking the following conditions must be met:
The user has access to the time tracking module
The user is a resource of a project that does not have a [container](#templates) type template.
The project is not in a [closed status](#statuses).
Users don’t need access to the projects module to use time tracking.
Time tracking
Note
Closing weeks
Users can close weeks. When a week is closed the manager can approve the hours up to and including the currently selected week. The user will not be able to edit the time entries anymore.
When a user accidentally closed a week the manager can reopen it at Administration -> Employees. Double click an employee and set the close date back in time.
Tasks
Projects can be defined as a number of tasks that share a common goal. Group Office support task and task list management from within a project. You can find more information on tasks on this page.
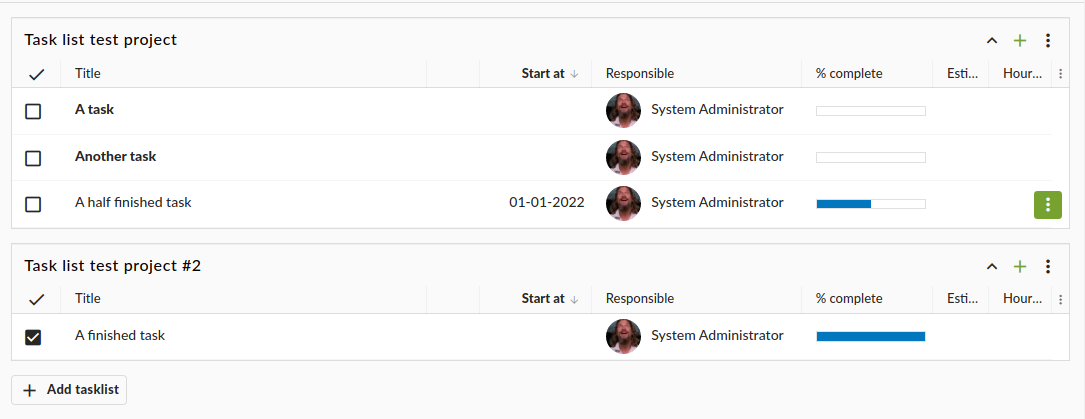
Project task management
Jobs
Attention
As per version 6.6, project jobs have been obsoleted in favor of the new tasks module.
In the jobs panel you can define smaller parts of the project. You can also select these in the time entry dialog to keep track of how much time these jobs took.
Before you can use jobs you must setup employees for the project. Otherwise the jobs panel will stay disabled.
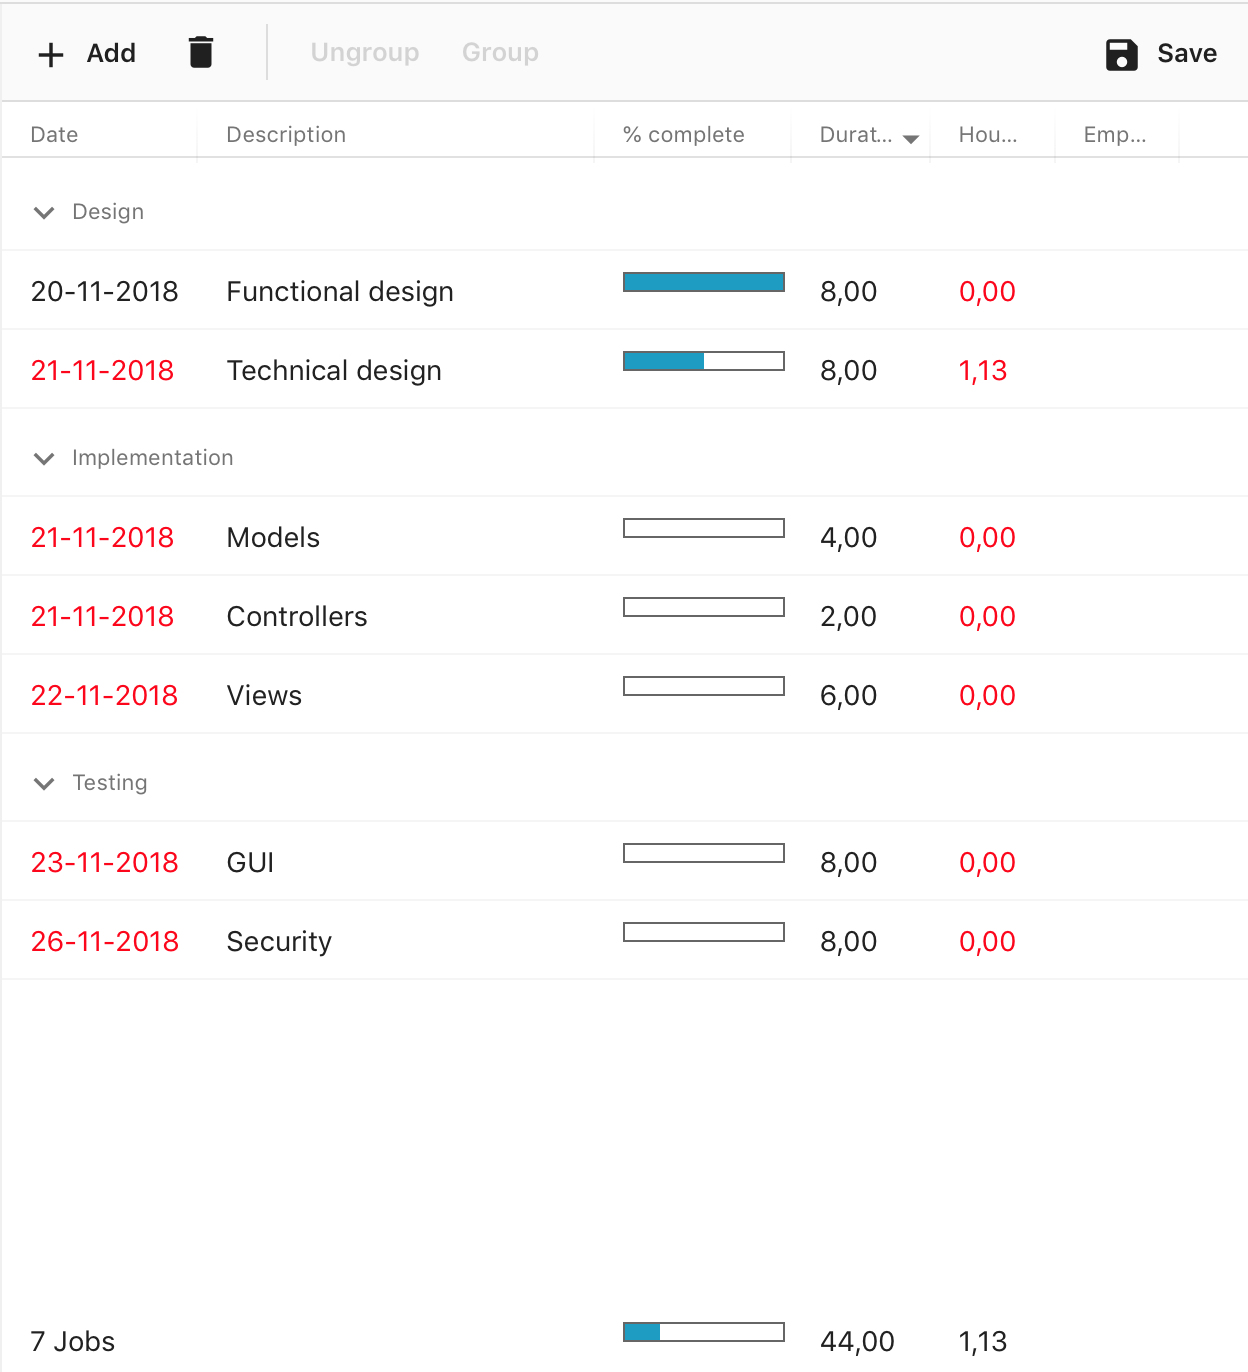
Project jobs
Hours approval
Project managers can approve hours if this module is installed. The “Manager” property of projects is important here. Users can approve all time entries of projects that they are the manager of. Only hours that are closed will show up for approval. So users must first press the “Close week” button in the time tracking module.
Only approved hours will be billed to the billing module when you use this function.
Billing
It’s possible to generate invoices from your time tracking. To do so you have to create a project and set the type to “Post calculation”. When time is recorded now the fees will be stored too.
The default fees can be set at Administration -> Employees. When you create new projects these values are copied to the project employees when you add them.
In the detail view of the project you see a summary of hours:
Booked: All the entries.
Billable: Billable hours are the ones that have a fee. You can have no fee when the project is not set to “Post calculation”. You can also set “Not billable” at activity types in administration. It’s also not billable when you set zero fee for the employee in the project.
Billed: An income was generated for these time entries.
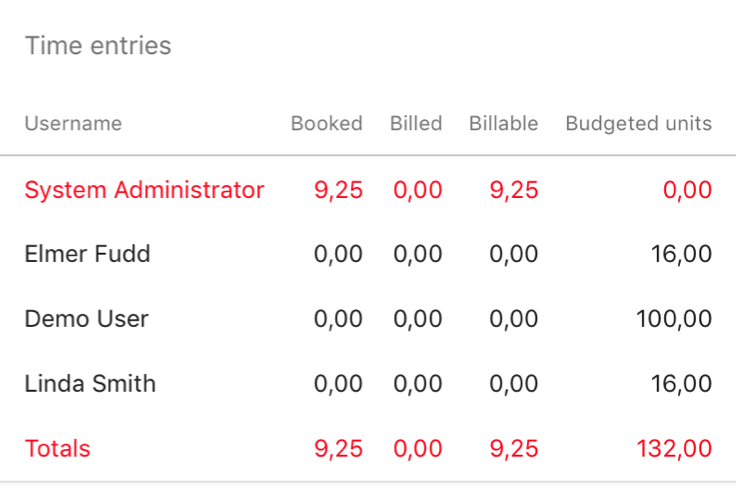
Time entries summary in project detail view
Generate invoices
To generate an invoice go to Projects -> Financial -> Post calculation. Select a time period and projects you want to invoice and click “Continue”. An invoice will be stored in the project.
If you have the billing module installed a popup will appear to also generate an invoice in the billing module.
Note
We plan to integrate the billing and projects more in GO 6.5 so this will become one.