Calendar
Every user gets a personal calendar. You can schedule meetings and share calendars among users via the web interface, your mobile or desktop computer.
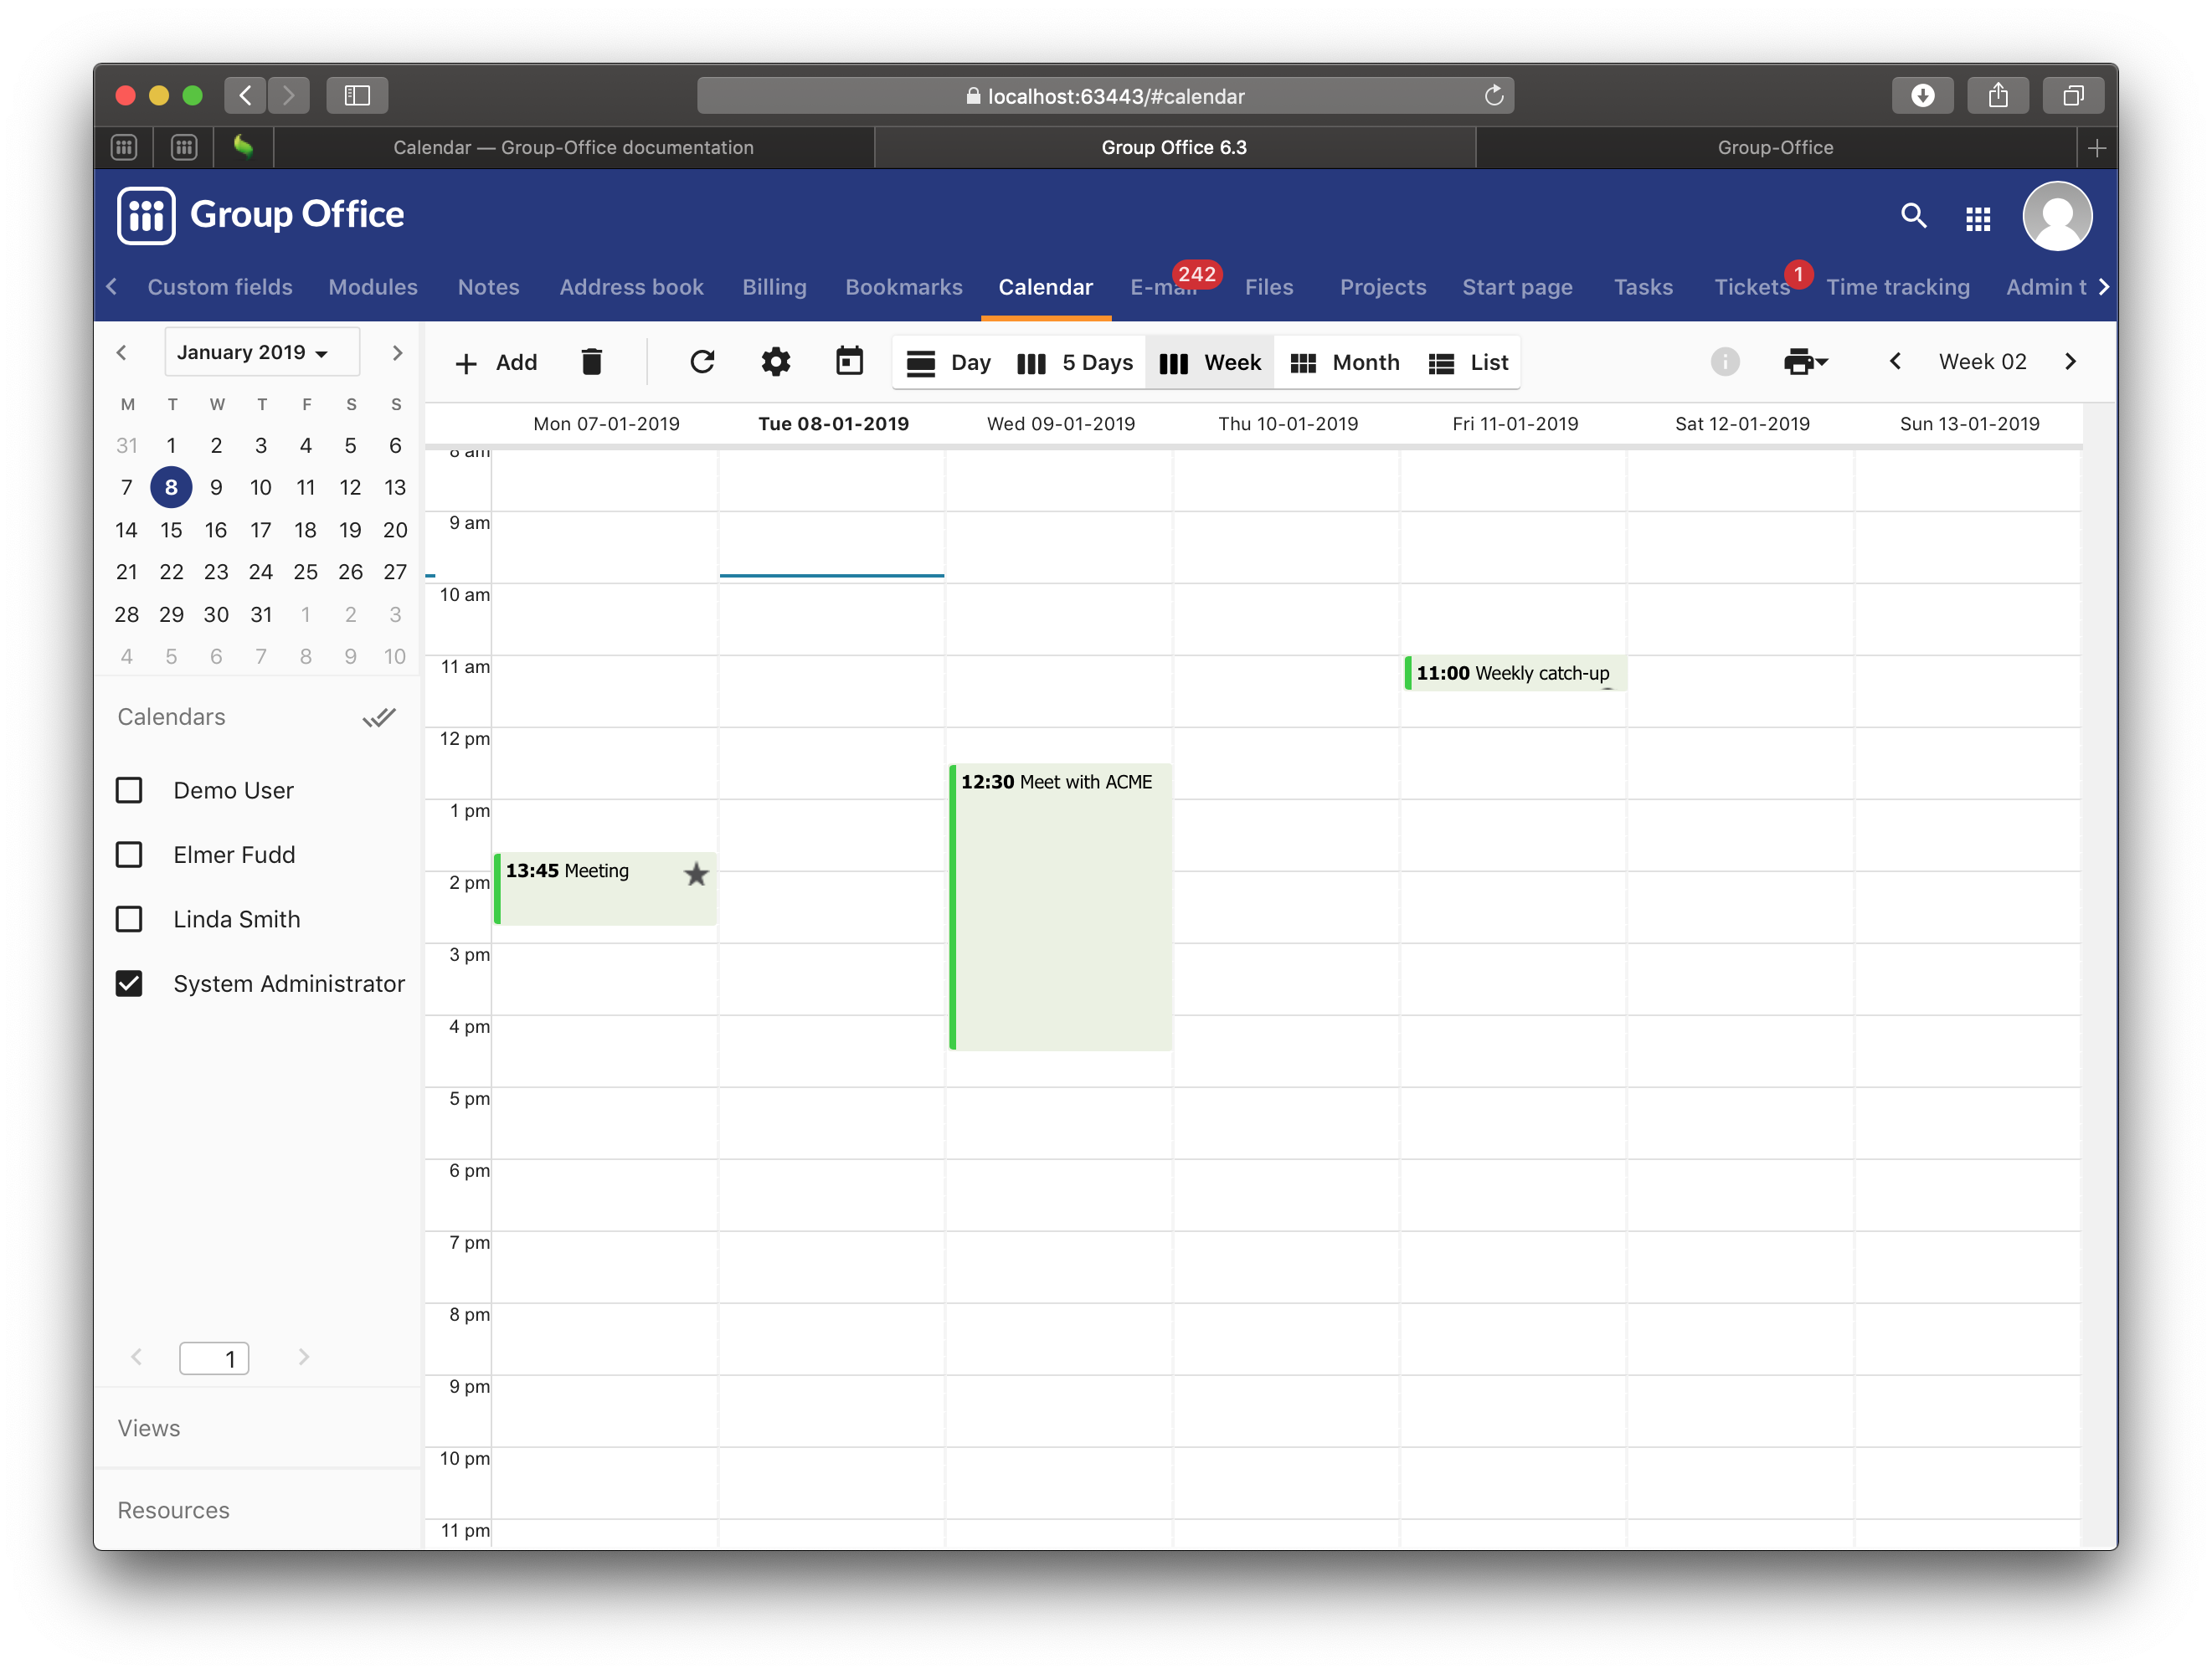
Calendar module
The calendar module supports:
The user can be given the following permissions on the module
Type |
Description |
|---|---|
Change calendars |
Ability to create new calendars. While still following ACLs for existing calendars. |
Change categories |
Ability to create new categories. Global categories can only be created by the System Administrator. |
Change resources |
Ability to manage resources and resource groups. |
Calendar Types
There are two calendar types:
Owned calendar
owner field is set.
All users act on behalf of the owner.
Accepting invites or sending invitations is done in the owner’s name (secretary model).
Shared calendar
owner field is empty.
Each user acts as themselves.
Accepting invites or sending invitations is done in the current user’s name.
Invites
Invites are events organized by another user (possibly on a different server).
Constraints:
Participants cannot reschedule the event.
Allowed actions:
Move to another calendar.
Delete from calendar.
For recurring invites:
Move/Delete applies only to the full series.
Individual instances can be declined.
Personal Calendar
Every user with access to the calendar module has a personal calendar by default. If a user is not allowed to create or modify calendars, and does not have at least one writable calendar, a dialog is shown prompting the user to create a new personal calendar.
Subscribing
You can subscribe to shared calendars via the more options menu button next to calendars:

You can unsubscribe at any time via the more options menu next to the calendar.
Add remote calendar
In the more options menu shown above you also find the “Add calendar from link” option. That option allows you to add a remote public calendar published in vCalendar (*.ics) format.
Note
There’s also a DAV client module that allows you to add remote caldav calendars (like Nextcloud or iCloud) that synchronizes bi directional.
Import and export
You can import and export vcalendar (*.ics) files via the more menu:

Views
The calendar module comes with multiple views. Either merged in one regular view or each calendar displayed unerneath each other in separate rows.
You can select a view in the middle of the top toolbar. There are 5 type of views:

Day column view
The day column view can show 1 to 7 days in a row. Each day being a column. The current day will show circled with the accent color. When the current day is visible a time bar will show at the current time. New events can be added by clicking and holding down the mouse button at the start time then drag the mouse down to the end time and let go. This will open a new event window with the selected time entered.
An unmerged view will put the calendars underneath each other:

Week rows
Each row in this view will be a single week. When you select the month view, it will show all the weeks in the select month. You can create a multi day event by press the mouse button in one day and releasing it in another. The week numbers and dates are links to the column view with the selected week or day.

Year view
The year view is an overview of a full year. It will show dot with the event for each day. The day, month and weeks are clickable to navigate to a specific view.

Split view
If multiple calendars are selected, the user might want to split the events of each one. The split view will show a row for each calendar. it can show 1 to 7 days depending on the selection that is made.

Selecting a time span
Select any custom date range by dragging over the date picker. The Calendar view adapts to your selection. Selections of 2 till 7 days will show the columns view. Selections of over 8 days will be displayed in the week row view. If the user is looking at the split view selection up to 7 days will remain visible.
There is a trick to create a larger split view, The address bar will show something like:
#calendar/split-5/2025-06-15
The number 5 is the amount of days to show starting at 15 June 2026. You can replace this in any view with any number Because larger numbers will likely not fit on your screen in a usable manner, this is not part of the user interface.
Settings
Calendar settings can be found under My Account -> Calendar
Users are able to change their default calendar for incoming invites and new event. They can set the raster size for the column view. This is used to snap the duration when dragging, moving or resizing an event on this view the timespan will snap to 1 hour, 30 minute, 15 minutes or 5 minutes.
Users can select a default view to start in when they open the calendar. They can select a default duration for the month view (where each row is a week) In this view events are created with a single click. If a multi-day event is created here the default duration value is ignored and GroupOffice will default to full-day instead

In the settings users can choose to automatically process the incoming invites. When the checkbox is enabled. GroupOffice will periodically check for new e-mail with an ICS attachment. If the attachment is an invitation it will be added to the default calendar the event can then also be accepted or declined from the calendar.
After the event is added the organizer could send an important update. This can also be auto applied.
Resources
It’s possible to create resources in GroupOffice to manage meeting rooms or company cars for example. The resources are organized in groups and can have multiple administrators per group. Administrators must check and approve resource bookings. The resources are part of the calendar module and also work together with custom fields.
Creating groups
Groups are useful to organize resources. You could have the following groups for example:
Meeting rooms
Cars
Books
etc.
To open the resource group management go to:
Calendar -> 3-dots top right -> Resources… -> + button next to Groups
Enter a name for the group and click “Save”. You can also select the custom field sets you want to use with this type of resource. For meeting rooms you might want to create a field set with a check box for lunch, a beamer or a text field for the number of persons.
It’s required to add at least one administrator to the group. A group administrator must check and approve a booking.
Note
Permissions for administrators
Administrators will automatically be granted write permissions for the resources in this group when you add them. Permissions will NOT be automatically removed because this might lead to unwanted deletion of permissions.
Creating resources
After you set up a resource group you can add resources. Go to:
Calendar -> 3-dots top right -> Resources…-> + button next to Resources
Enter a name and click on “Save”.
Note
Permissions
Give users that need to book this resource read permissions. They don’t need write permissions. If you give them write permissions they will be able to accept their own bookings and that’s probably not what you want.
After at least one resource is created users can subscribe to the corresponding resource calendar.
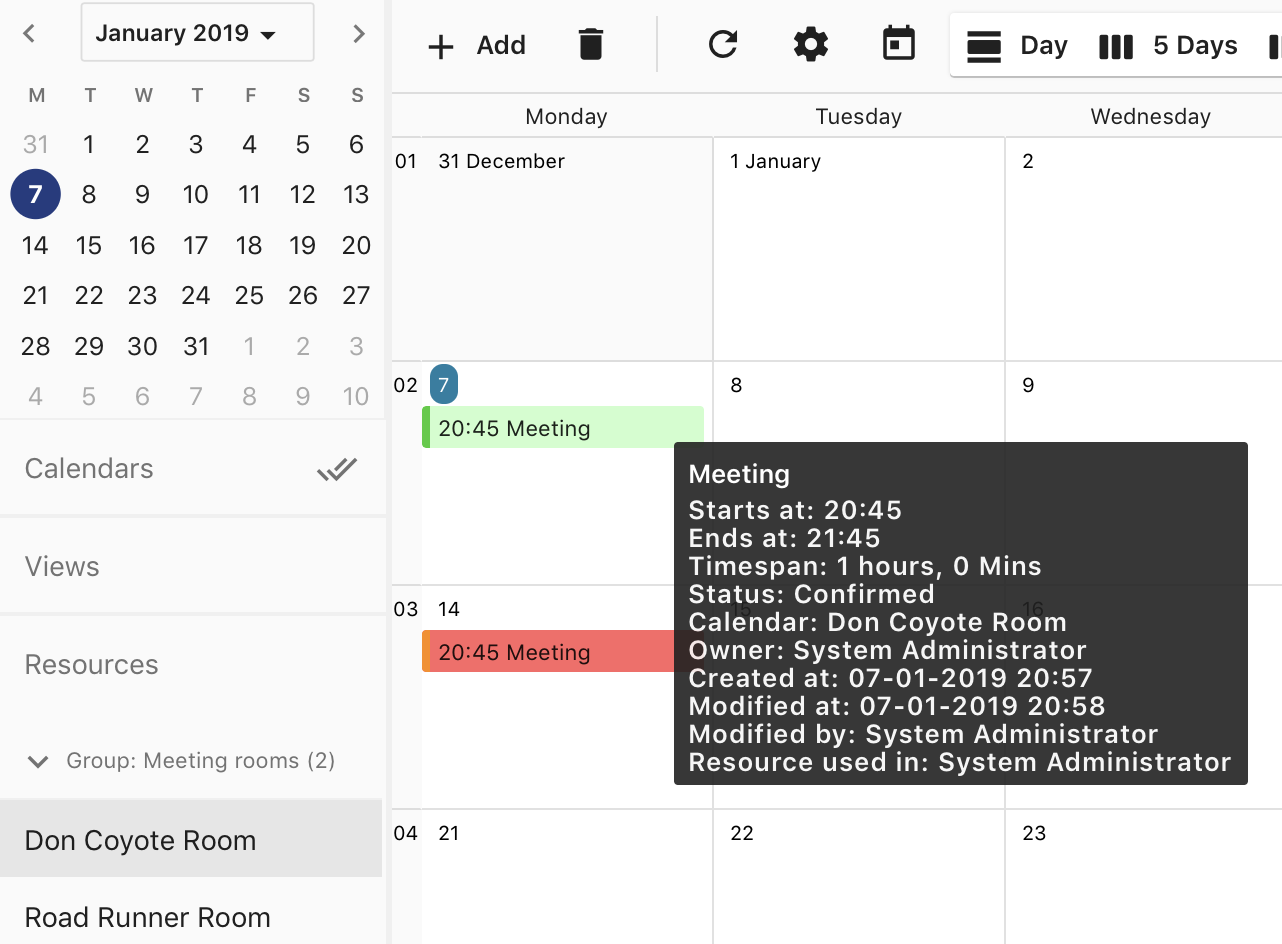
Resources
Video meetings
To plan a video meeting, users can insert a link to the video meeting in the location field When configured, there will be a button with a video camera and plus sign next to the field.
GroupOffice currently has two modules providing video meeting links:
Creating categories
GroupOffice supports three types of categories - Global categories: Those can only be created by the administration. They are always available to be used by any users. - Per calendar categories: The access depends on whether the user has access to the calendar they belong to. They are only shown when the user is subscribed to the calendar. - Personal categories: Only for the user who created it. Not seen or usable by others. Permission to create / change categories is given in the Calendar module permissions.
Creating appointments

Event dialog
When creating a new appointment, users can click and drag on any of the calendar views to select a time period. The default calendar is the calendar selected in the list of calendars on the left. This is indicated by a background color. The checkbox is to show/hide the event on the calendar. The above form window is shown when a time period is selected.
Title: Title of the event
Calendar: Calendar this event is saved into. Only calendars the user is allowed to write into are shown.
Location: Can be a physical location of a meeting link
All day: When active the event only has a date and time will span the full day independent of the timezone.
Recurring: This will show a list of common recurring rules. It will take the start value as first occurrence. If the needed rule is not in the list or the user would like to specify an end time, click Customize for more options Invite people / Add resources: see below
Reminder: available options would depend in the chosen calendar and whether the event is all day or not. The calendar default is the default for new events. Users can set this to None (no reminder) or pick a different time. Reminders are set per user. Another user with access to the event will not have the reminder set but they can choice to set a reminder for themselves.
Categories: Users can add 1 or more categories to the event. The category’s color will be displayed in the calendar view.
Free/Busy: This is set per user. Each user can indicate whether they are shown busy or free in the schedule during this event.
Visibiltity: there are 3 options. - Public: users with read access to the calendar can see the content of the event. - Private: users up until write own access can not see the content but do see you are busy. - Secret: the event is only every shown to the owner of the calendar.
Invite people / Booking a resource

The invitation field in the event form will show a list of Principals. A principal is an individual or a resource.
When a principal is added the current user is also added as organizer. Organizers are recognized by the icon in front. When searching for participants some individuals are shown in bold. This indecates they are local GroupOffice users instead of external contacts. Local users, for example, can grant others free/busy access to their calendar.

Resources also have an availability schedule. They consist of a single calendar that is equal to their schedule. The availability schedule of a user is a bit more complex. It is based on the following rules:
The user is subscribed to the calendar.
The Include in Availability property of the calendar for the user is “All” or “Attending”.
If “attending”, then the user is a participant of the event, and has “accepted” or is “tentative”.
The user has Free/Busy permission for the calendar.
The event’s “privacy” property is not “secret”.
The Free/Busy status of the event is “busy”
The event is not cancelled.
When the event is saved a confirmation dialog appears asking to send an e-mail to all administrators of resources, and all participants (internal and external) they can then accept or decline the invite.
The administrator of the resource must approve the booking unless you are an administrator yourself. When an individual accepts an invite the organizer will receive a reply with their participation status.
Replies are immediately processed for internal users. Participation replies from external users are processed when the e-mail message is viewed or if automatic email reply processing is enabled in the settings.
Accepting or declining a booking
When you are a resource administrator and you get an e-mail like displayed above, you can click on the link to open the booking or you can subscribe to the resource calendar and accept the request from there.
You can change the status to Accepted or Declined in the dialog. After saving it, an e-mail will go out to the user.
Notifications
Event reminders include five distinct alert types:
Invited
Shown when: An event is created via automatic email invitation import.
Removed when: The user changes their participation status or the event is canceled.
Stale when: The event has started.
Updated/Cancelled by Organizer
Shown when: An event is updated via automatic email import.
Removed when: The event is changed or removed by the user.
Stale when: The event has started.
Created for You
Shown when: Another user adds an event to your calendar.
Removed when: Only manually.
Stale when: The event has ended.
Alarm
Shown when: At a predefined alert time.
Removed when: The user acknowledges the notification.
Stale when: If the event has ended.
Alarm per Instance
Shown when: The user sets an alarm for a specific instance of a recurring event.
Removed when: Only manually.
Stale when: After the instance has ended.