Studio
The studio module allows administrator users to quickly create their own modules. It generates a number of files in the
www/go/modules subdirectory. This module is specifically aimed at developers and resellers who wish to add non-standard
functionality within GroupOffice

Prerequisites
The studio module has no particular dependencies from other modules. It is part of the professional package and will run in GroupOffice versions 6.4 or newer.
We do encourage developers to tinker with the code. If you wish to do so, you need a bit of Javascript and PHP knowledge. Please refer to the development section for more information on how to program for GroupOffice.
Out of the box, a module will have plenty of functions and options though.
Note
Please make sure that the ownership for the www/go/modules subdirectory is set to the Apache or
nginx user. In the case of Debian or Ubuntu, this is commonly www-data. The www-data user must have write permissions
in the www/go/modules subdirectory. This is commonly NOT the case. So you must run:
chown www-data:www-data /usr/share/groupoffice/go/modules
Installation
You can find the studio module in Business.
Workflow
This workflow is to be accompanied by a fictional example of Intermesh lunch management.
Creating a module is done in a few steps.
Open the studio module and click on the ‘Plus’ button on top of the grid;
Fill in the module data;
Add custom fields;
Add ACL data;
Enter frontend options;
Confirm your choices
Create a Module
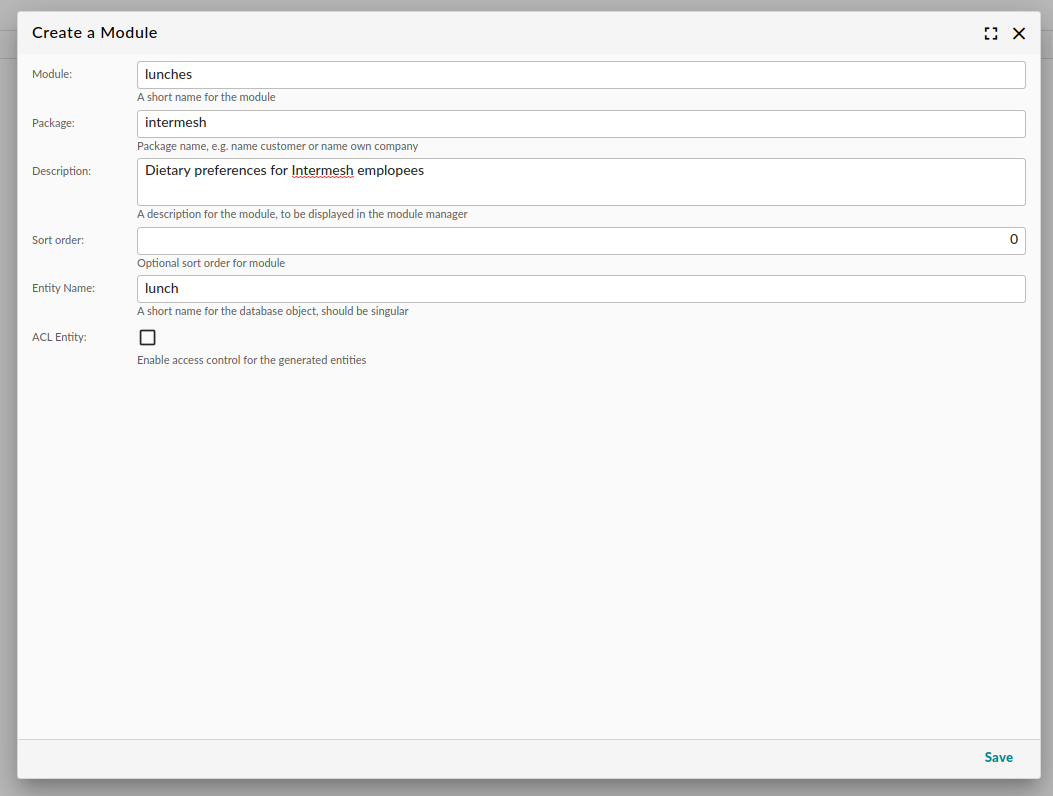
Add a new module
The following fields need to be entered. This step can be run only once for each module, so make sure that you enter the correct data:
Property |
Description |
|---|---|
Module |
The name of the module |
Package |
The package name. This allows you to group your modules, e.g. by customer name. |
Description |
A description to be displayed in the modules manager |
Entity name |
The name of the database object. |
Module type |
Define the permission level of the module. |
Upon finishing this step, a database migration script will be generated for the module, a number of PHP files is
generated and the module is saved into the www/go/modules/PACKAGE/NAME/ subdirectory. Subsequently, the module is
installed directly.
Warning
Trying to install a studio module into business or community generates an error message.
Warning
It is not possible to save two different entities with the same name.
Access control by Module type
There are three types of modules, defined by their level of access control:
Collections: This is probably the most common use case. You can define collection type entities (i.e. AclOwnerEntities) which have items that inherit the permissions from their parent.description
Items: Permissions are defined by item level and permissions are not inherited.
Module: Permissions are defined on a module level. As long as a user has permissions for the module, its types can be managed without restriction.description
As a rule of thumb, you should enable permission control on collection or item level if you wish your end users to have access to your generated module.
Add Custom Fields
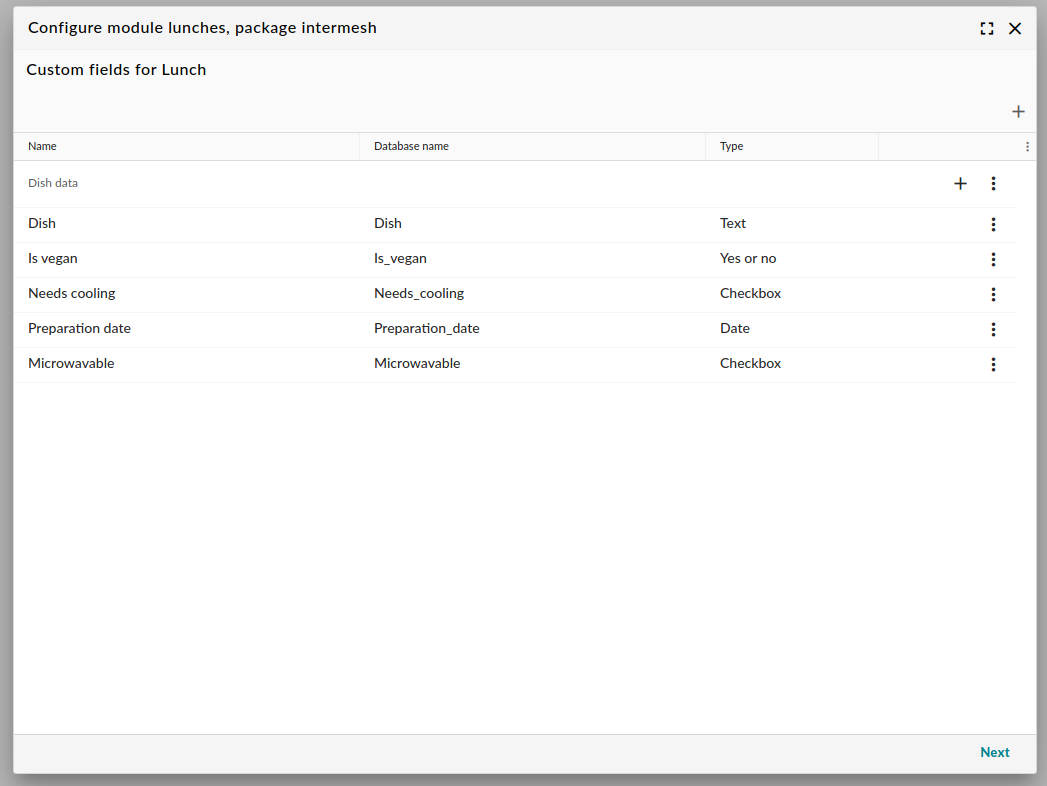
Add custom fields to the entity
A feature of studio is that almost every field is stored as a custom field. After all, the entire module is custom! This works in exactly the same way as for standard modules.
It is recommended to have at least one custom field with the following database names as this allows the API to display a generic title field:
name
title
description
subject
Note
If you want to present data of a linked item. Read the template field section on the custom fields page.
Permissions
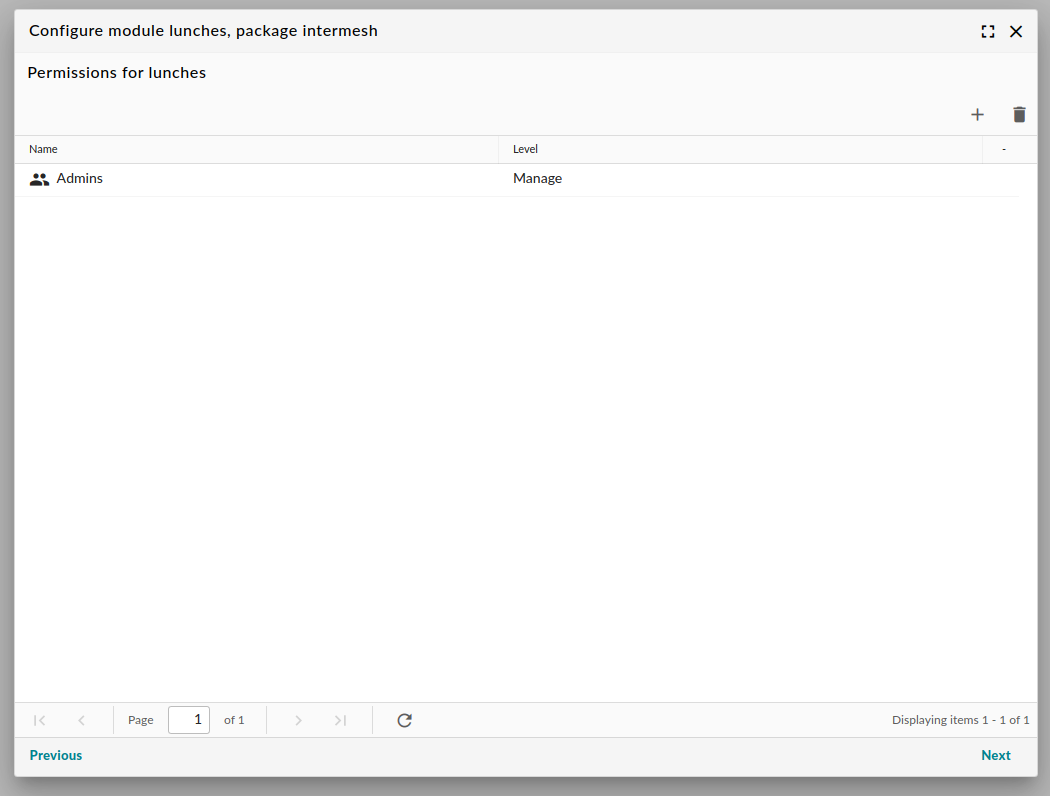
Add permissions for the module
The permissions for studio modules work are straightforward and work in a standard way.
Model options
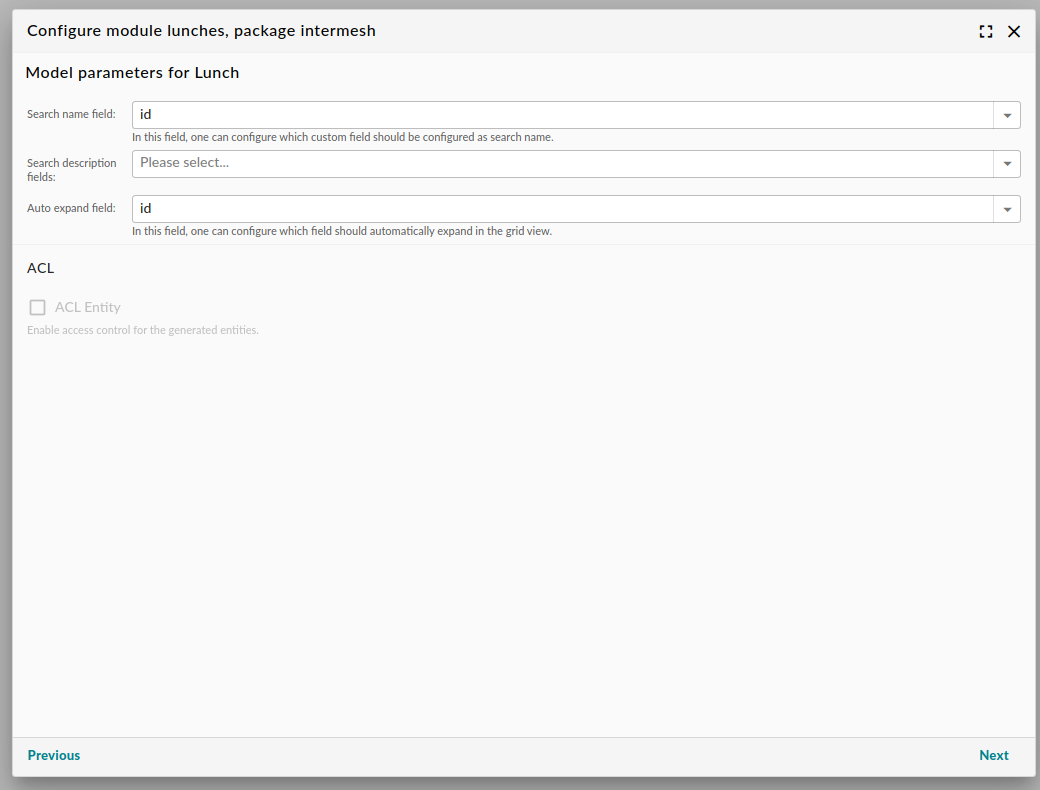
Configure the model class
Since the database objects are saved as entities, one can enter code generation options for the model:
Property |
Description |
|---|---|
Search Name Field |
Generates the search name for a certain entity |
Search description fields |
Generate search descriptions based on fields. |
Auto expand field |
Configure the name of the column to be automatically expanded in the grid |
Frontend options
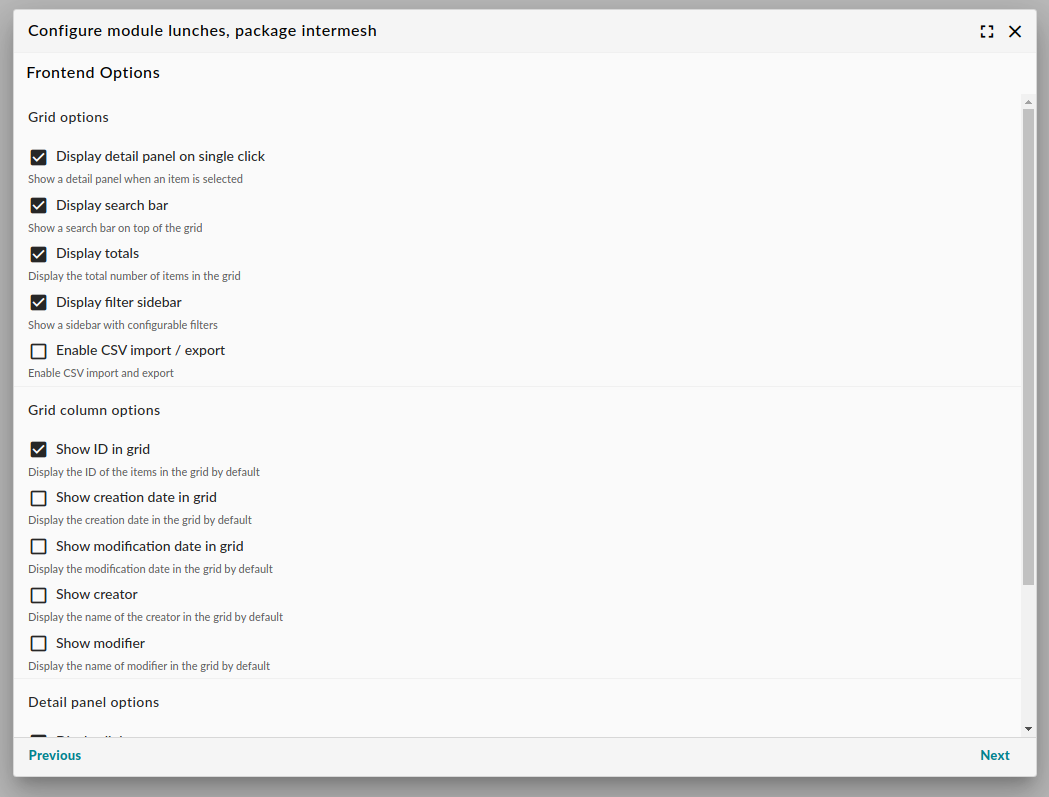
Frontend configuration
This step enables you to generate the actual screens and is arguably the most interesting step for the end user.
Property |
Description |
|---|---|
Display detail panel |
Toggles the right panel within the grid |
Display search bar |
Toggle search bar on top of the grid. |
Display totals |
Toggles the sum of total items in the grid |
Enable CSV |
Toggles the CSV import and export functions |
Toggle ID |
Toggles the display of the ID in the grid |
Show creator and modifier |
Toggles the display of creation and modification information in the grid |
Display links |
Enables or disables :ref:<links> on top of the detail panel |
Display comments |
Enables or disables comments in the detail panel |
Display file uploads |
Enables or disables file uploads from the detail panel |
Display modification info |
Toggles creation and modification date in the detail panel |
Frontend options are saved in a separate Javascript file: www/go/modules/PACKAGE/MODULE/views/extjs3/ModuleConfig.js
If you want to toggle certain frontend options, you can directly edit this file, thereby preventing any overwrites
of custom code.
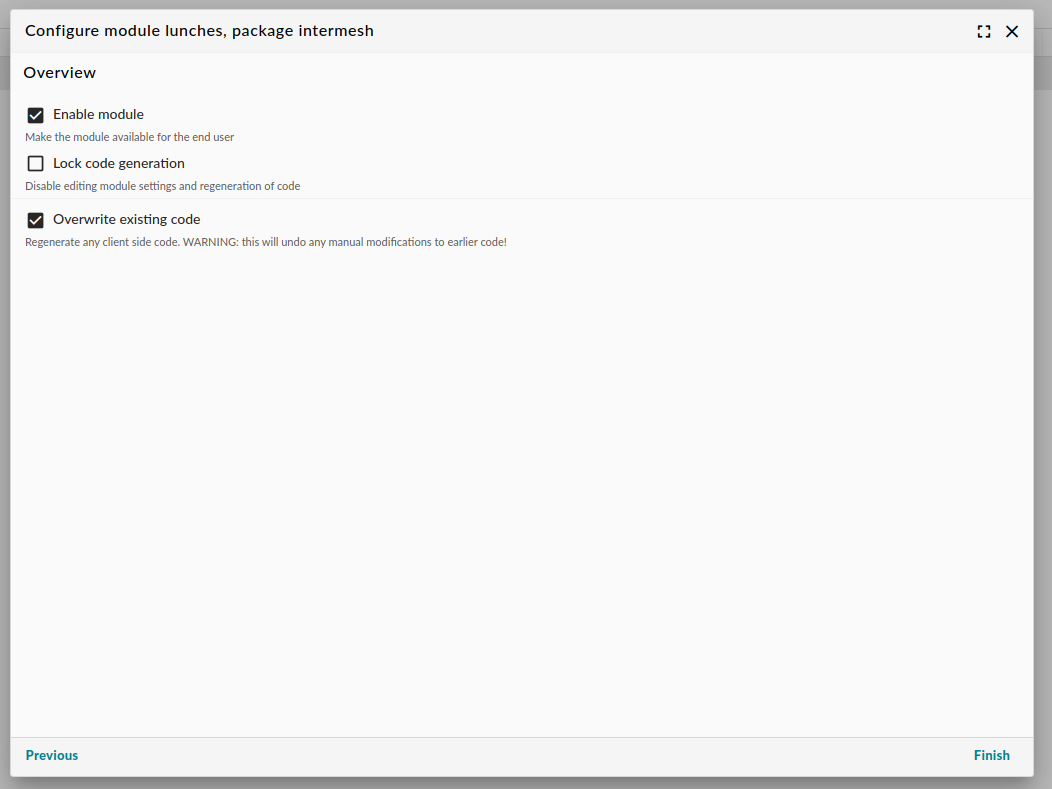
Confirmation
“Now I am become Shiva, destroyer of worlds” (R. Oppenheimer)
Warning
This is the point that makes you want to evaluate your choices. You will now overwrite any generated code. If you have any self-written code in your module, you will lose it unless you have a backup ready.
The ‘Enable module’ will make the module available for your end users. You may want to disable it if you wish to do some custom editing. In that case, you can re-enable it from the System Settings.
In order to finish the workflow, you must check the ‘Overwrite existing code’ checkbox. This will re-generate all code and throw away any and all manual additions to the code. By clicking finish, code generation will be initialized.
Removing a studio record manually will not delete the module. It will merely disable the regeneration of code in a very thorough way.
The Generated Screens
Grid

A newly generated grid with one item
The overview of objects of a certain type in a table is called a grid. By default, a generated grid looks like below:
Detail panel
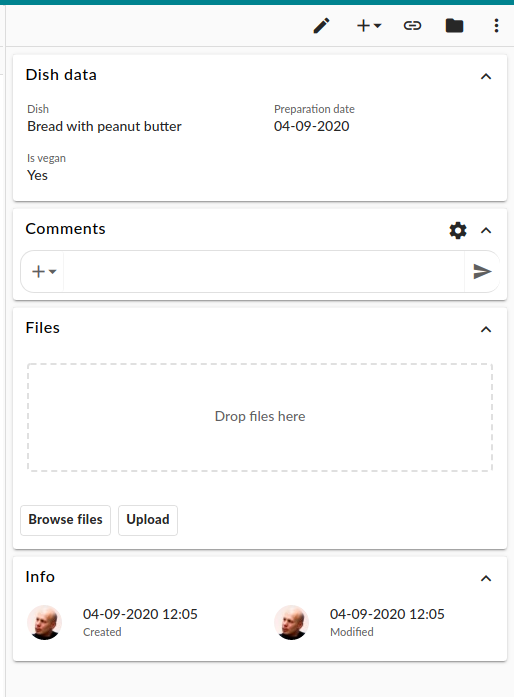
The optional detail panel
Single items are displayed right of the grid in a so-called detail panel. Please note that you can disable the detail panel. In that case, you can only display items in a grid.
Dialog
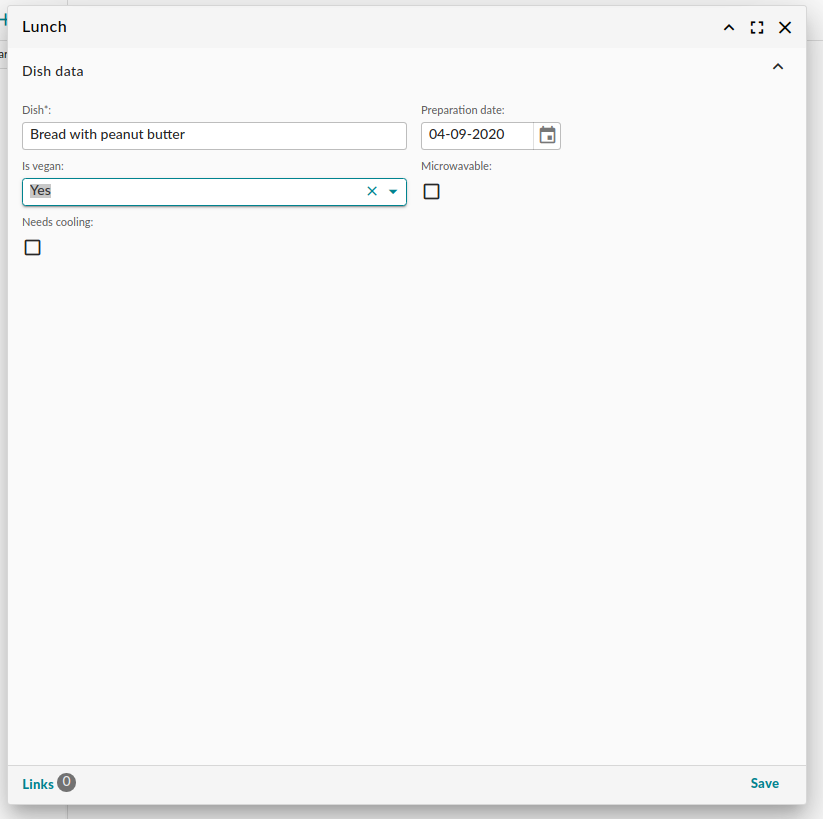
The dialog for editing items.
The dialog for editing items looks like the screen shot above.
Deleting a Generated Module
Everybody likes experimenting. The Studio module is particularly inviting. We know!
If you need to entirely clean up your generated code, there’s two steps to be taken.
- Remove the module from Group Office:
Log in as administrator;
Go to System Settings > Modules;
Find your module and hover over its corresponding table row. A three dot menu appears on the right. Select the ‘Delete’ option.
Click the save button on the bottom right;
Physically delete the subdirectory with the generated code.
Warning
Deleting an entire module will delete any database records for this module as well. If there’s any data you do not wish to lose, make sure to have a backup at hand.
Note
After physically removing a subdirectory, if you receive an error that a module class was not found, you may
want to re-run the upgrade script. Alternatively, regenerate the autoloader by running composer install in the
GO root (if you have composer on your system that is).
Warning
You will encounter error messages if you perform the second step without performing the first step. In certain cases, you will not be able to log into GroupOffice anymore.
Converting a Generating Module
If you migrate from Group Office 6.5 to 6.6, the minimum supported PHP version is bumped up to 7.3 . Older Studio modules will not run anymore, since we implemented return type hinting in 6.6. Older studio versions do not generate the code with return type hinting, so the generated PHP files need to be converted.
Normally, this conversion happens automatically. It is just part of the update process. If for some reason, you still need to convert modules manually, we have written a convenient CLI tool. Log onto your server, navigate to the Group Office installation subdirectory and run the following command:
# sudo -u www-data php cli.php business/studio/Studio/patch65to66
Please note that the module itself needs to be visible from the studio module, i.e. in the studio_studio table a
record must exist that refers to your generated module.