Connect Group Office to Azure
As of 1 October 2022, basic authentication is deprecated. In this guide, we will explain how to enable OAuth2 authentication in Azure and how to configure email accounts using this connection. Please note that you need management permissions for your Azure environment to connect to Exchange.
Prepare
Please read the following articles by the Microsoft documentation team.
The first article explains the peculiarities of the OAuth2 protocol implementation for Azure. The second article details the steps to take within your Azure Active Directory (AAD) in order for Group Office to be able to connect. Since Group Office does not support the POP3 protocol, you can skip the sections on POP3.
Register your AAD application
As with Gmail, you need to set up an application first. This happens in the Azure environment and is documented on this page. Make sure that the app is configured as a web application.
You need to add the following redirect URI:
https://<YOURDOMAIN>/go/modules/community/oauth2client/gauth.php/callback
Of course, ‘<YOURDOMAIN>’ refers to the domain of your Group Office instance.
After saving, you can find your application in Active Directory > App registrations.
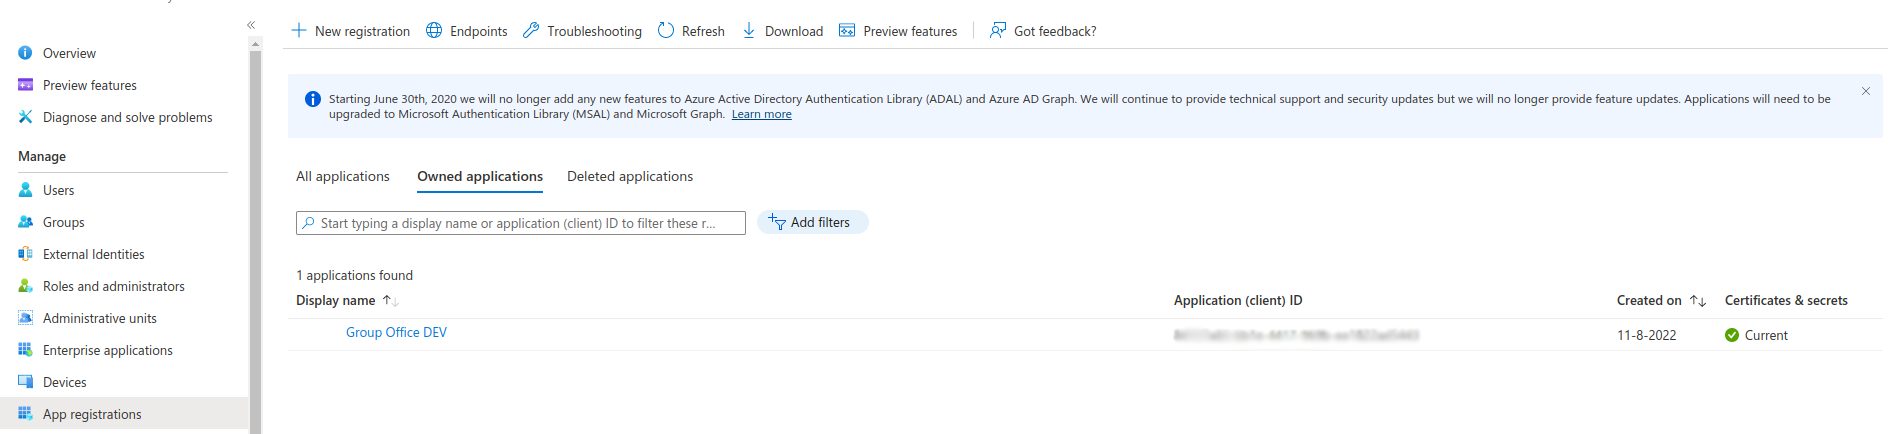
In the example, I simply called the application ‘Group Office DEV’. After clicking your application, you’ll see something like below:

Please note the Application ID and Directory ID fields. You will need both fields in your Group Office OAuth2 client configuration.
Configure your AAD application
Note
This section is basically a summary of this article . Please refer to this article for more information.
First, open the AAD application in the Azure portal.
Create a new client secret:
Under ‘Manage’, click ‘Certificates and secrets’
Click the tab ‘Client secrets’
Click button ‘New client secret’
A form is opened, add a description and expiry date. Make sure to save the actual secret. You will need this when configuring Group Office.
Add the IMAP permissions to your AAD application:
Under Manage, click ‘API permissions’;
Click ‘Add a permission’;
c. Choose “Microsoft Graph” e. Click ‘Delegated permissions’ and add these:
IMAP.AccessAsUser.All
SMTP.Send
offline_access
email
openid
Get tenant admin consent. This depends on who is the owner of the tenant. If you are the tenant owner, simply click the button ‘Grant admin consent’ in the API Permissions list.
Register service principals in Exchange. You need the Exchange power shell for this. My powers end here.
Configure Group Office
In System settings > OAuth2 Client Settings, when you add an Azure connection, the following fields should be entered:
Select “Azure” as provider
The Client id field is the Application ID of your app.
The Client secret is the client secret you should have written down in step 1d above. Please make sure that you write down the value of the secret, not the Secret ID.
The API Project ID is the Directory ID of your app.
After saving, you can configure the email accounts as per the generic documentation.
Tip
If you see that sent messages are saved twice in your ‘Sent’ folder, you can deactivate the “Sent” folder in the account settings. This will not prevent Exchange to copy a message to “Sent”, but the sent message will not be duplicated.
A note to developers
When using the official Group Office development environment, please make sure to set the URL to http://localhost:8000 in the system settings. Localhost is the only non-https URL that accepted by Azure. You cannot use http://host.docker.internal:8000 as the URL in your system configuration.