MacOS
On Mac OS you can synchronize:
Files
Calendar
Contacts
E-mail
Files - GroupOffice Assistant
The GroupOffice Assistant is a small program that you can install on your Windows, MacOS or Linux computer. It will automatically download files opened from GroupOffice and monitor it for changes. When the file is saved it automatically uploads it back to GroupOffice.
Download the GroupOffice Assistant for:
After downloading take the following steps to install:
Open the DMG file and drag “GroupOffice Assistant” in the “Applications” folder.

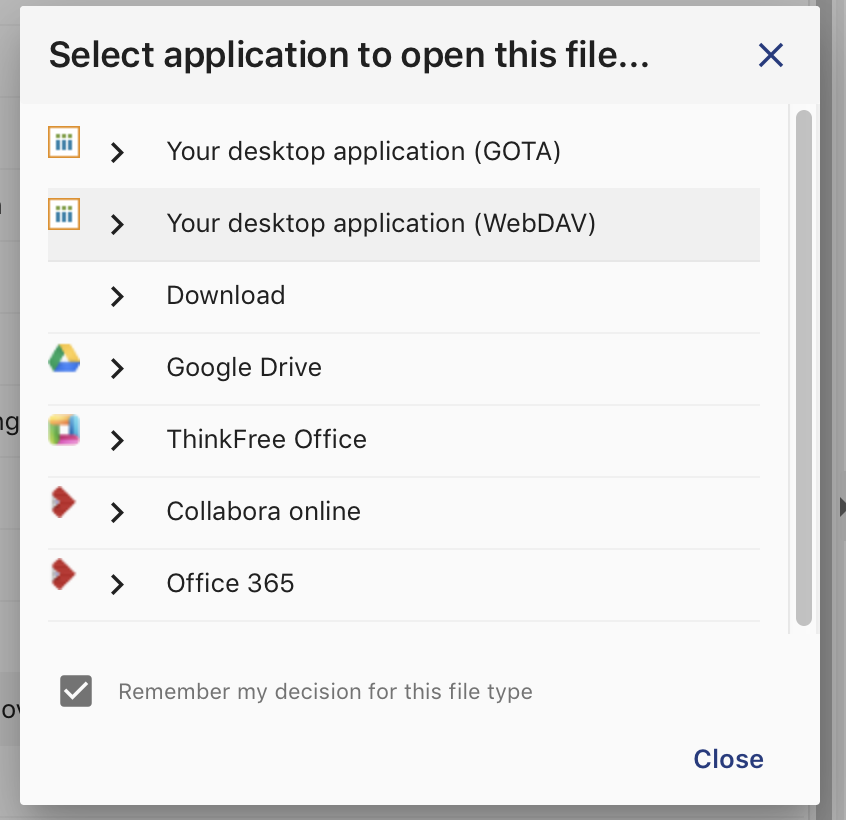
In GroupOffice right click on a file and choose “Open with”.
Select the “Your desktop application (WebDAV) option to use the assistant.
Note
For Chrome users. You might be annoyed by the popup dialog everytime you open a file. Here’s a solution for that: https://superuser.com/questions/1481851/disable-chrome-to-ask-for-confirmation-to-open-external-application-everytime
WebDAV clients
You can use WebDAV to mount GroupOffice as a network drive. Unfortunately the MacOS webdav implementation can be rather slow due to a lot of redundant requests. We found that the Mountain Duck WebDAV client is much faster. Additionally, it has a smart synchronisation feature to work with your files offline. Connect the client to:
https://[Server hostname]/webdav
Calendar, Reminders and Contacts
Adding contacts and calendar accounts work identically in MacOS. Just choose “CalDAV” for calendars and “CardDAV” for contacts.
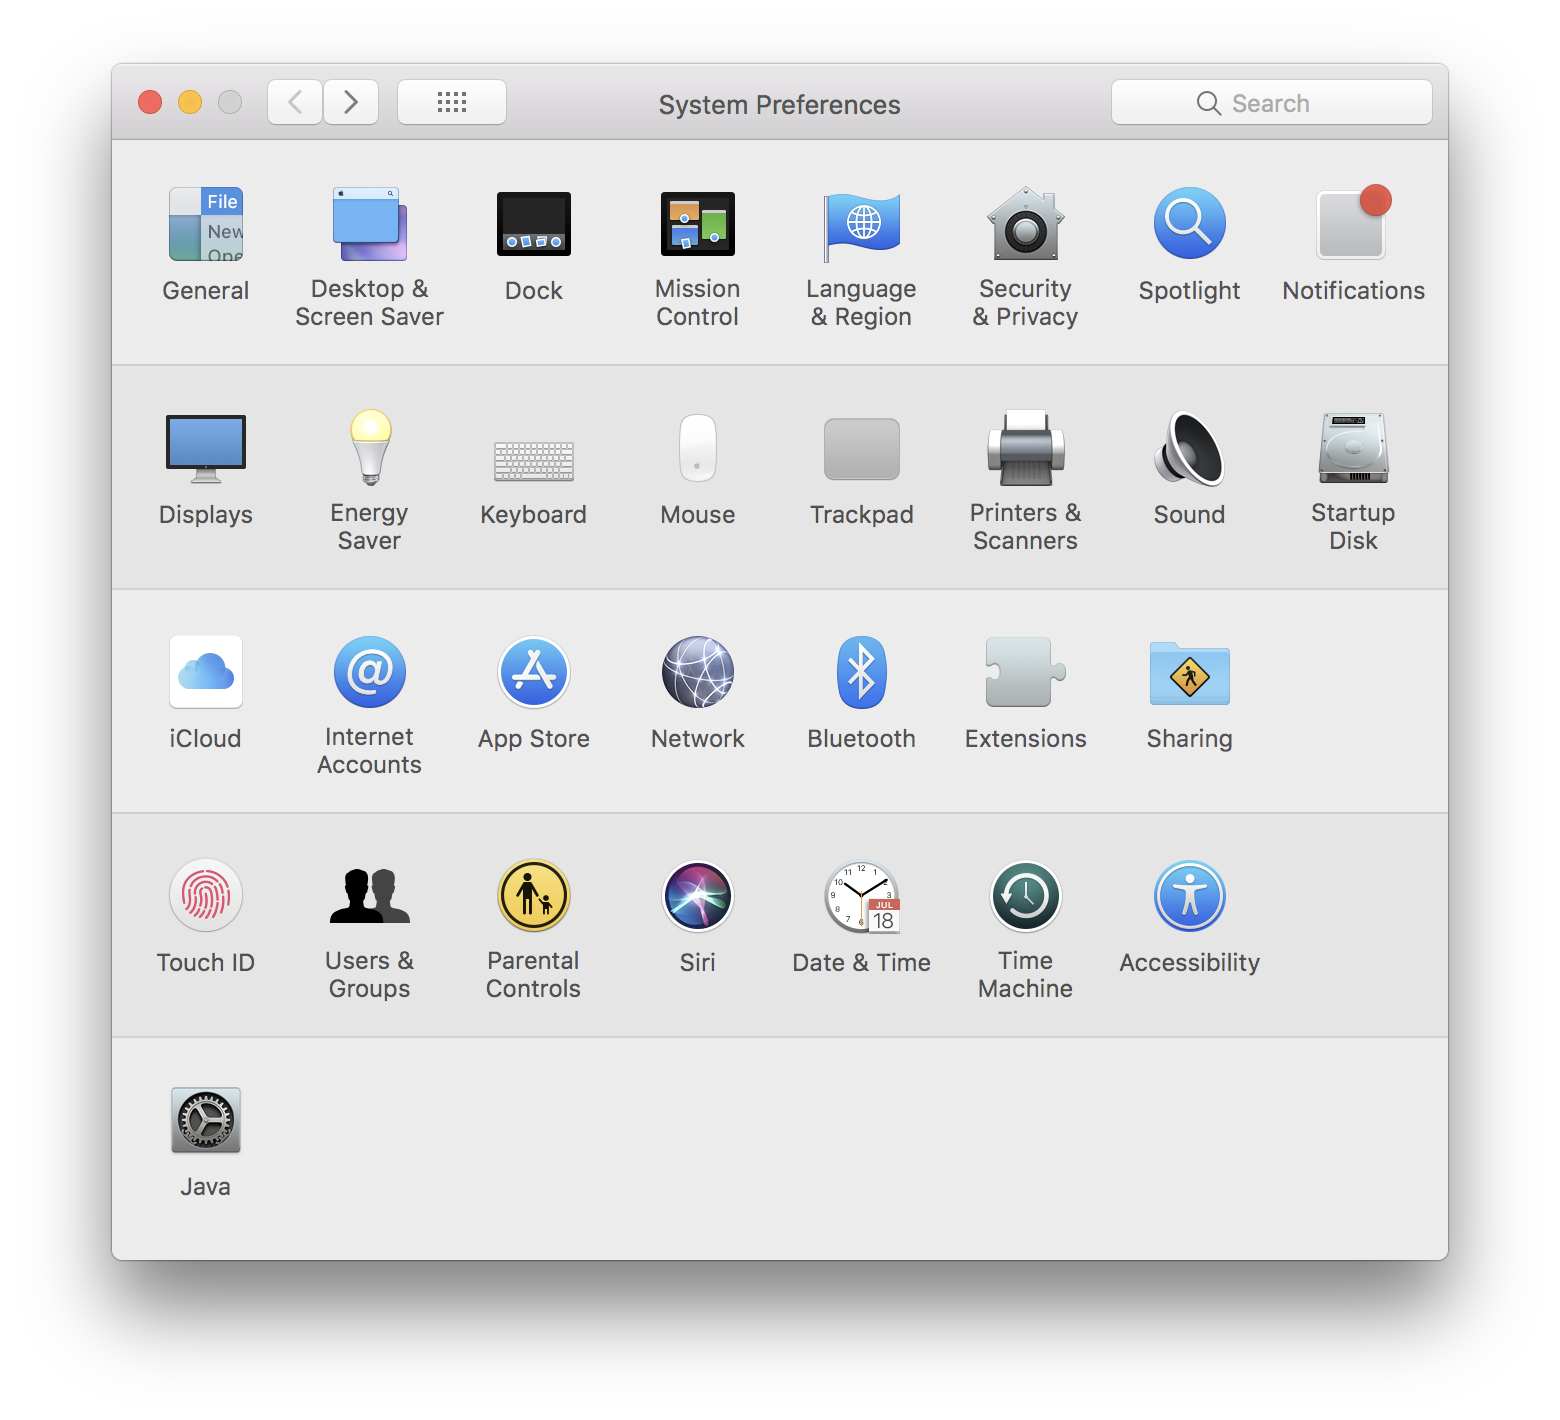
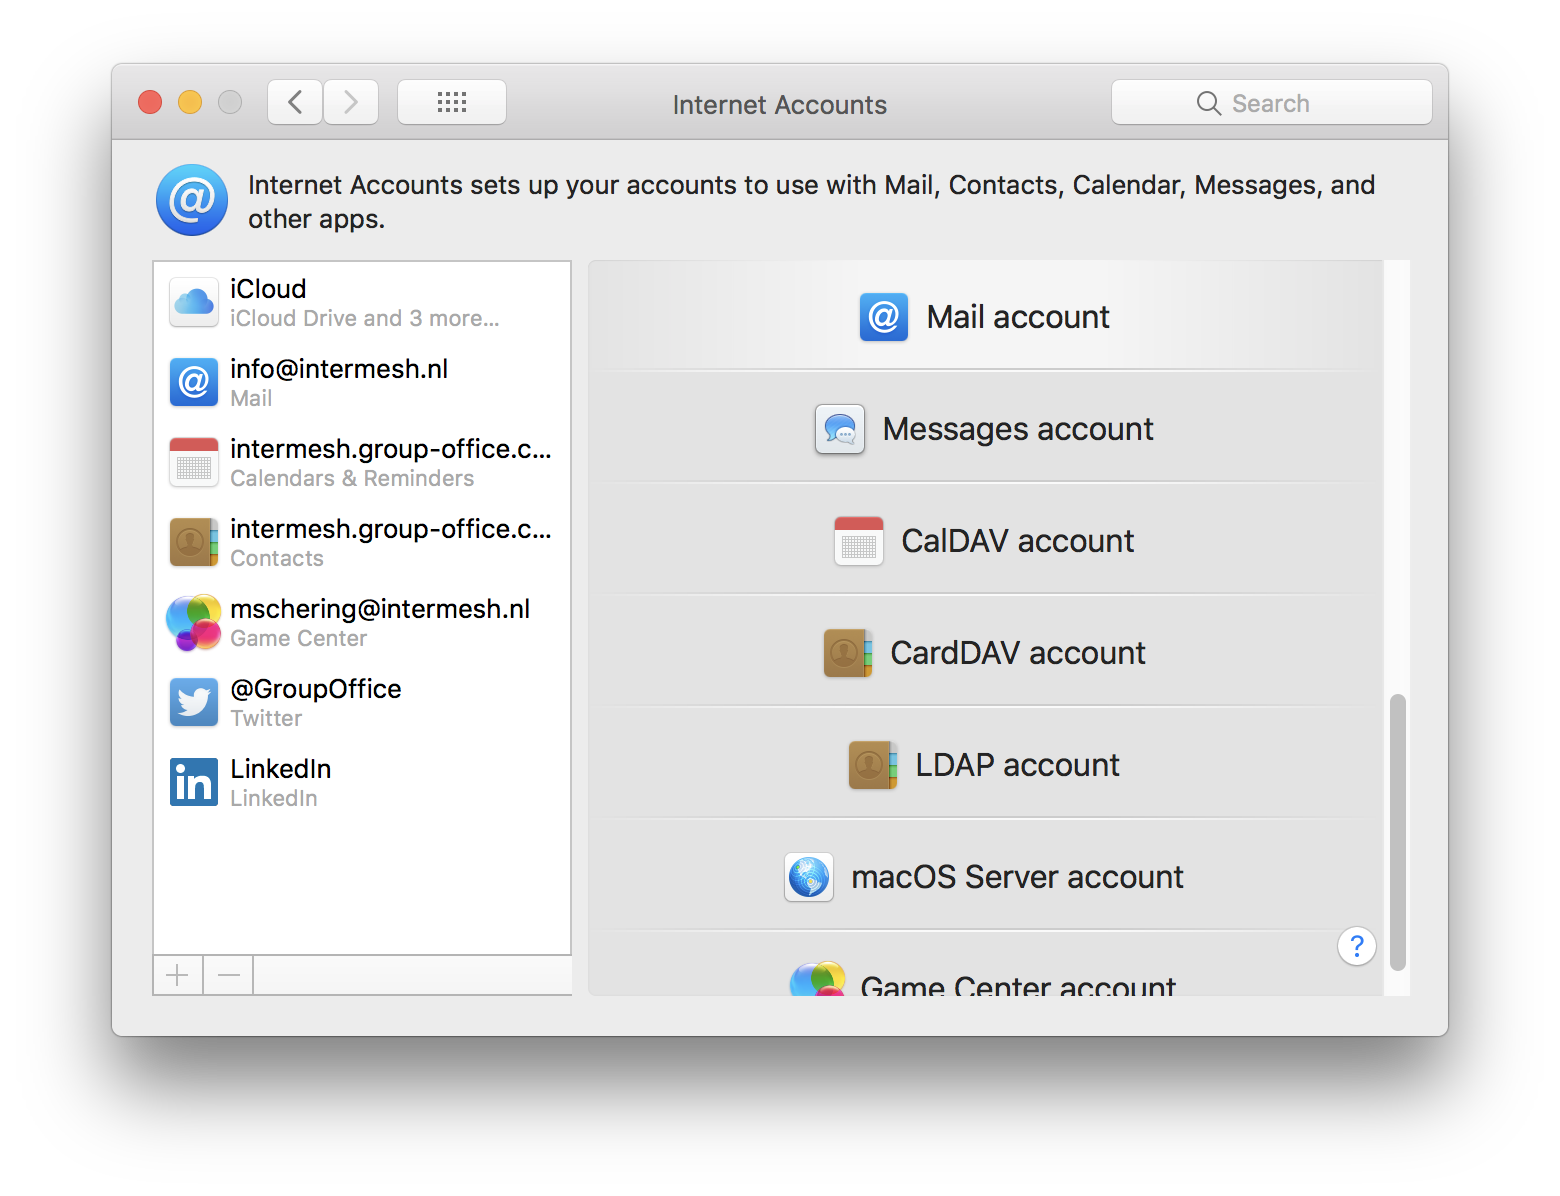
Open System Preferences and click “Internet Accounts”.
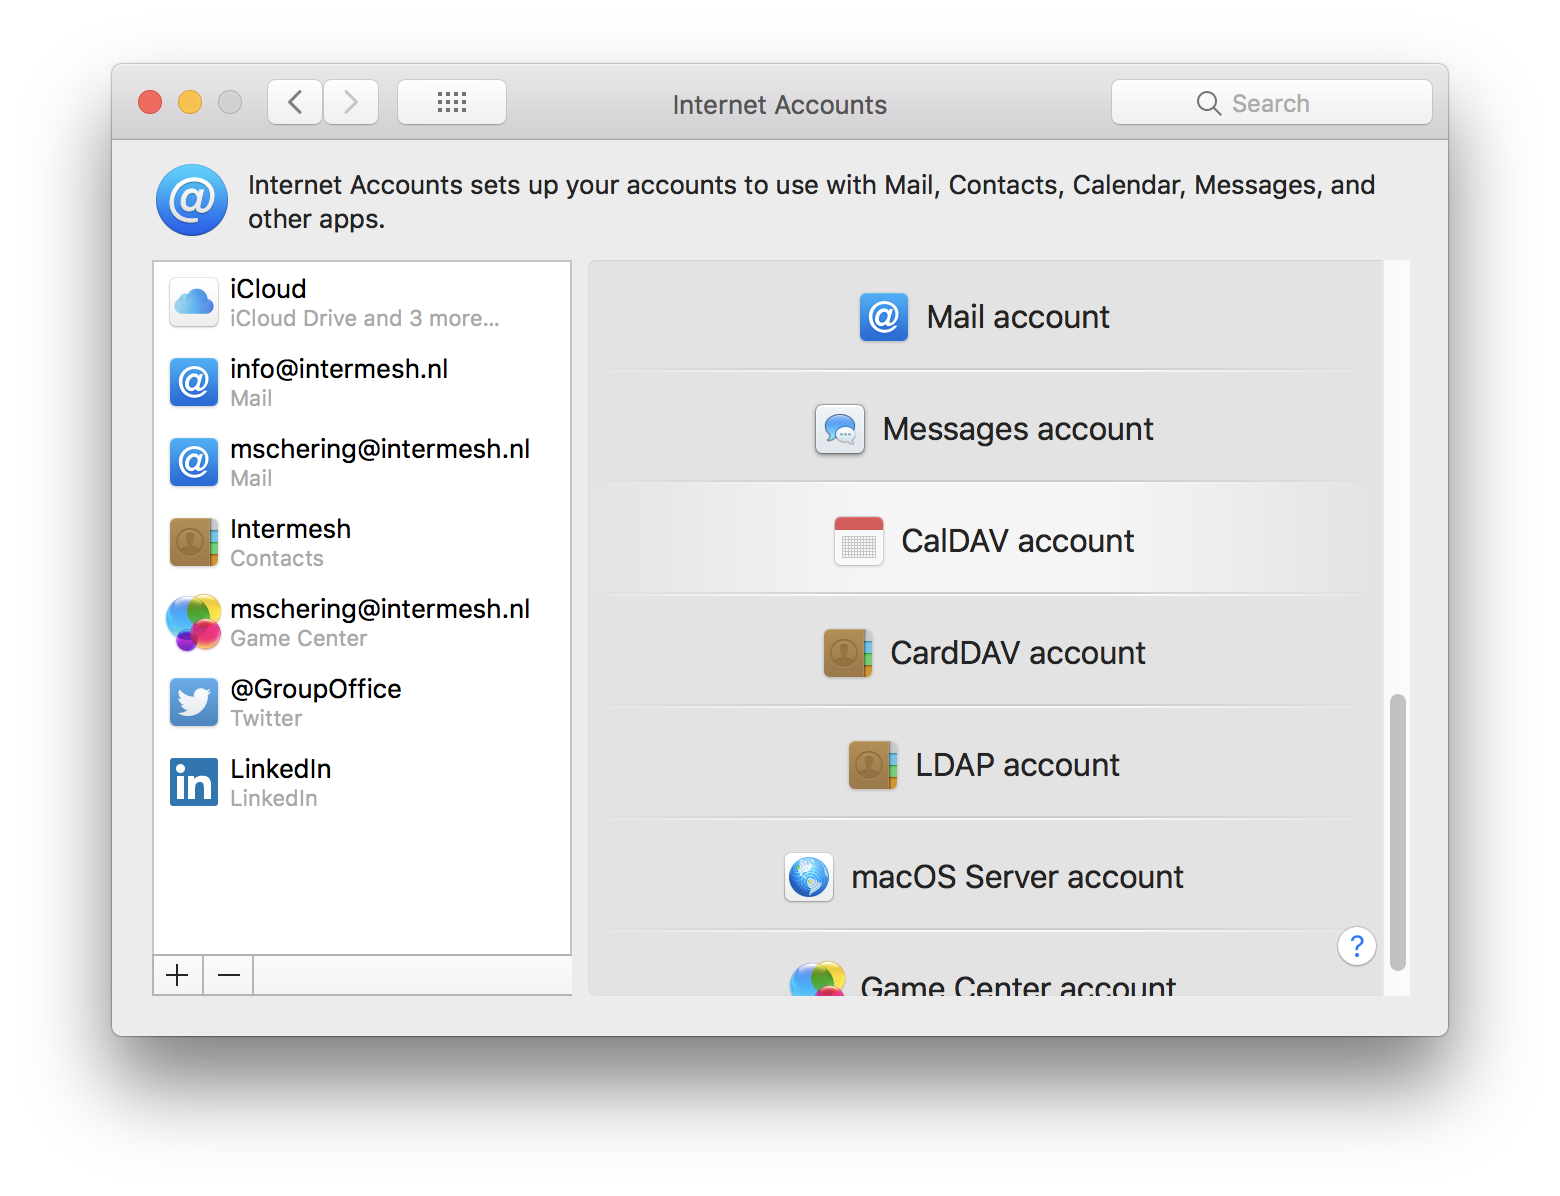
Click the “+” button in the bottom left to add an account. Scroll down and choose “Other account”.

Now choose “CalDAV” for calendars or “CardDAV” for contacts.
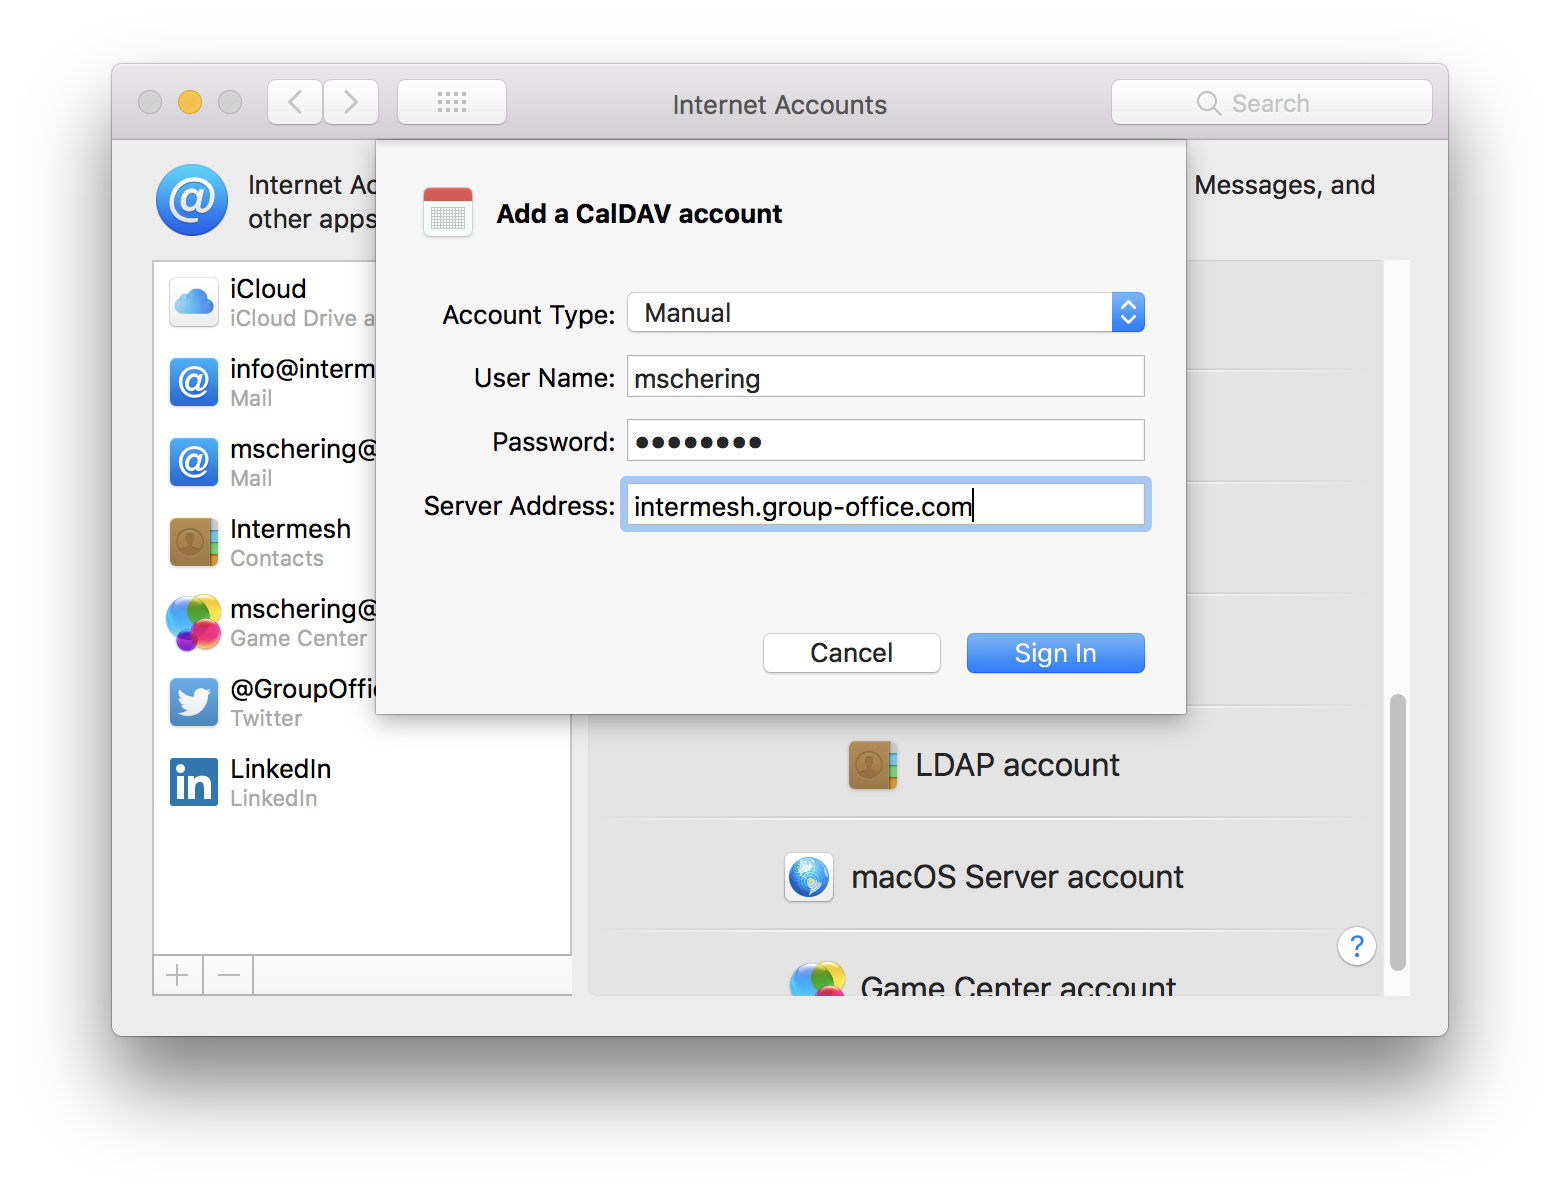
Select “Manual” in the “Account Type” dropdown and enter the username, password and Server hostname.
Note
On some servers the auto detection fails. In that case you can try to set the type to advanced and add this path (The trailing / is important here):
/caldav/principals/<YOURUSERNAME>/
Click “Sign in” to finish and you might be able to select additional data sources in the account settings screen.
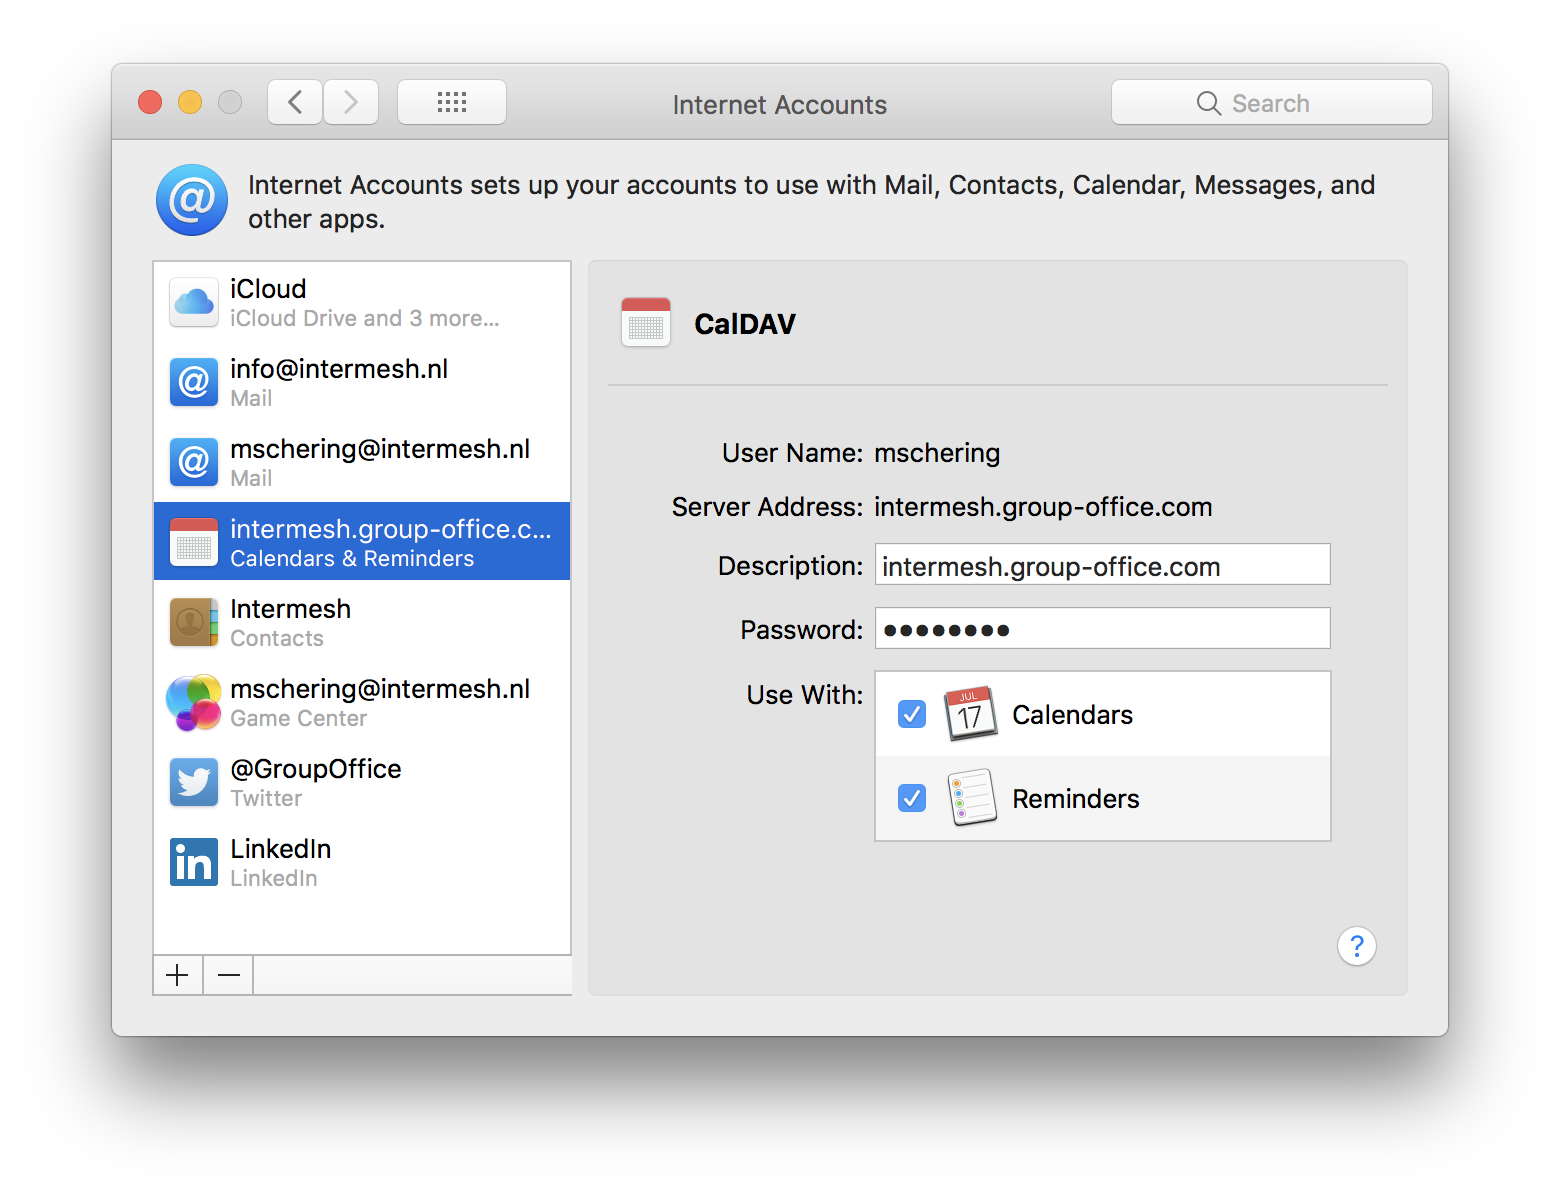
Now check your Calendar or Contact app for your GroupOffice data!
Note
Unfortunately the Contacts app on MacOS will only sync the first address book in CardDAV.
E-mail
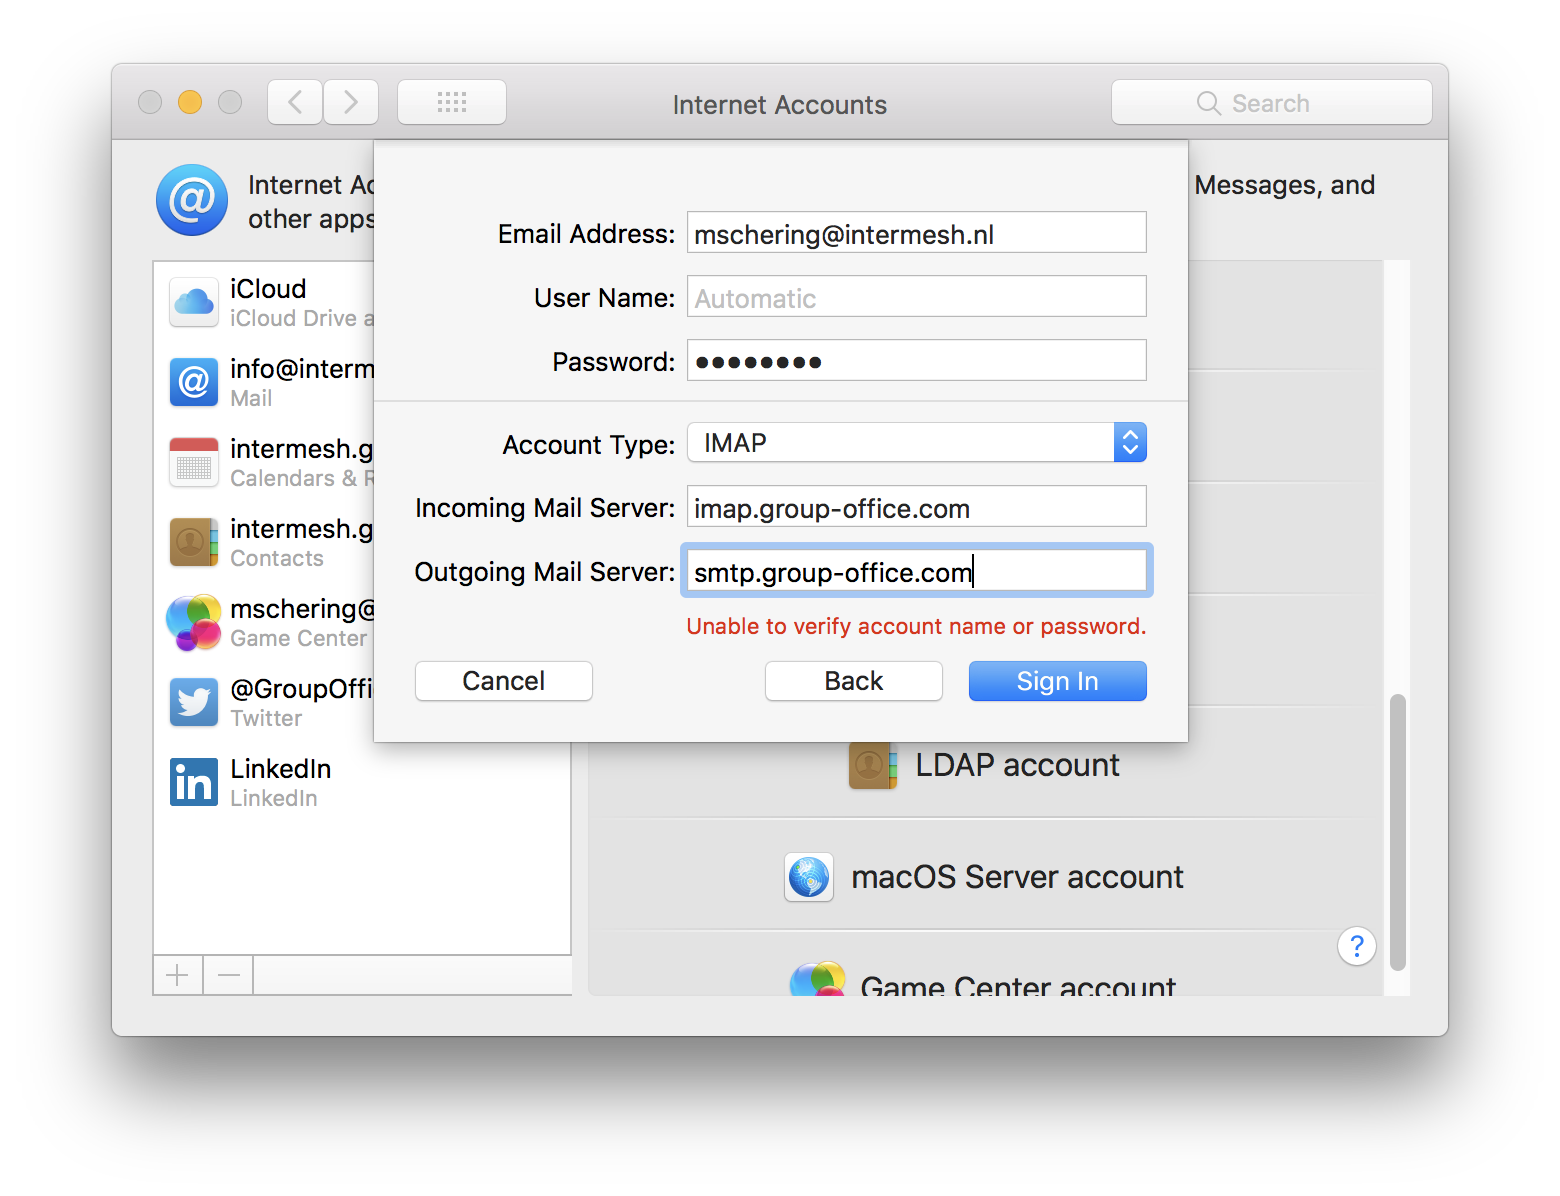
E-mail on MacOS works with IMAP and SMTP. These settings vary between providers so please ask your system administrator for the right IMAP and SMTP settings.
Intermesh uses:
Username |
E-mail address |
Password |
GroupOffice password |
Incoming mail server (IMAP) |
imap.group-office.com on port 143 |
Outgoing mail server (SMTP) |
smtp.group-office.com on port 587 |
Encryption |
TLS Encryption for both servers |
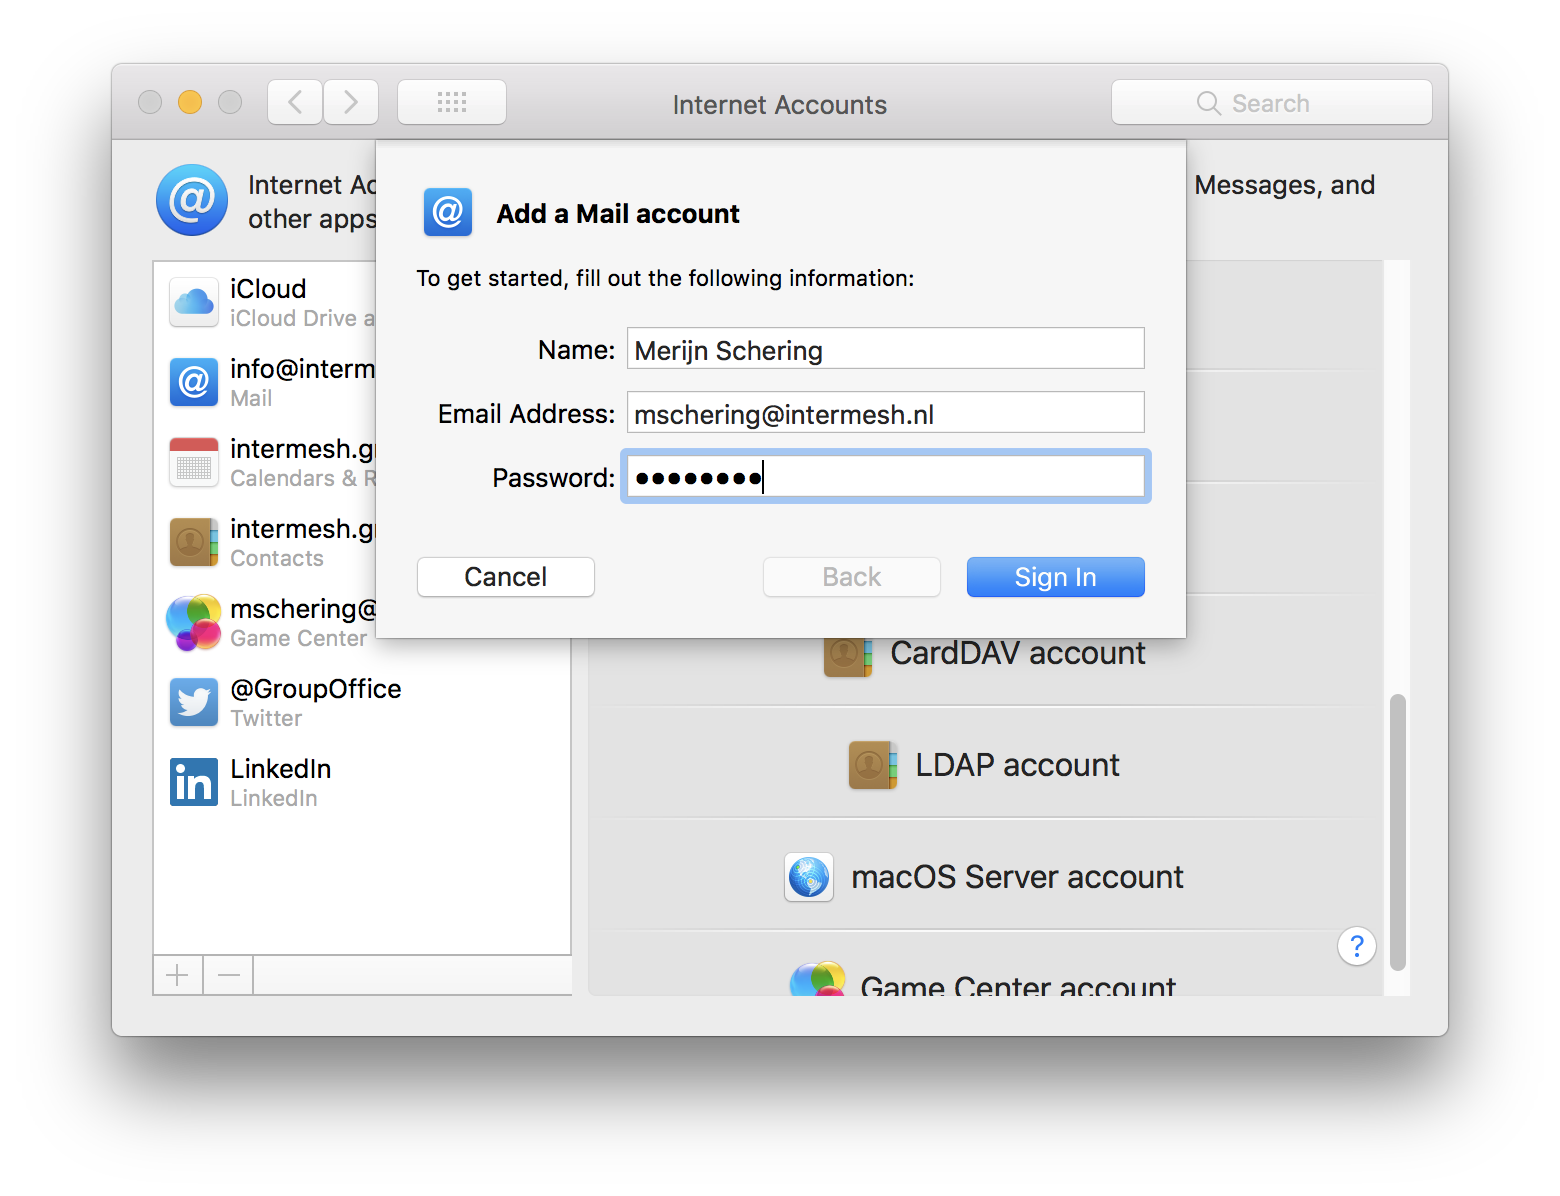
To add a mail account take the following steps:
Open System Preferences and click “Internet Accounts”.
Click the “+” button in the bottom left to add an account. Scroll down and choose “Other account”.
Click on “Mail account”.
Enter your e-mail address and password and click “Sign in”.
If auto discovery fails enter the server addresses and click “Sign in”.
Select the apps you’d like to synchronize and click “Done”.

Check your mail!