Rocket Chat
Since version 6.4.145 GroupOffice can integrate with Rocket.Chat. With rocket chat you can chat with your team in different channels, share files and even start a video conference from your desktop, phone or tablet!
Rocket Chat
Installation
To install you need a working Rocket.Chat installation. See the Rocket.Chat documentation for that.
Login to Rocket.Chat as administrator and:
Important: Disable OTP authentication at Administration -> Settings -> Accounts or it won’t work.
go to Administration -> Settings -> OAuth.
On the top right choose “Add custom oauth”.
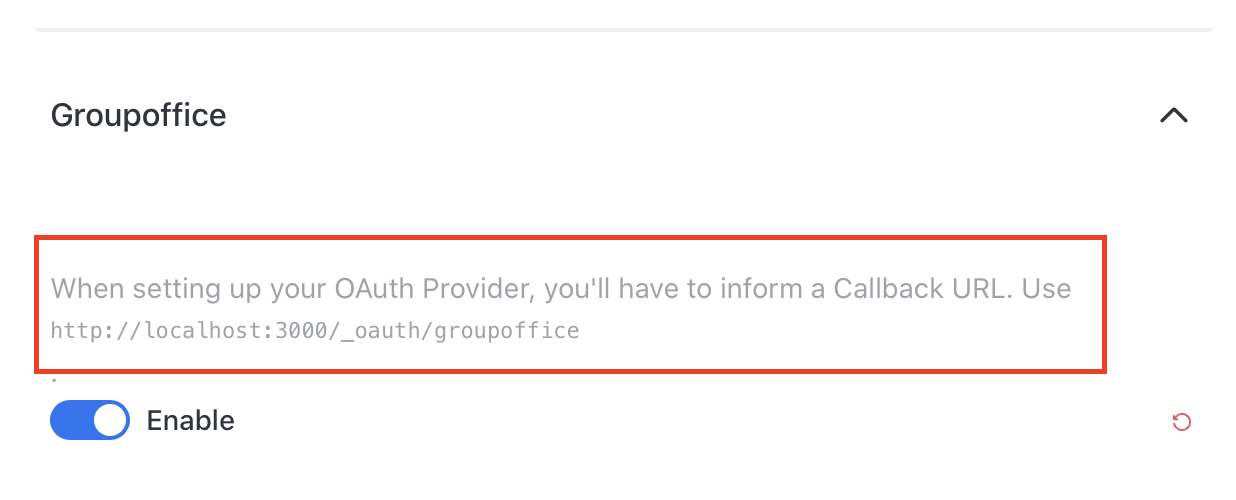
Note the callback URL / or redirect URI on top. For some reason they made it grey so it doesn’t stand out. You need that later when adding the client in GroupOffice.
Fill in your URL to GroupOffice plus /api/oauth.php. For example: https://groupoffice.example.com/api/oauth.php
Copy the settings from the image below. Instead of the example password choose a strong password.:
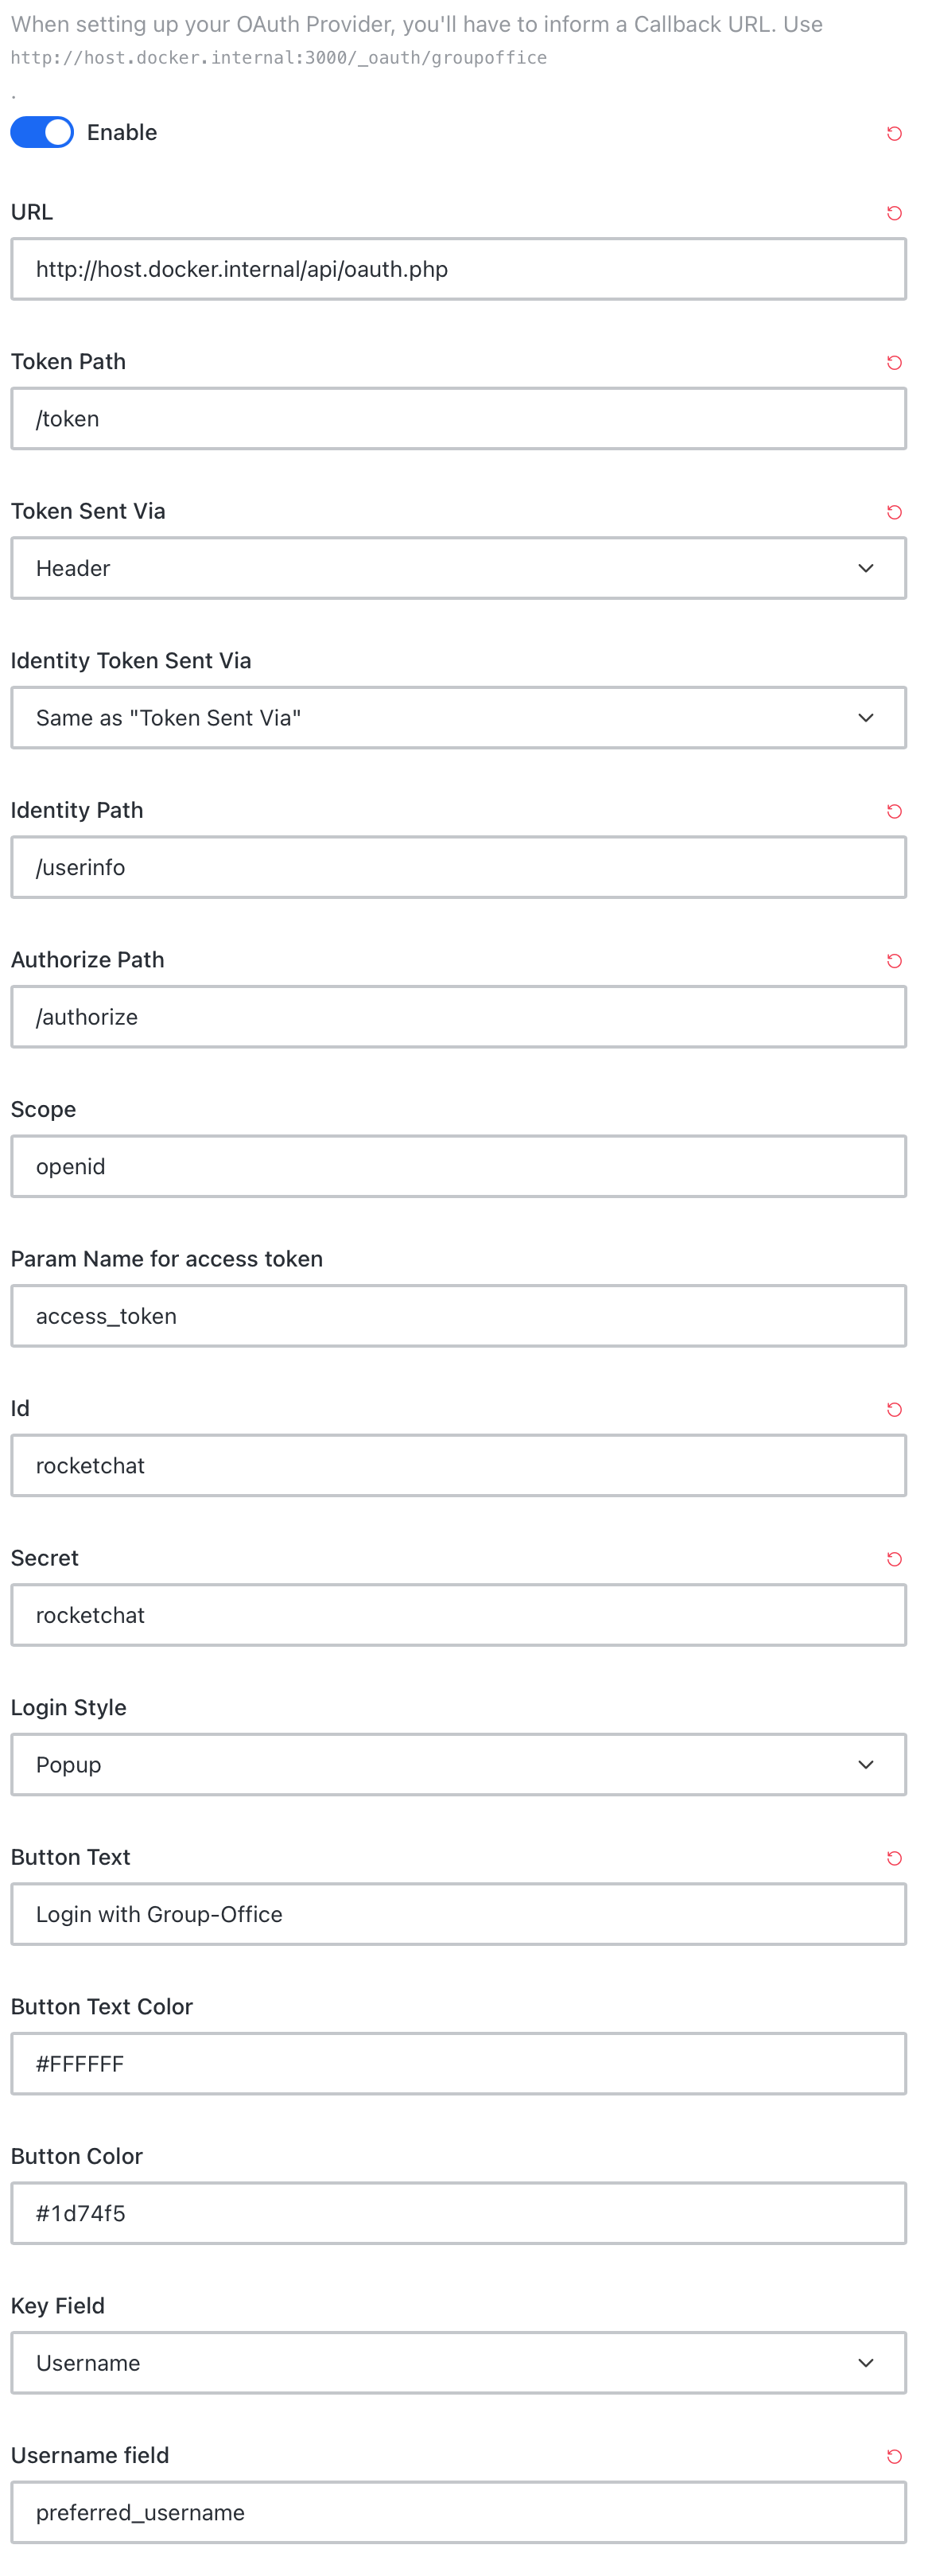
Rocket Chat custom oauth settings
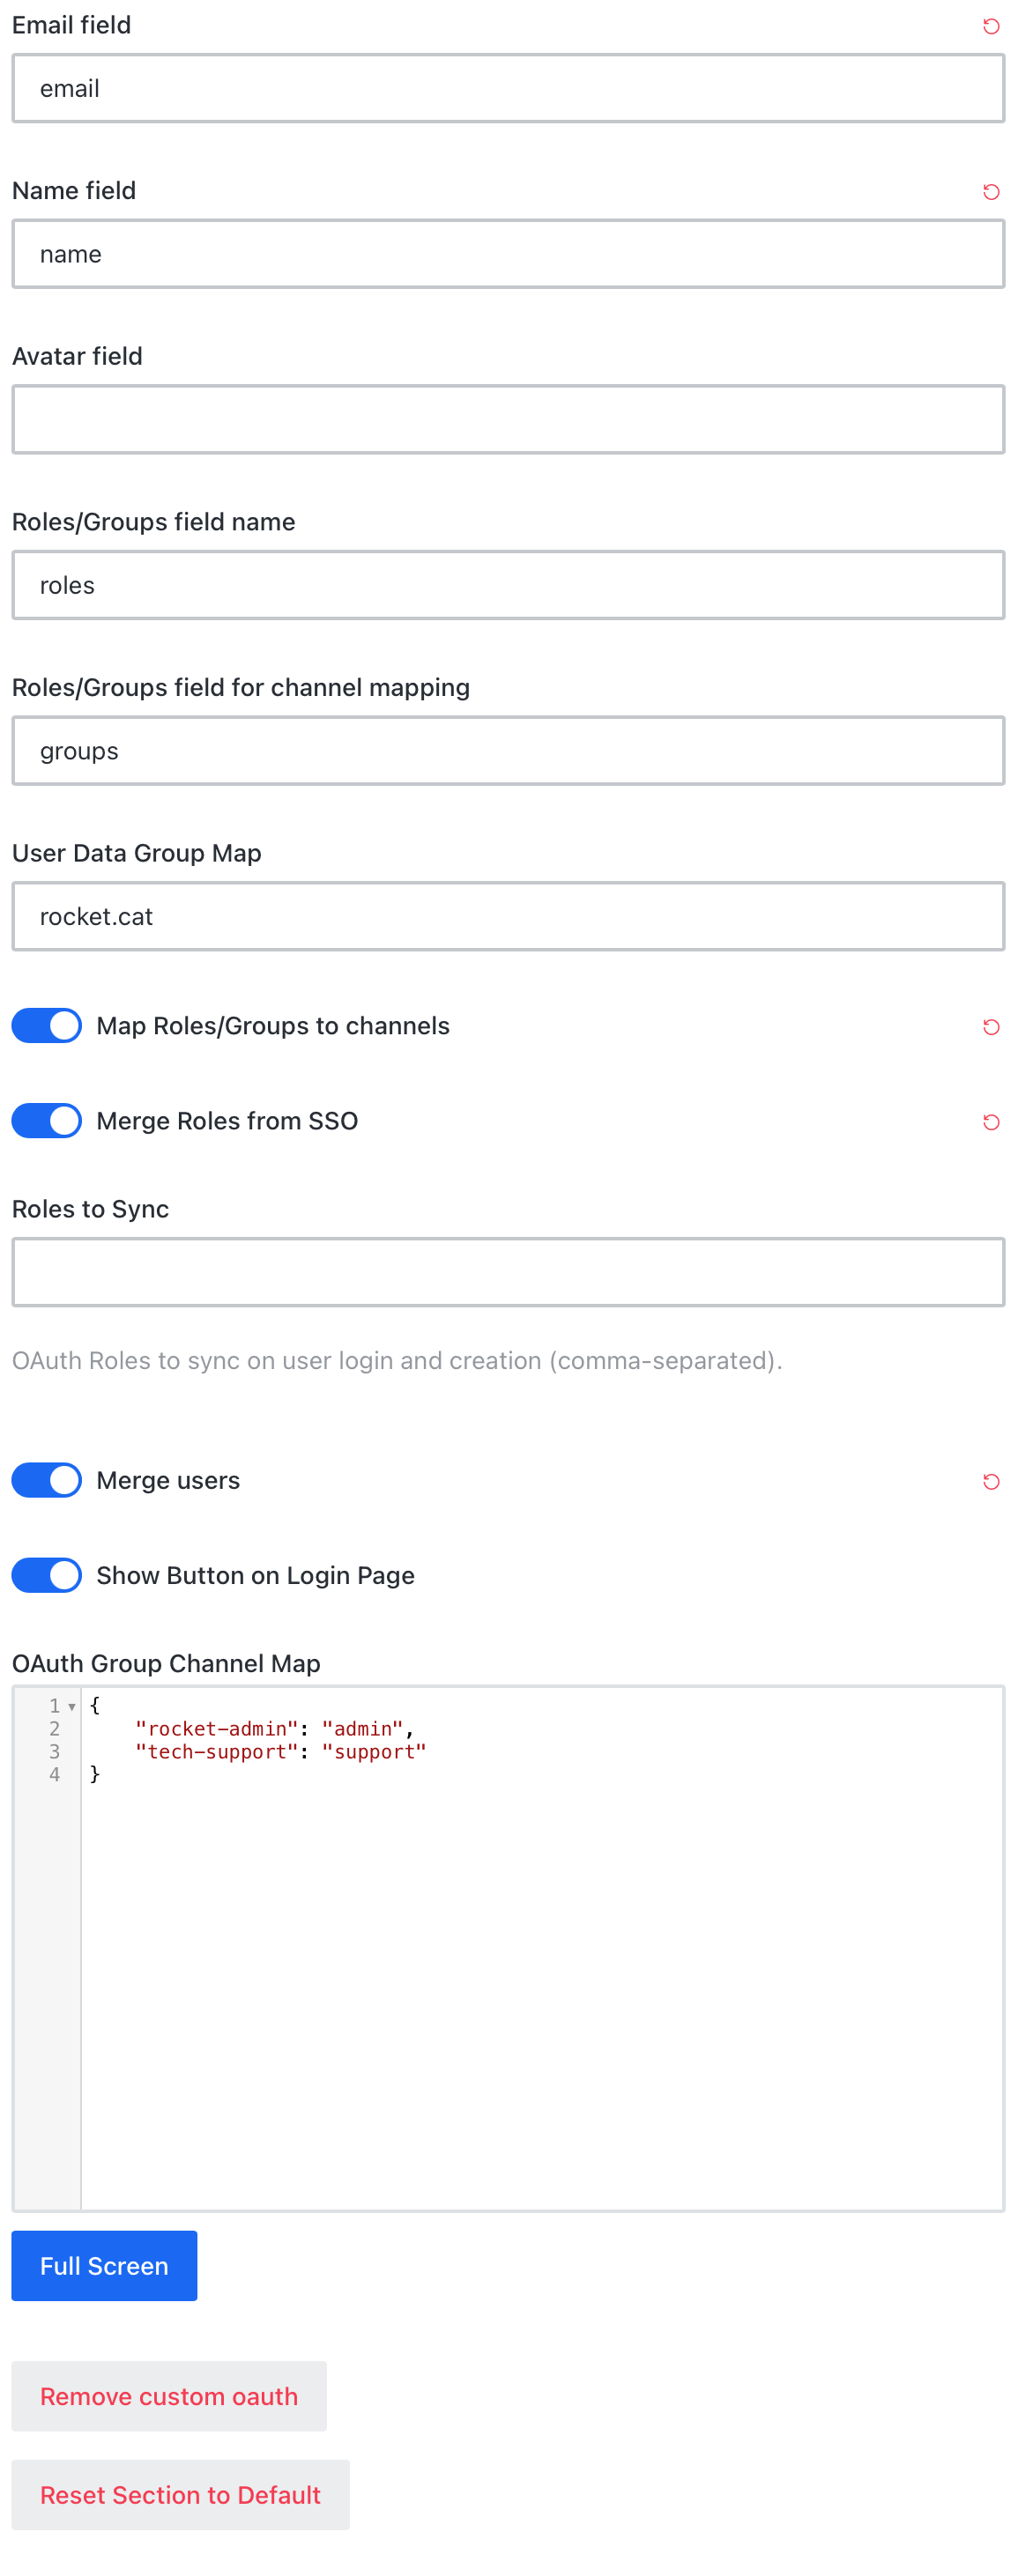
Rocket Chat custom oauth settings part 2
Login to GroupOffice and go to System Settings -> Oauth 2.0
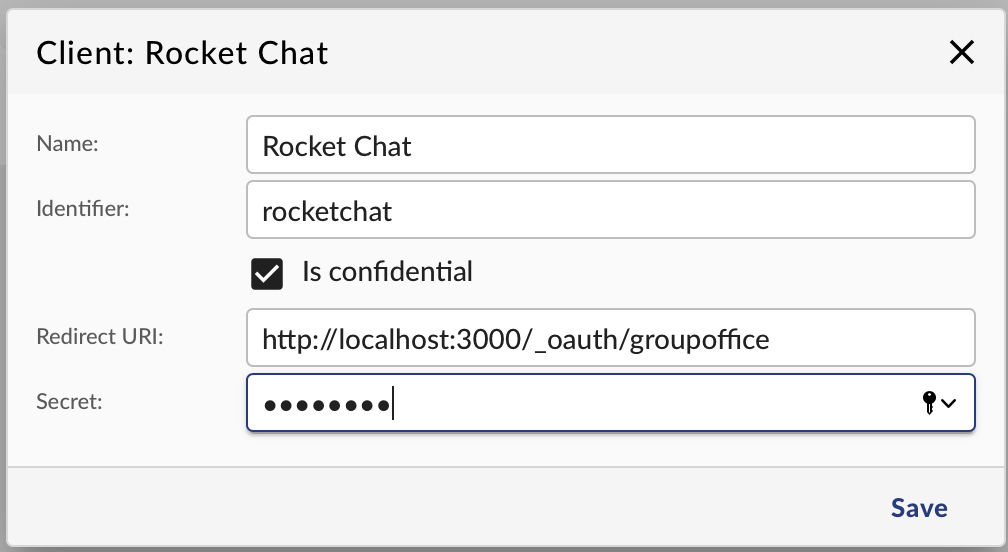
Click “Add client” and fill in the fields:
Match the “Identifier” and “Secret” from step 5.
Enable “Is confidential”
The redirect URI is the callback URL on top of the Rocket.Chat custom oauth page. It’s marked in the red square in the screenshot below:
The input should look like this:
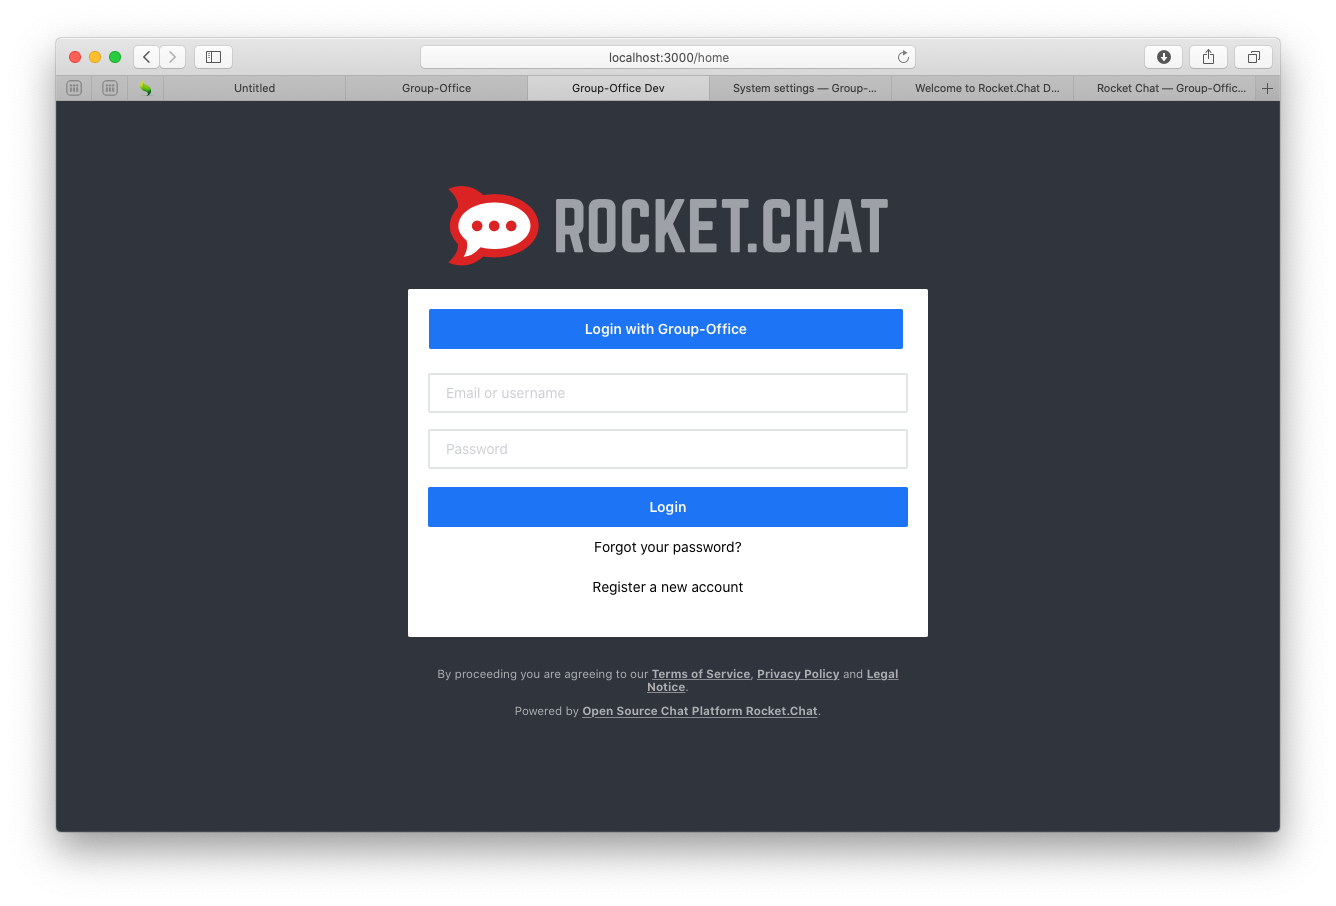
Click save and test if you can login with GroupOffice. You should see a “Login with GroupOffice” button.
Note
If you get an error double check these settings:
Administration -> General -> Site URL. It has to match for the openid handshake to work.
Administration -> Oauth -> Groupoffice: check if id and secret match the parameters in the GroupOffice client. Also verify the other fields.